Good afternoon. Today I can finally sum up the large collection of craft ideas from natural material. We already have a wide-format article with crafts from autumn leaves for children and adults. There is a detailed article in autumn theme. In this article I will publish the most interesting and non-standard techniques and techniques. I decided to do wide overview page, which will prove and show that natural material for creativity is not only acorns and chestnuts. You will see with your own eyes and fall in love with all your soul in new fresh ideas working with natural materials. Crafts made with your own hands, from branches, from leaves, from dried flowers, from everything that is under your feet. Nature is rich in material, and man is rich in beautiful ideas. So, let's see what crafts you can make from natural materials this season.
Package of ideas No. 1
SCALES from cones.
Cones are made up of scales. If you collect the revealed pine cones, then it is convenient to pull them out with pincers, pliers, or bite the SCALES with nippers. And then use this cone-like natural material as a mosaic covering for a variety of autumn crafts.
Note. So that the cones open well, their scales spread out, they can be heated in the oven.
Here we see mushrooms. Their legs are carved from thick wooden blocks. The hats are made of plasticine and the top of the hats is covered with scales. You get some cute DIY mushrooms. Suitable job for school activities.

But FIR cones have scales flatter and smoother. They look like smoothed feathers of birds. That’s why the idea for a craft comes to mind on a bird theme. We sculpt the body of the bird from plasticine, coat with PVA glue, put a layer of torn paper napkins on the glue, again with glue, again with napkins - it turns out papier mache shell. We dry this shell until it is completely lignified. And on this hard, dry surface, with hot glue (layer by layer, row by row), we lay a spruce “tile” of feather-scales.

And also The scales of a fir cone are similar to the scaly armor of ancient lizards. So here's another idea for you. After all, this is a great challenge to your artistic potential. It’s not just a bird here—it’s a whole animal that looks as if it were alive. An excellent craft for boys made from natural materials.
Here we act exactly the same as with the bird.– we sculpt the base from plasticine, pack it in several layers of papier-mâché (alternating PVA glue and paper napkins). And then, after this mass has dried into a hard crust, you can paste over the dinosaur figure with spruce scales.


After plucking the cone, the cone BOTTOM remains. It looks like a flower with petals. From such cone flowers you can make a new autumn craft with your own hands - for example, a WREATH. We glue the base for the foam wreath with a chopped pine cone - just use hot glue from a gun.

You can cover such flower cones with bright gouache. To make the color of the gouache richer and shine, I recommend spraying this product with a simple hairspray after drying with gouache. The color will stick and won't stain your hands.

You can do it yourself beautiful flowers, selecting the most accurate and even scales of different sizes, and laying them radially from the center. The middle of the flower can be decorated with beads or rhinestones. From such natural material, you can even make brooches in autumn style with your own hands - and wear them with a coat, or pin them on a shawl.

Flowers from cones can not only be collected into craft-wreaths, but also simply laid out on a panel. Place it on a piece of plywood with glue. This will make an excellent craft from natural material for a competition for school or kindergarten.

From whole cones You can also make some great crafts. We add not only natural material to the cones, but also other materials (colored felt, cardboard, rope, plastic, etc.).


Package of ideas No. 2
Crafts made from natural materials
WALNUTS.
From nut shells As children, we all made boats or hats on plasticine mushrooms. But you can go further with your walnut creations. Children will be happy to create mice or birds, and adults with skillful hands and a warm heart can create a whole world from a nut shell... Now you will see it.


In this article I want to introduce you to a very good person. Her name is Marina. A master with an attentive soul.
This is what the account page of this master looks like on the Fair of Masters website.

I really like the works of master Marina from the Fair of Masters website. With her own hands she created amazing, in its sincerity and warmth, the world of kind old women. Walnuts in the place where the doors join, they surprisingly look like a wrinkled, smiling old woman. All that remains is to add eyes, a nose-bone and wrap everything up with a cotton scarf. And now the cunning old woman looks at you cheerfully.

We make a body from a pine cone, weave the arms from coarse paper packaging twine. We make warm felt boots from felt. Each old woman can be made with her own character. I'll run wild with a wide smile. Or silent, thoughtful, on her own mind.

Old ladies can be both summer and winter.

You can create entire worlds from natural materials in which good old ladies live and work. They themselves will keep their world clean.

And after work they will gather over a cup of herbal tea to tell stories, make fun of each other and sing songs of their youth.

Master Marina sells her crafts. You can order her works on the master’s personal page - https://www.livemaster.ru/woods. Marina can make you a custom craft for your family and friends.
After all, how nice it is to receive as a gift the World of kind old women, which will always smell like a village CHILDHOOD for you - grandma’s pancakes, a woodpile of firewood by the barn, chickens running around the yard, the heated wood of an old bench near the fence.
Master Marina, I want to give you an idea. In one I talked about another Czech Master who created the world of ACORN PEOPLE - Dubanchikov and wrote a book with stories about them, which he illustrated with emotional scenes made from natural material. The book is published in the Czech Republic, and only in Czech. I think that many children will like our Russian book with good stories about Russian village grandmothers, illustrated by Marina’s works.
After all, it’s a real miracle to make with your own hands from natural materials. new world– kind, fabulous, REAL. More and more houses, cozy benches, swings, carts, and carts will appear in it.


Package of ideas No. 3
Crafts made from natural materials
FAIRY HOUSES.
If you love fairy tales with fairies and magicians, then you will love the world of fairies made from natural materials. You can create cozy houses for fairies with your own hands, set up entire housing complexes for them, with ponds, parks, gardens, swings.

You can bring a man-made miracle to a school competition for crafts made from natural materials. The house where the gnome lives. Parts can be attached to plasticine, staples (from a staple gun), or glue from a hot gun.


Pieces of moss, acorn caps, scales pulled out of a cone with pliers, lichens and dry hard hanging mushrooms taken from trees in the forest. And even pieces of plants torn from indoor flower pots - any natural material will be used for the construction of such a complex but interesting crafts. The house will grow and be ennobled with natural design before your eyes.


You can take as a basis thick wooden driftwood, found in the forest. Cut off a convenient piece from it. Buy at a hardware store tinting stain for wood- and cover the tree with noble dark color. Cut from thick cardboard windows, cover them with the same stain. From popsicle sticks put together a real door, decorate a porch. Sculpt a conical roof from plasticine. Break a large pine cone with pincers or pliers on scales and lay tiles from them on the roof of a natural house.
Some elements can be sculpted made from salt dough(a glass of fine salt, a glass of flour + water (add water one spoon at a time and rub with the salted flour with your hands until a single lump similar to plasticine is formed). Roll out the dough - cut into bricks with a knife. Dry - and you will get a lot of building material for the porch , paths, fences, etc. The dough can also be painted with gouache or stain.


But the house is VERY SIMPLE. Now I’ll tell you how to make it with your own hands from the things that surround us.
- Take a durable cardboard milk or juice bag. Cutting windows in it will be the future façade of the house.
- Buy a small bag of gypsum plaster (or putty), dilute it with water and coat the façade of the house with this mixture.
- Dry and cover with whitewash or white gouache (toothpaste at best).
Make the roof out of cardboard, also apply glue to it and lay tiles from pieces of bark or pine cones. or wood chips.

Package of ideas No. 4
Applications
And of course, the most common crafts made from natural materials are applications using dry herbarium - herbs, leaves, flowers. We all made chicks or fish in an aquarium from leaves. In a special article, I give many options.
And in this article I want to show a beautiful mosaic technique of laying out dry natural material in the form of a SILHOUETTE PICTURE.

You can find a lot of ready-made silhouette templates on the Internet. If you type the phrase “silhouette of a hare picture” or another animal in the search bar.

The most important thing in such a craft is to achieve recognition - clarity of the silhouette. Therefore, you need to choose a silhouette without small details - protrusions. And if you choose one with detailed protrusions, try to ensure that the small relief detail is made with ONE WHOLE petal (like the bunny’s ears or the protrusions of its paws in the photo above).
If, when laying out the mosaic, the edge of the plant protrudes beyond the border of the silhouette, it must be trimmed carefully with scissors (as was done in the photo above with the cat - its ear triangles are cut out).
Natural ideas package No. 5
Crafts from branches.
You can make beautiful crafts with your own hands from branches of different shapes and curves. Branches are possible just spread out on a white paper background repeating the outlines of a bird or animal. You can do it on paper in advance. draw a silhouette of a bird faint pencil lines. And then select branches that would lie on this drawn silhouette of a bird, repeating the curves of the drawing.
You can make crafts from natural materials secure with glue from a hot glue gun. Or make a photo craft. That is, lay out the twigs and photograph the craft, thereby immortalizing your product made from natural material in the form of a photograph.

You can fix the craft at key nodes of the branch plexus and then attach it to the base (vertical wall or horizontal shelf-stand) at these nodes, as was done in the photo below.

In addition to branches, you can use natural wood chips, pieces of bark, chips and saw cuts from logs, logs, and thick branches in your crafts. This is how the owl crafts from the photo below were implemented. Simple and interesting, made with your own hands - you can safely take it to an exhibition of autumn crafts at school or kindergarten.

The same idea can be implemented from different angles and different materials. For example, in the photo of a horse craft made from natural materials, branches, bark, and driftwood are used.

You can lay out entire mosaics, completely filling the silhouette image with natural material. The direction of the branches should repeat the direction of the details of the drawing. Arrange the branches in the same directions as the fur pile of the animal, or use the branches to repeat the muscle relief of the animal.

Perhaps this type of crafts made from natural materials will captivate you so much that will turn into a solid hobby with prospects for monetization into a profitable business. Why not make beautiful wooden sculptures for sale for your dacha or estate.

And if you want to use branches to create crafts from natural materials in class at school, then here you go simple ideas how this can be implemented in labor lessons for boys. Everyone is taught cut out with jigsaws plywood figures. In addition to animal figurines, you can put together frames from slats and create beautiful landscape pictures of an autumn forest with mossy branches covered with lichen.

Similar ideas can be implemented in girls' labor lessons - without plywood and a jigsaw - by making a frame from cardboard rolled into a square tube (fold 4 pieces into a frame frame, insert branches into the holes), and cut out animal silhouettes from thick corrugated packaging cardboard from old boxes and paint in gouache, if desired.

Natural crafts package No. 6
Maple and ash seeds.
Dry lobed tree seeds can be played very interestingly in the most various crafts with your own hands.
You can make a mosaic craft from this natural material in the shape of a bird (because maple seeds look like feathers). You can lay out a pattern in the form of a butterfly on the glass, and thanks to the transparency of the background, it will seem that it is hovering in the air, as is done in the photo below. Maple seeds take well with watercolors, so your butterfly craft can come in all the colors of the rainbow.

At school or kindergarten From the same natural material you can make very simple children's crafts with a base on thick cardboard. Maple seeds can be the hairstyle on a drawn human head, they can become the bushy tail of a squirrel, the feathers on the wings of an owl, or the needles on a cardboard hedgehog (as in the photo below).

And maple seeds look like dragonfly wings. Therefore, you can make simple children's crafts in the form of Coleopteran insects. For example, string beads onto a wire (this will be the body) and glue the seeds to the body using glue or plasticine. The wings can be painted with nail polish and sprinkled with glitter. The bulging eyes of a dragonfly can be cast from frozen drops of the same nail polish. It will turn out beautiful, fast and simple craft made from natural material for children.

And this same maple natural material can become the basis for funny GRAPHIC CRAFTS-DRAWINGS with a regular black marker. We paint on the missing details to the snub noses and turn the seeds laid out on a sheet of paper into interesting graphics. These are already crafts for training your imagination - great idea for a circle on the topic “Learning to think creatively.”

I talked more about this GRAPHIC technique of using natural material in the article
Package of ideas No. 7
Crafts made from natural materials
STONES.
A simple rubble stone left over from dacha construction, or smooth river and sea stones can become the material for your natural crafts with your own hands. The stone itself can tell by its shape who it resembles. And all you have to do is take markers or gouache to bring this image to life.
If you feel like an artist in yourself, you can make complex multi-line drawings – as was done in the case of the owl craft made from stone. Or smooth, thick pebbles can look like clumsy, plump panda bears - and such a craft made from natural material will be feasible for children. First, we cover all the stones with white, dry them, and then with a black marker we draw the black details of the teddy bear on it.


Ordinary felt-tip pens draw very well on stones. After completing the general painting work, details of the drawing need to be given contours(clear boundaries) black felt-tip pen.

You can draw the silhouette of a snail or sheep on the stone yourself. And give the children the task of simply coloring the finished silhouettes, adding them with a pattern of stripes and dots or curls.

You can make a nest from dry grass and wire or other natural material. And put chicks made from stones with your own hands into this craft. Older children can color a complex picture with a chick and an open beak. For younger children, a simpler task in the form of chickens in shells will suit them.

On a piece of plywood or a round cut from a log, you can lay out a whole picture of painted stones and other natural materials. This craft is suitable for an autumn competition for school or kindergarten.

Older girls will enjoy exquisite pictures from the life of a fashionable girl - felt-tip pens, paints, stones and rhinestones.

You can use the mosaic technique to lay out a variety of characters from stones. Attach the stones with glue from a hot glue gun. The stones in the mosaic can be painted with gouache, or have their own natural color.

These can be landscape paintings made from natural materials (sea pebbles, pieces of glass ground with water, shells, etc.).

Package of ideas No. 8
Crafts made from natural materials
PORTRAITS.
Very interesting topic for crafts made from natural materials these are portraits. The face in the picture always attracts the eye. You want to look at such a craft for a long time, it has a soul, human eyes that you want to look into and read their thoughts. A portrait is a craft that looks back at you.

You can plant all the details of the portrait from natural material on glue. Or simply fold the portrait like a mosaic on a sheet of cardboard, take a photograph and brush all the details of the masterpiece off the table with your hand. And on the wall in your room there will be a photograph of a disappeared but ever-living portrait.
As an ornamental natural material, you can use stones, dry leaves, cones, seeds, and bark. To draw thin lines of a branch different trees, straws, blades of grass.


If you work with children, then you can give them an easier task. Print the finished face on a printer. And from natural material into this craft make additions
Good luck with your work.
Olga Klishevskaya, especially for the site
Nature generously gifts us with everything necessary to create diverse, interesting and unusual crafts. This article contains recommendations for making products from natural materials with your own hands. The crafts, photos of which you will find in the article, range from easy ones that you can make together with your child and give him to school or, to more complex ones, with hard-to-find, but absolutely natural ingredients.
Classmates
Crafts for elementary school and kindergarten
Children are often given the task of making some simple craft with their parents and bringing it to school. Everyone remembers the lessons of labor in primary school. This section of the article will tell you how to create pleasant trinkets with your own hands, so that your child will proudly take these crafts made from natural materials to school or kindergarten.
Angel made of pine cone and acorn
This autumn angel is a pleasure to make. Materials for crafts can be collected in the park or forest. You will need:

How to do:

Ships made from walnut shells
The child will have fun in the bathroom with these boats. They can also be released along streams in the spring. You will need:
- colored markers or pencils;
- walnut shells;
- toothpicks;
- glue;
- candle;
- lighter or matches.
How to do:
- Cut out small sails of any shape from paper, decorate them to your liking and glue them to toothpicks.
- Light a candle and drop a little wax into each half of the shell.
- When the wax hardens a little, insert a toothpick with a sail into the middle of each half.
- Leave the wax to harden. You can speed up the process by placing the boats in the refrigerator.
Rattles on sticks
Children love everything that rattles. Make these funny rattles with them, so you will keep the children occupied and save the house from pogrom. You will need:
- wooden sticks 10–15 cm;
- small plastic containers with lids;
- beans or rice;
- dye;
- paint brush;
- hot glue gun;
- clay.
How to do:
- Fill the containers halfway with beans or rice and close the lids tightly.
- Using a hot glue gun, glue each container to the ends of the sticks.
- Cover the containers and sticks at their base with clay and let dry.
- Now you can color the rattles and draw on them.
Maple dragonfly
This craft is fragile and beautiful, just like the dragonflies themselves.
You will need:

How to do:
- Color the seeds and branches to your liking and let dry.
- Attach two short branches to the end of the longer branch where you marked the head. These are the antennae of a dragonfly.
- Turn the dragonfly branch “belly” up and glue a couple of large maple seeds, slightly moving away from the end of the branch.
- Under the large pair of wings, slightly extending onto them, glue a small pair of seeds.
We grow grass and feed the birds
grass head
This funny face with green hair It will delight the children, and you can trim the growing grass-hair. You will need:

How to do:

Bread feeder for birds
In autumn and winter, it is more difficult for birds to find food for themselves, so this feeder is a godsend for those who want to take care of birds. In this way, the child is instilled with a kind attitude towards animals. You will need:
- dried bread;
- peanut butter;
- corn;
- thick needle;
- strong thread, thin rope or wire.
How to do:
- Pass a thick needle and thread through top part slice of bread and tie a loop.
- Thickly coat both sides of the slice with peanut butter.
- Cover the peanut butter with seeds.
The feeder is ready, you can hang it on a tree, your feathered friends will be delighted.
Other crafts made from natural materials
Cosmetics
By keeping your children busy with fun crafts, you can think about yourself.
Lip scrub
 In this scrub, bee honey is an antiseptic, coconut oil moisturizes and nourishes lips, and brown sugar is the main ingredient that exfoliates the dry top layer of lip skin. It is important to remember that homemade cosmetics do not last as long as store-bought ones due to the lack of preservatives, so making large portions at a time does not make sense.
You will need:
- coconut oil - 1 tablespoon;
- bee honey - 1 tablespoon;
- brown sugar - 2 tablespoons;
- small glass container with lid;
- small capacity;
- teaspoon.
How to do:
- Mix honey and coconut oil in a container. Blend until smooth, thick and dense.
- Add brown sugar and stir until smooth.
- Place the mixture in a glass container.
This scrub will be good for use for two weeks.
Mascara
The recipe is quite complicated and you will most likely have to work hard to find all the ingredients. However, nothing will stop lovers of all things natural. You will need:

How to do:
- Mix all ingredients in a bowl until smooth.
- Using a pipette, carefully draw up the mixture and squeeze it into an empty tube.
That's all, mascara can be used. To remove such mascara you need warm water or heated olive oil.
Various products for home decoration
Seashell candles
The only thing more beautiful and romantic than tea candles on a rainy autumn day and shells brought from a trip to the sea is their unusual combination.
You will need:
- tea candles;
- small pot;
- medium saucepan;
- seashells;
- essential oil;
- water;
- glass container;
- pipette;
- spoon.
How to do:

Once the wax has hardened, the shell candles are ready to use.
Roses made from pine cones
Prepare your most beautiful vase - these roses will never wither. You will need:
- pine cones;
- branches;
- paper;
- paint of different colors;
- paint brush;
- scissors;
- hot glue gun.
How to do:

Now you can put the roses in a beautiful vase.
Autumn wreath on the door
Autumn crafts made from natural materials usually include gifts of autumn. Most often these are fallen leaves and ripened fruits. In the West, at this time of year it is customary to hang wreaths on the front door, symbolizing fertility.
You will need:
- wreath base 45 cm in diameter;
- corn leaves (18-19 pieces);
- corn cobs (9-10 pieces);
- hot glue gun.
How to do:
- Glue, alternating, leaves and cobs onto the wreath base.
- Fold the ends of the leaves to give the wreath volume.
The autumn wreath is ready, you can hang it on the door.
Pictures made from natural materials
Pictures from natural materials are created easily. The following brushes can be used:
- fallen leaves;
- wool;
- feathers;
- flowers, etc.
These same materials can be made into elements of a painting.
You can make natural safe paint. You will need:
- 1 tablespoon white kaolin clay;
- 1 tablespoon of crushed pigment (for example, mustard for yellow, cornflower for blue, rose petals for red, spinach for green, etc.);
- water.
By mixing all this, you get safe paint and the sea positive emotions your children.
That's all. We hope that this article will be useful to you, and that the process of creating things with your own hands will be as enjoyable as the result.


Applications made of autumn leaves and natural materials
Early autumn is a beautiful time - the time when the trees change their attire and prepare to part with it until spring. At this time of year, it’s nice to take a walk in the park or garden, rustling the fallen leaves. Autumn fascinates both children and adults, and it is difficult to resist collecting a bouquet of colorful leaves, or raising fir cone, or maybe a strangely shaped driftwood. But all this - leaves, cones, driftwood, chestnuts, and acorns - is an excellent material for creating amazing crafts: beautiful applications or figurines fairy-tale heroes, elegant jewelry and gifts for friends and family. Don’t miss this time, collect more different leaves: large and small, yellow, red and green.
We would like to introduce you to applicative works made from dry natural materials: tree leaves, grass, flowers, seeds (ash wings), poplar fluff (cotton wool, fluff - dandelion seeds), straw, shells, pebbles, cereals, eggshells, etc. d.
Making appliques from natural materials helps children develop a love for nature and develop a caring attitude towards it. By creating a picture, children compare natural objects with their images and learn to see the depth of nature. Appliqué classes develop children's creative imagination and the ability to see in a pile of dry leaves. unusual images. Children develop a sense of aesthetics, rhythm, color, and the ability to work accurately and accurately. In their compositions, children express their inner world; they create, creating their own works of art.
Collection of natural material
The more diverse material you and your children collect, the more creative and interesting your work will be. You can collect plants at any opportunity: in the yard, on a walk in the forest, on a trip to the country, etc.
Useful tips
In autumn, you can make a huge number of different crafts, especially considering that the leaves of the trees take on a beautiful color.
Leaves can be used to create and/or decorate all kinds of crafts, but besides them there are other natural materials that you can use: fallen twigs, pine cones, acorns, nut shells, etc.
Read also:10 Cool DIY Halloween Decorations
Here is just a small part of the crafts that can be created using natural materials:
What to make from natural autumn materials: a vase of autumn leaves

You will need:
Autumn leaves
PVA glue
balloon
Brush.
1. Inflate balloon and place it on a cup or bowl.

2. Clean the leaves from the cuttings.

3. Start gluing one leaf per ball at a time, generously using PVA glue.

4. Lay out several layers of leaves, which also need to be covered with glue on top.

5. After the glue has dried, carefully blow off the ball and you will have a vase.
Painting made from natural materials

You will need:
Small branches (choose the size yourself)
Thread of several colors
Various natural materials (leaves, pine cones, acorns)
*You can make a triangular or square shape.

1. Connect the ends of the sticks using thread (see image). You will have a frame for your work.


2. Tie one end of a colorful thread to the corner of the frame and begin wrapping the thread around your frame, leaving plenty of room for the embellishments.


*Try wrapping each branch twice (see image).
3. When you have wrapped the entire frame, tie the end of the thread to the opposite corner of the frame.


4. Start collecting natural materials from forests, parks and/or your yard (leaves, flowers, nuts, etc.).

5. Try to secure the collected material between the stretched threads. Use your imagination to create different pictures.


Crafts made from natural materials for children: autumn shooting stars

For one star you will need:
10 long stems from leaves (in this case stems from chestnut leaves)
Wire or multi-colored threads
Decorations (small leaves, sprigs of berries)

1. To make one star element, connect two stems for strength. Fasten them together with wire or thread. You have one blank (star element).
2. Start assembling the star by passing each piece over and under the other two pieces that intersect it (see image).

3. Start decorating the star by tying branches of berries, leaves and other decorations to it.
* These stars can be used to decorate your home, cottage, corridor, veranda, etc.
Children's crafts made from natural materials: leaves mask

You will need:
Leaves different sizes and flowers
Cardboard (you can use a cereal box, for example)
Strong thread or elastic
Scissors
PVA glue or "Moment"
1. Draw a mask on cardboard and cut it out.

2. Check where the eyes will be and make the necessary holes in the paper.
3. Make small holes along the edges of the mask (you can use a stapler) and tie a thread or elastic band to keep the mask on your head.

4. Using glue, begin attaching various fallen leaves to the mask. It's a good idea to start with the large leaves at the edges and slowly cover the mask, ending with the small leaves closer to the middle of the mask.

Nature crafts in autumn: collage

You will need:
Dried thin branches (in this case, a grapevine)
Thread of different colors
Decorations (leaves, flowers)
1. Make a circle from the twigs as shown in the image. You can secure the structure with threads or wire.

2. Using colored thread, start wrapping a circle of branches to create a “web”. At the end, tie the thread tightly into a knot.

*You can wrap the thread however you like.


3. You can decorate the round frame with leaves (insert them between the threads of the web) and other natural materials.
Crafts made from natural materials in autumn: monsters made from pine cones (photo instructions)


Compositions made from natural materials: autumn crown

You will need:
Adhesive tape
Cardboard or thick paper
Scissors
Leaves of different colors and other natural materials that can decorate the crown
1. Measure the head circumference of the future king or queen. Use this information (adding a few more centimeters) to cut a 5cm wide strip of cardboard.
*You can cut out several strips and glue them together if one sheet of cardboard is not enough.

2. Cut another strip from another cardboard, but this time cut one side in a zigzag pattern.
3. Cut a piece of duct tape the same length as the cardboard strip and place it on a flat surface, sticky side up.
4. Glue one cardboard strip to the top half of the adhesive tape (just above the middle of the tape), and the jagged part to the bottom (just below the middle of the tape). You will be left with an uncovered piece of duct tape in the middle.
It is to the uncovered part that various natural materials can be glued.

*Alternatively (if you have covered all the adhesive tape), you can use Moment glue (or PVA) or another strip of adhesive tape, which will be used to attach natural jewelry to the crown.
Crafts made from natural materials in kindergarten: finger puppets

You will need:
Cardboard cylinders (from toilet paper or paper towels)
Thin twigs or thin brush
Colored paper (if desired)
Plastic eyes or plasticine
Buttons or small stones
Scissors
Glue stick
PVA glue

1. Start gluing the piece of paper evenly to one end of the cardboard tube.
* If you want, you can first cover the cardboard cylinder with colored paper, or you can do both options - without colored paper and with it.

2. Glue small branches on the sides - they will act as hands.

3. Glue buttons or pebbles along the cylinder.

4. Glue the eyes or make them out of plasticine and add them to the cardboard cylinder.

Children's autumn crafts: spider from a pine cone

You will need:
4 branches resembling spider legs or 4 parts of a thin pipe cleaner
Plasticine (for making eyes) or plastic eyes
Glue "Moment" (superglue)
Thread to hang a spider.

1. Use 4 pipe cleaners to make the legs - thread each one to the middle and bend so that the ends of the pipe cleaners on both sides resemble the legs of a spider.


DIY craft from waste material. Master class “Tender cake”
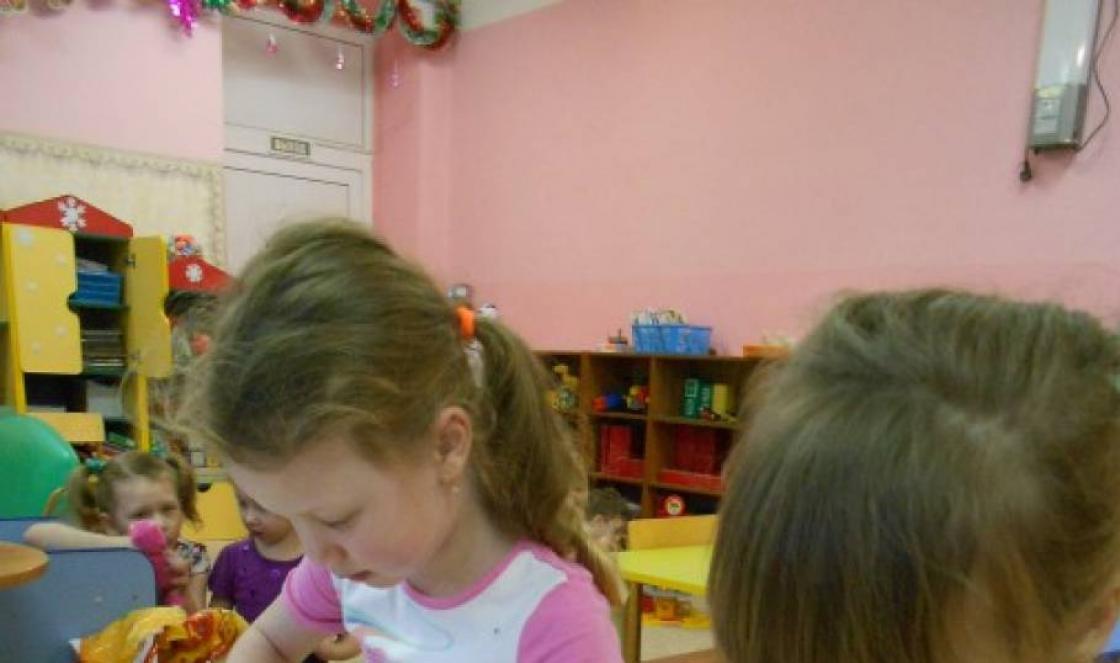
Author of the work: Svetlana Vyacheslavovna Kotlyar, teacher at the Berezovsky kindergarten No. 33, Arzamas district.The master class is designed for older children preschool age, teachers and parents.
Purpose: This work can be a decoration for a group in a kindergarten, a craft for an exhibition, or a gift.
Target:
development of artistic and creative abilities.
Tasks:
- teach how to make voluminous flowers;
- develop imagination and creativity;
- development fine motor skills hands;
- development of creative thinking;
- training in the ability to work with a stapler.
You will need: paper napkins, stapler, scissors, glue, markers, gouache, brush, cake packaging.
We will make such a beautiful cake.
Let's start our work by coloring the inside of the cake packaging. We painted the middle yellow.

Gouache will stick to plastic better if you add PVA glue. We didn't add any, our gouache was quite thick.


We continue to color the “cake”, you can choose the colors to your taste.

This is what we got.

Now we make flowers for decoration. Paper napkin fold in four, secure in the middle with a stapler.

We will immediately make 17 such blanks.

We take something round, for example, a lid, and trace it, making round shapes.

Cut it out.

We color the edges with a felt-tip pen and begin to form flowers by gathering and squeezing each layer towards the center.

We straighten the petals, adding volume, and we get this flower.

Seventeen flowers.