Seams are used to connect the parts of clothing and finish their edges. The distance from the stitch to the cut of the part is called the width of the seam.
A stitch is a complete cycle of crossing threads in fabric. Stitches can be simple or complex. Simple stitches are divided into temporary and permanent stitches. Temporary stitches include: basting, copying; for permanent stitches - overcasting, hemming, overstitching, quilting.
The basic rule: the thinner the fabric, the thinner the needle and thread should be; when sewing with small stitches, use a short needle, and with long stitches, use a long needle. The beginning of the seam must be secured with a knot, the end with a few “back needle” stitches. For basting it is better to use cheap simple threads.
The running stitch comes in various lengths. Length
per stitch is the distance between the entrance and exit of the needle from the fabric. When sewing dresses and suits, the length of the basting stitch is from 0.5 to 3 cm, when sewing coats - from 0.7 to 5 cm.
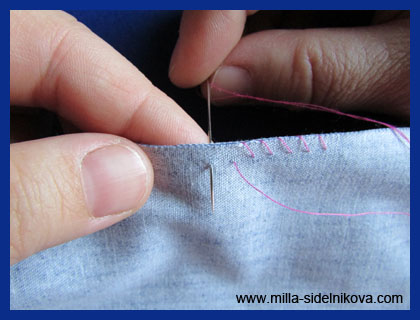
Basting stitches are laid as follows. The needle and thread are inserted from above into the part, holding it at an angle of 30° to the fabric, and pulled through all layers of fabric, while simultaneously moving the needle tip forward; then the needle is reinserted into the tissue from the underside at a distance of 0.2-
0.4 cm from the previous puncture, pulling the needle up (Fig. 5.1).
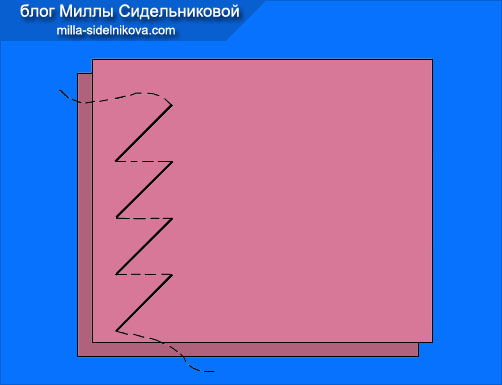
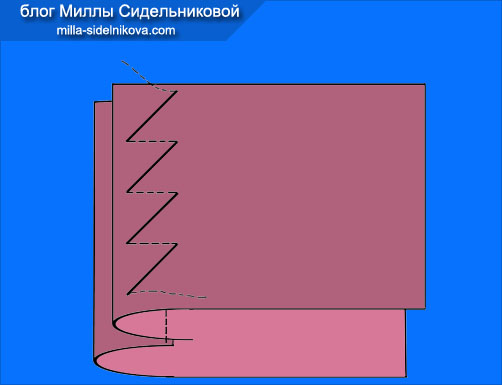
Oblique basting stitches (basting stitches), unlike straight basting stitches, are laid at approximately an angle of 30° to the stitch line. These stitches are used for temporary fastening of parts when basting hems onto shelves, basting borders, collars, etc. In this case, shifting of the fabric during processing of the product is almost eliminated. A stitch formed from oblique stitches is more elastic than a stitch made from simple stitches. The length of the oblique running stitch is 0.5-1 cm, the frequency is 2-4 cm, depending on the type of fabric (Fig. 5.2).
Copy stitches are used to transfer chalk lines and marks onto symmetrical parts. To do this, straight running stitches are laid along the intended lines, capturing both parts, the thread is not
tighten, forming loops 0.5-0.7 cm in size. Then the parts are moved apart, the threads between them are cut with scissors. The ends of the threads remaining on the parts show the direction of the lines transferred from one part to another (Fig. 5.3, 5.4).
Overlock stitches are used to protect fabric sections from fraying. Overlock stitches are distinguished: oblique stitches - for overcasting sections of parts over the edge; looped - for sewing cuts in corners and notches. Overlock stitches are performed by piercing the fabric from bottom to top at a distance of 0.3-0.5 cm from the cut of the part. The punctures should run parallel to the cut. Stitches are made from right to left across the edge. The needle is inserted into the fabric in an oblique direction, holding the part on your knees with the edge being sewn away from you. Overlock stitches should tightly, but without tension, bend around the fabric cut, be equal in size and have the same angle of inclination. The frequency of such stitches is allowed 3-4 per 1 cm, and the length is 0.5-0.7 cm (Fig. 5.5, 5.6).
Quilting stitches are permanent stitches and are used to join two pieces together to give them elasticity. Quilting stitches differ from bias running stitches in that when pierced with a needle, they capture the lower fabric only half its thickness, so the stitching is invisible from the front side. The parts are slightly bent, holding them with the gasket facing up. The length of the stitches is 0.5-0.7 cm, the distance between the rows of lines is 0.5-1 cm. Quilting stitches are used mainly for basting lapels, collars and are made with silk threads in the color of the main fabric (Fig. 5.7).
There are three types of hemming stitches: open, hidden and curly, used for processing hemmed sections. An open hem stitch is performed in the same way as an overlock stitch, only
the difference is that here the hem allowance is grabbed by a needle at a distance of 0.2-0.3 cm from the cut, and the main fabric is pierced with a needle only half its thickness, and the stitch turns out to be invisible from the front side (Fig. 5.8).
Blind hem stitches are performed in the same way as open hem stitches, but the needle is inserted into the very fold of the hem allowance and at the level of this puncture the main fabric is captured to half its thickness. When making subsequent stitches, the needle is inserted into the fabric at the point where it exits the fabric from the previous stitch.
The frequency of stitches is 2-4 per 1 cm. The blind hem stitch is used for hemming the lining of products along the sides and neckline, lining sleeves along the armholes, and along the bottom of the product (Fig. 5.9).
Curly (cross-shaped) stitches are used for hemming sections of parts made of thick, fraying fabrics. These stitches, unlike others, are performed from left to right, forming a stitch that secures the cut of the part and protects it from shedding. The hemmed section of the part is pierced with a needle to half its thickness. Depending on the density, the length of the stitches is 0.5-0.7 cm, the width of the line is 0.3-0.7 cm (Fig. 5.10).
Stitch stitches are used to connect parts with a tight seam, replacing a machine one, and also as a finishing stitch. By appearance On the front side the stitching is similar to machine stitching. To form a stitch stitch, the needle is inserted into the fabric at the site of its previous puncture. The length of the stitch on the back side is equal to twice the length of the stitch formed on the front side. Thread in a stitch stitch
completely captures the fabric from the face and back, which ensures sufficient strength of the connection of the parts and stretchability of the stitches. Stitch length E, 1 -0.4 cm (Fig. 5.11).
Fur stitches are used to fasten parts on multi-layered areas of clothing, for example, a hem with a side, a collar with a collar in the absence of a finishing stitch along the edge. Fur stitches are similar in structure to stitch stitches, but unlike them, these stitches are hardly noticeable from the front and back. wrong sides. The length of the stitches is 0.5-0.7 cm, the line is laid at a distance of 0.2-0.5 cm from the edge of the part and is done with silk threads. When doing this, it is very important not to tighten the thread; it must lie freely inside the fabric, otherwise the ties will be visible on the surface, which greatly spoils the product (Fig. 5.12).
Plaster stitches are used to connect parts of a product when repairing clothing made from dense, non-fraying fabrics. The fabric sections are adjusted according to the pattern and placed end-to-end, after which the needle is pulled from the front side, the section is pulled together, but so that the thread is not visible. A tight seam is placed on the inside of the fabric. The needle punctures are placed at a distance of 0.1-0.2 cm from the sections of the part. To ensure that the sections of the part are connected tightly and the seam is not noticeable, the threads should be tightened well when forming stitches. Stitch frequency 5-9 in 1 cm for thin fabrics and 3-7
1 cm stitches for thicker fabrics. Stitches are made with threads matching the color of the fabric. The seam of the connection is ironed and the tip of the needle is used to carefully straighten the pile along the entire seam (Fig. 5.13).
Special stitches are used to make fastenings - simple and finishing. Simple bar tacks are used to secure the ends of the pocket entrance, the ends of the cut of overlock stitches, and the ends of the hidden fastener strips. When forming a simple bartack, first lay 4-7 longitudinal stitches, tightening them equally. Then these stitches are wrapped around the front side with the same thread, while capturing the fabric. The fastenings are made with cotton threads No. 10-30, silk threads No. 18,
33.65. The frequency of stitches is 10-15 per 1 cm of bartack length and so that the threads lie close to each other (Fig. 5.14).
Curly tacks, or “nuns,” are made with silk threads. They are used both for finishing and for strengthening the ends of folds, vents, and welt pockets. On the front side of the product, mark an equilateral triangle with soap, pencil or running stitches. Having secured the thread from the wrong side, bring the needle to the front side at one of the vertices of the triangle. The second puncture is made in the lower right (relative to the first puncture) corner. Then the fabric is pierced from the inside and the needle is brought out at the third vertex (lower left corner) to the front side. The next puncture in the upper corner of the triangle is made slightly lower than the first (by the thickness of the thread), piercing the needle on one side of the triangle and bringing it out on the other side. On the lower side of the triangle, the needle is inserted and withdrawn, each time shifting it by the thickness of the thread. All subsequent stitches are made strictly along the intended lines, the needle is inserted into the fabric next to the previous puncture. The threads of the stitches should lie tightly, with a slight tension. Instead of a “nun”, you can sew a leather applique in the form of a triangle (Fig. 5.15).
Hello!
We continue to get acquainted with hand stitches. Today we have hand stitches with bias stitches “under the microscope”.
Oblique stitches differ from straight stitches in their location on the fabric. If they are laid in a straight line without deviating from it, then the oblique stitches are laid at an angle to the stitch line.
I use hand stitches with oblique stitches when I need an almost 100% guarantee that the connected cut parts or layers of fabric will not move relative to each other. Because, due to their characteristics, oblique stitches practically eliminate further shifts and distortions of cut details. And since hand stitching with bias stitches is also much more elastic than hand stitching with straight stitches, it will not interfere with the stretch of the fabric and will secure its fit more firmly.
Oblique stitches are used to perform hand stitches, both temporary and permanent. Temporary hand stitches using bias stitches include basting stitches and basting stitches.
Basting (basting) lines using oblique stitches.
When making basting (basting) lines with oblique stitches, they are laid from left to right, stitches parallel to each other, length Lst from 0.7 mm to 20 mm.
The needle is removed from the material, at a short distance from the edge of the parts, through all layers, from bottom to top. The stitch (on the top layer of the cut parts) is laid by piercing all layers of material, from top to bottom, away from the cut, at an angle to the stitch line. The next needle puncture (on the bottom layer of the cut details) is made through all layers of material, from bottom to top, along a line perpendicular to the cut of the fabric, along the line of the previous needle puncture (needle entry into the material).
Basting (basting) lines with oblique stitches are used, for example, for hems, collars, etc.
Basting stitches with bias stitches.
The needle should go along the marked lines on the cutting details, with a basting (basting) stitch laid on the same details using straight or oblique stitches (described above). sewing machine and execute the line. You will remove the basting (basting) stitch using straight or bias stitches and turn the garment right side out. When all this happens, you will be able to consolidate edge seams located already inside the parts, use a basting stitch with oblique stitches.

The technique for making basting stitches with oblique stitches is the same as for basting (basting) oblique stitches. The stitch length Lst ranges from 0.5 mm to 10 mm. But the distance at which such a stitch will be laid depends on the width of the seam cuts, which are now located inside the sewn parts.
So hand stitch with bias stitches, for example the edges of lined patch pockets, the edges of sides, collars, etc.
But there are limitations to the use of temporary basting (basting) and basting bias stitches. When basting cut pieces made of thin fabrics and fabrics with checks and stripes, you should not use hand stitches with bias stitches. Because in the first case, the structure of the fabric may be disrupted, and in the second case, during (wet-heat treatment), the patterns of cells and stripes on the fabric may be distorted.
Manual stitches with permanent bias stitches.
Let me remind you that hand stitches remain on the finished product forever. Therefore, all permanent stitches are made with threads matching the color of the base material. And the threads should be thin, but strong. Sometimes they even pull the thread out of the fabric to make permanent stitches on it. Then no one will notice the thread.
For clarity, permanent stitches with oblique stitches in photographs and pictures are shown with contrasting threads (colors). You don't have to do that!
Overcast stitch with bias stitches.
Overcasting with oblique stitches is used in cases where it is necessary to protect a cut of fabric from fraying. This line is done like this.
The needle must be inserted into the tissue perpendicular to the cut,
at a distance of 0.3-0.5 cm from the tissue cut, from bottom to top, from right to left. Stitch frequency nst 3-4 pcs. by 1 cm, stitch length Lst 0.5-0.7 cm. To make it look beautiful, you need to place the stitches at the same distance from the cut and from each other, and not tighten it.

Hemming stitch with bias stitches.
Hemming with oblique stitches is used when you need to hem a folded, non-fraying section of fabric. For example, the bottom of the sleeves, the inner edges of the hem, etc.
To perform a hem stitch, you need to insert the needle into the fabric, in the direction from the main fabric (pierce half the thickness of the main fabric with the needle)

to the folded cut (pierce the entire thickness of the folded cut).

The distance from the edge of the folded cut to the exit of the needle (puncture on the folded cut) is from 0.3 to 0.5 cm. The stitching is done from right to left. Stitch length Lst 0.3-0.5 cm. Frequency nst stitches 2-3 pcs. 1 cm.
The next stitch must be made by reintroducing the needle into the main part, opposite the thread exiting the folded edge or 2-3 mm to the left.

And as you can see, nothing is visible from the front side.
Quilting with bias stitches.
Quilting with oblique stitches is used to impart stability and elasticity to individual sections of the sewn products. For example, when connecting cut parts made from the main fabric with parts made from interlining materials.
In such cases, the quilting stitch is laid, just like the basting stitch, with oblique stitches (see above), but with one difference, the upper part of the lining fabric is pierced completely, and the lower part (from the main fabric) is captured by one or two threads. The quilting stitch is performed in parallel rows from top to bottom, and then from bottom to top and vice versa.

On the finished product, this stitch will remain inside between the trim pieces (top and bottom layers). It should not be visible from the bottom part. Therefore, it must be done carefully; the stitches cannot be pulled together.
Stitch length Lst 0.5-0.7 cm.
Plaster stitch with oblique stitches.
Plaster stitch with bias stitches . In fact, this stitch is used more often when repairing clothes made of thick fabrics with non-fraying cuts. When, as a result of an “accident,” tears and cuts in the tissue occurred. And you need to quietly connect the sides of the gap, the cut. Then this line is irreplaceable. But since it is done manually, with oblique stitches, then, as they say: “Our client!” and we will consider it.
The sections of the rupture and incision are placed close to each other. We fix ourselves at the beginning of the cut (tear) and do . Using a needle, from right to left, the material inside the fabric layer is pierced (sewn) with oblique stitches, but not through the entire thickness of the fabric, but so that the stitches are not visible from the front side. And from the outside you get straight, parallel stitches that tighten the sides of the cut (tear).

After completing the stitching, you can try to disguise the stitched area by straightening the pile with a needle.

Bye bye!
Next article Sincerely, Milla Sidelnikova!
This lesson is an attempt to show that technology, like no other subject, can become an experimental creative platform on which, through integration with other subjects, the application non-traditional forms conducting lessons and extracurricular activities, the mandatory use of ICT, ideal conditions are created for the formation of intellectual competence and creativity of students. It is only necessary to create an atmosphere of cooperation in the classroom, to captivate the children in the “search for truth”, to stimulate their activity and creativity, equipping them with modern technologies. When studying a topic "Kinds hand stitches and lines" Students become familiar with the classification of seams, with their conventional and graphic images, and master the successive stages of making a seam. The most effective learning of material by students is achieved not by the reproductive method of teaching, when memorization and reproduction of the communicated information is carried out, but by the problem-search method of teaching. The organization of students' work in the lesson can be either individual or group (they can choose for themselves). The degree of complexity of the problem statement should increase when studying each new seam. Methods for testing students' knowledge can be in the form of tests, control questions, and also in the form of questions that the students themselves composed after studying the material. This method of testing knowledge is well suited for group work of students. The group fills out the technological map, makes seams, makes up questions and asks them to other groups, and for the teacher this is a way to determine how correctly and deeply the students have mastered the topic of the lesson.
Technology Lesson Planin 5th grade
| Lesson No. 9-10 | Date 05.10.2008. | Quarter 1 |
| Lesson topic | Types of hand stitches and stitches. | |
| Number of hours | 2 | |
| Use of ICT | R/R program; text editor, printout additional materials and exercises. | |
| General educational skills | Answering questions, perceiving information, consolidating knowledge through application in exercises, self-analysis of results. | |
| Special skills and abilities | Organization of the workplace. Technology for performing hand stitches and stitches. Ability to perform basting and copying lines. Techniques for working with tools and materials. | |
| Lesson type | Formation of knowledge and skills. | |
| Triune didactic goal | To familiarize and ensure the acquisition of knowledge and skills when performing hand stitches and lines, to familiarize with the rules of T.B. Learn to independently evaluate your work results. | |
| Contribute to the formation of interest in culture and art; improve aesthetic views, promote development creativity personality. | ||
| Promote the development of students' sensory and motor skills | ||
| Teaching methods | Conversation, demonstration of visual aids, independent practical work, work with a textbook, exercises in performing work techniques. | |
| Repeatable material | Safety rules when performing handmade, when performing an OBE. Know the terminology of manual work, the terminology of WTO. Crossword "Tools" | |
| Types and forms of knowledge control | Completing test tasks, mutual control, self-control, individual practical work. | |
| Practical work | Making hand stitches and stitches | |
| Homework | Textbook of par. 4. Practical work 5 p. 24. Practical work:“Performing hand stitches and stitches” |
|
Lesson summary
Lesson objectives:
- To familiarize and ensure the acquisition of knowledge and skills when performing hand stitches and lines, to familiarize with the rules of T.B.
- Contribute to the formation of interest in culture and art; improve aesthetic views, promote the development of creative abilities of the individual.
- Promote the development of students' sensory and motor skills
Equipment: hand needle, thread, scissors, thimble, PC, projector.
Materials: details made of cotton fabric, thread, two buttons.
Visual aids: stand with seam samples.
The following terms are written on the chalkboard:stitch, line, stitch length, seam, seam width, baste, baste, baste, sew.
During the classes
I. Organizing time.
- Greetings.
- Attendance mark.
- Checking readiness for the lesson.
- Checking the organization of workplaces.
- Communicate the topic and objectives of the lesson.
II. Updating knowledge.
Crossword puzzle "tools".
III. Explanation of new material.
- Students read the messages “The History of the Creation of Things”
- When sewing clothes in the studio and at home, the cut product is first basted by hand and then sewn together. sewing machine. Manual work is used when finishing a product and when performing such operations as sewing loops and cuts, sewing on buttons.
The parts are joined together manually using stitches and lines.
Stitch is the complete process of weaving threads onto fabric.
Line is a series of repeating stitches on fabric.
Stitch length– this is the distance between two consecutive needle punctures.
The seam- This is a thread connection of parts.
Seam width– the distance from the cut of the part to the stitching. Appendix 3
By method of execution stitches are divided into manual and machine, A by appointment on connecting and finishing.
Hand stitches form lines for temporary and permanent purposes.Appendix 4
When performing manual work, the following terminology is used.
Terminology usedwhen performing manual work
| Term | The content of the work | Regionapplications | Drawing |
| Sweep away | Temporarily connect two or more parts of approximately equal size. | Baste parts of the belt, parts of the frill, parts of the product. | |
| Baste | Temporarily connect two parts superimposed on top of each other. | Baste the pocket onto the main piece. | 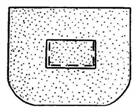 |
| Tack | Temporarily connect a small part to a larger one. | Baste the belt to the apron. |  |
| Sweep | Temporarily secure the folded edges of the part and folds. | Baste the bottom of the product, side sections and folds. | 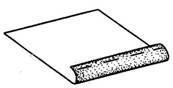 |
| Sweep | Process the sections with loop stitches to protect them from fraying. | Sew down the cuts. |  |
| Hem | Secure the folded edge of the product with constant stitches. | Hem the bottom of the product. |  |
| Sew on | Attach fittings and trim to the product with permanent stitches. | Sew buttons to the product. |  |
IV. Current briefing.
Before starting any business, you need to equip your workplace. Workplace It is customary to call a section of the office designed to perform a specific job and equipped in accordance with this work. For manual work, you need a work table on which tools and equipment are placed. All work is done on the table; the workpiece should be held in front of you.
Correct seating has a great influence on the well-being of students and the quality of their work. Incorrect position of the body causes premature fatigue, decreased performance, and also contributes to the appearance of stoop, curvature of the spine, and the development of myopia. Appendix 5
The correct posture while working is as follows:
- The feet should rest firmly with the entire sole on the floor, because with a different position of the legs, blood circulation is disrupted.
- The body should be kept straight or slightly tilted forward.
- Tilt your head slightly forward.
- You cannot lean your chest on the table.
- Arms should be bent at the elbows and no more than 10 cm behind the body.
- When working, do not place your elbows on the table.
- The distance from the eyes to the product or part should be on average 30 cm.
- During operation, you should periodically change the position of the body.
When performing manual work, the following tools and equipment are used. Appendix 6, Appendix 7.
Hand needles must be sharp, unbreakable, well polished, with an ear of sufficient size. Needles are distinguished by diameter (thickness) and length by numbers from No. 1 to No. 12. Needles are selected depending on the type of product and the fabric being processed. For cotton fabrics, needles No. 1-3 are used. In accordance with the needle number and the type of fabric being processed, you should also select the number thread When making cotton fabrics, threads No. 40-80 are used. |
|
Tape measure It is a tape made of rubberized fabric, 150 cm long, with metal fasteners at the ends. A measuring tape is used to take measurements on a figure when cutting material. |
|
Thimble intended to protect the finger from being pricked when pushing the needle into the tissue. It is placed on the middle finger of the right hand. The size of the thimble should exactly match the thickness of the finger. |
|
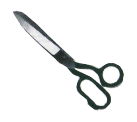
Scissors used for cutting fabrics and trimming threads. Scissors used in sewing production have eight numbers. |
|
Pins can be with a metal or glass head. Used for chopping off product parts and pinning paper patterns to fabric. Pins should be thin, well sharpened and polished. |
|
Tailor's chalk used to mark lines and marks on the material during cutting and fitting. Sometimes finely ground dry soap is used instead of chalk. |
|
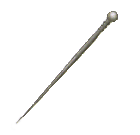
Peg – device for removing basting when sewing. Pegs are made of wood, glass or bone. It is used to straighten the corners of the side, collar, and various figured seams. |
|

It must be remembered that faulty tools and ignorance of safe working methods can lead to an accident.
Safety rules when performing manual work.
Dangers at work:
damage to fingers from a needle or pin;
hand injury from scissors;
eye injury.
count the number of needles and pins in the pincushion;
Place tools and equipment in the designated place.
be attentive to work;
put a thimble on the middle finger of your right hand to avoid pricking your finger;
stick needles and pins only into the needle bed;
place the scissors on the right with the blades closed, pointing away from you;
pass scissors only with closed blades and rings forward.
count the number of needles and pins in the pincushion;
clean the workplace.
Safety rules when performing wet-thermal work.
Dangers at work:
cord fire;
burns: steam, on the sole of the iron and from fire of the cord;
electric shock.
What you need to do before you start:
check the integrity of the cord and the cleanliness of the soleplate of the iron;
check the presence of a rubber mat.
What to do while working:
perform wet-heat treatment while standing on a rubber mat;
turn the iron on and off with dry hands, grasping the plug body and not the cord;
place the iron on a special stand;
make sure that the cord does not touch the soleplate of the iron and the iron does not overheat;
use a spray bottle to moisten the fabric.
What to do after finishing work:
turn off the iron;
place it on a special stand.
V. Practical work: “Performing hand stitches and lines.”
- Make temporary stitches.
- Make permanent stitches.
- Complete the practical task in accordance with the table. Appendix 8, Appendix 9.
Requirements for performing manual work (technical conditions)
- Chalk lines are transferred from one part to another, laying copy stitches.
- The color of the threads for sewing temporary stitches must differ from the color of the parts being joined.
- Baste the pieces along copy stitches or chalk lines. After basting, the copy stitch threads are removed.
- The thread is secured at the beginning and end of the line. At the beginning with a knot at the end of the thread, at the end with two or three stitches.
- The color of threads used for permanent stitches must match the color of the fabric.
- The trim on the product is sewn with threads matching the color of the trim.
- Buttons with through holes are sewn on with threads matching the color of the buttons. Buttons with a stand are sewn with threads in the color of the fabric.
VI. Final part.
Review questions.
- What are the requirements for performing manual work?
- What is a seam?
- What is a stitch?
- What is the seam width?
- What is a line called?
- What is stitch length called?
- Where are straight stitches used?
- Where are loop stitches used?
VII. Analysis of deviations.
Self-control: compare the quality of stitches with samples; check compliance with technical conditions.
Performance evaluation.
VII. Homework:
Textbook No. 4;. Practical work No. 5, page No. 24.
Practical work:“Performing hand stitches and stitches”
Additional material.
Scissors.
The first scissors were invented one and a half thousand years BC. The oldest scissors in Eastern Europe were found near Smolensk, in Gnezdovo. Based on the composition of the material from which they were made, scientists determined that they were used by a tanner of the 10th century.
In Rus', scissors were made by artisans who made knives. The materials used to make scissors were iron, steel, and sometimes even silver plated with gold.
Some master manufacturers gave free rein to their imagination: from under their hands came a strange bird with a beak that cut fabric. These were real artists who turned a simple working tool into a work of art. Sometimes there were so many decorations on scissors that it made using the tool difficult, and they remained a purely decorative item. For example, this happened with scissors, the rings of which were entwined with metal vines with clusters of grapes.
There are many varieties of this ancient cutting tool. Scissors have their own “specialization”: for tanners, hairdressers, doctors... They vary in size - from small ones for manicures to huge ones for cutting cars.
Electric scissors have been created that cut thick leather, rubber, linoleum, and plastic at a speed of 20 meters per minute.
The most advanced are laser scissors; they are used in sewing factories. An electronic computer compiles and displays on the screen clothing patterns of any style invented by fashion designers. The cutting operator makes final changes to these patterns using a light pencil, and laser scissors automatically cut the fabric according to these patterns.
Button.
Before the advent of buttons, even outerwear was worn over the head. Buttons were brought to Europe from Turkey about 900 years ago. Large buttons with a diameter of several centimeters were fashionable. Portraits, flowers, butterflies were inserted into the buttons and covered with glass. Buttons were also made from pearls, wood, mother-of-pearl, bone, horn, leather and precious stones. Hundreds of them were sewn onto clothes - no longer for convenience, but for beauty.
Iron.
In ancient times, before the advent of irons in Rus', as well as in Central and Northern Europe, a wooden press was used to straighten fabric after washing. Then a wooden gurney appeared, on which they wrapped the laundry, then rolled it along the board several times.
In the XIV century. They began to use a wooden ironing machine. It was driven by a toothed wheel by hand or by a horse-drawn winch and had wooden rollers moving along a board.
The first iron appeared at the beginning of the 16th century. It was a large, heavy body made of brass, steel or cast iron, with a wide polished bottom surface and a wooden handle. Such irons were heated on a stove, either with hot iron or with coals, which were placed inside the body. Cuffs and some other things were ironed using a special bell-shaped brass device, inside of which there was a hot iron. Products made from thin fabrics were ironed with a glass cylinder, which was used to straighten them until all small folds were removed.
Over the next three centuries, the design of the iron changed slightly, the quality improved and the speed of work increased.
A significant achievement of the beginning of the 20th century. It is believed to be the creation of an electric iron that does not depend on an external heater, the thermostat being a mandatory element of it. Then they began to use devices for moistening fabrics during ironing; the traditional cast iron sole was replaced by a lighter aluminum one or with a non-stick coating; The body and handles began to be made of heat-resistant plastics. These are the main characteristics of a modern household electric iron.
Literature
- Edited by V. D. Simonenko. Technology textbook for 5th grade students. M.: – 2007.
- V. N. Chernyakova. Fabric processing technology grade 5. M.: – 2005.
- Yu. V. Krupskaya Guidelines 5th grade. M.: – 2005.
- AND I. Labzina, E.V. Vasilchenko. Service labor 4th grade. M.: Education - 2006.