We have almost spent the first spring month of March and very soon we are waiting for the onset of April, which brings with it the holiday of spring, joy, but at the same time sadness, the holiday of Easter, the holiday of the resurrection of Jesus Christ. Why is this holiday at the same time sad, because on this day it is customary for many to visit deceased loved ones in the cemetery, arrange a memorial dinner and exchange colored eggs, Easter cakes and other mini-gifts with all their acquaintances, relatives and friends. And nowadays, the topic of handmade gifts is becoming increasingly relevant. They are considered very special and valuable, because truly, there is nothing better and more pleasant than receiving some kind of souvenir in which a piece of love and soul is embedded. Now, regarding the holiday of Easter, the main animal of this day is the Easter bunny. So, as an idea and a cute little gift for the holiday, you can sew soft rabbits from fabric.
We’ll be looking at just such a master class right now. To sew Easter bunnies we will need to take:
- The fabric is not very variegated, we take a gray-white check, this is Polish cotton and gray daisy cotton made in Korea;
- Rabbit pattern (many different patterns can be found on the Internet and printed);
- Ball filler synthetic fluff;
- Black rhinestones for eyes;
- Satin salad green and turquoise polka dot ribbons;
- Threads black and white, needle;
- Ribbon with large white pompoms, use them for tails;
- The ribbon is white with small bobbles;
- Knitted flowers in turquoise, beige and blue;
- Scissors and pencil;
- Glue gun.

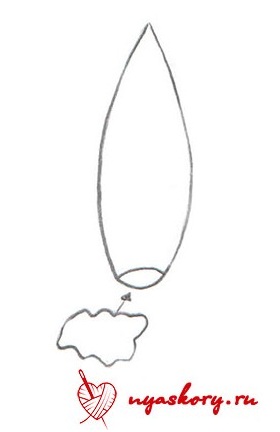
Take the printed pattern and cut it out.


Now we unfold the fabric and apply our prepared pattern to it.


We trace the pattern and cut out two fabric parts of the rabbit from each fabric.


In total, we sew three rabbits in the master class, so we have only six fabric blanks.


Now we put them in pairs with each other, so that the front part is inside. We sew all three blanks on a machine, leaving 2-3 cm of understitching at the bottom of each so that we can turn our blanks inside out and stuff them with filler.


We turn them inside out and stuff our bunnies with stuffing.
Greetings. Today I want to give you some interesting ideas on how you can make your own Easter bunny. It can be used as a symbol of Western Easter, as interior decor, or simply as a cute gift for loved ones.
Before moving on to the actual description of the creation process, I would like to explain why I chose the theme of fluffies and what they have to do with Easter. And their connection with this holiday is the most direct - bunnies are symbols of fertility and new life in the West; Germany is considered their homeland. In our country, these meanings are transferred to eggs and Easter cakes.
There are a lot of legends about why the rabbit was chosen as a symbol, but for you and me, I think it’s time to call the kids and start choosing a craft.
As a cute present, I suggest making a wonderful bunny from a terry towel. And inside we will put a Kinder Surprise or a real boiled egg. Can you imagine how happy your baby will be? I am sure that he will definitely remember this holiday.
So this craft can also be used as an egg stand.
I have prepared two step-by-step master classes. Both of them are easy and quick to do, so I’m just confident that you will succeed.

We will need:
- towel (30*30 cm)
- 2 hair ties
- beads for eyes and nose
- Kinder
- Double sided tape
Since this craft is completely waste-free, we will not use scissors and a knife for it, but we will cut three small pieces of tape in advance and glue the nose and eyes to them.

You can take the towel in other sizes, but then be prepared to get longer ears.

Notice that all the ends matched and the edges were smooth. Still, the child will appreciate neatness.

Instead of an elastic band, you can use a satin ribbon, but it is not very convenient to tie, so I ask you to be prepared and find or purchase two elastic bands in advance.

Lower the elastic band of the body to better press the kinder, otherwise it may slip out of the towel.

You can also glue carrots or flowers.

Do you think your child will appreciate your idea? I think that such an extraordinary congratulation develops children’s imagination well.
Also look at how you can roll the towel in a different way; everything is shown in order in the picture.
You will need:
- square towel,
- hair elastic.
The first step is to find the middle of the towel. Next, we twist its ends into a tube; here it is important to straighten the corners and edges.

Now fold the workpiece in half and put the elastic band on the towel. You pull the edges as if you want to pull them out, but do not do this, leaving the free ends pressed against the body. This is how we formed the head and ears. All that remains is to move the ears themselves away from each other.
You can, as in the previous version, put the testicles inside, and glue the eyes and nose on the craft itself.
DIY Easter bunny on a postcard
I wrote a little about postcards in the article, but there are a lot of ideas, so let’s make a bright congratulations with a bunny.
The card itself is very joyful, and what inspired me most was the bunny’s tail. It doesn’t have to be made flat out of paper; you can glue a fluffy pompom instead.
You will need:
- scissors,
- glue,
- white sheet of paper,
- thick cardboard for the base,
- about 20 multi-colored stripes, 1 centimeter wide and length corresponding to the width of the base.
My daughter and I cut out these strips from self-adhesive colored paper. It is sold in regular stationery stores and has bright, saturated shades of sheets.
The strips may not be the same length if you don’t have enough of them, but the middle must be even. Because the edges will be covered by the top sheet of paper, but the middle will remain visible.

You can draw a bunny schematically or not like this, but this one has a very cute tail. Cut it along the outline and glue it on top of the side of the base with stripes.

If you are doing a craft with a child, then use PVA glue; it is considered the most harmless and non-toxic.

Still, you need to try making a donut instead of a ponytail! Sign the message and the postcard is ready.
Fabric bunny with patterns
Cute fabric rabbits are very good as decoration. They are easy to sew and look very cute. And if you choose floral fabric, the animal will also become a symbol of spring!
Of course, needlewomen will be happy to start creating, and I offer them diagrams for inspiration.

You will need:
- soft gray fabric
- white fabric for ears,
- scissors,
- threads with a needle,
- any filler (cotton wool, padding polyester).
The details from the diagram above must be transferred to fabric and cut out. Each part needs to be cut out two pieces.
We apply all the matching parts with the wrong sides facing each other and sewing the edges, leaving a little edge free.
For example, we fold the foot in half and sweep the edges, leaving the tip free. We turn the part inside out and fill it with padding polyester, and sew up the edge.

We make the ears from two types of fabric and put two machine stitches in the middle, as in the picture.
Assemble all the parts and use thread knots to make eyes and a nose. You can use beads instead if you have them.
Another interesting option for animals. Everything here is generally simple, transfer the parts onto the fabric, fold them right side inward and stitch them, also leaving the edge free.
Turn the part inside out and do the stuffing. Then you stitch this edge by hand.
You can decorate with beads and ribbons. If you take a beautiful elegant fabric, then little decor is needed, just to indicate the eyes and neck.

You can use this pattern. Just a reminder that you need to cut out two pieces.

For those who don’t want to make the whole flock according to one pattern, I’ll give you another, very cute one. By the way, it is also perfect for making felt products.

Well, a very simple, but very cute version of bunnies.

It’s not at all a shame to put such textile animals in a basket and give them a treat.
Master class on how to crochet a rabbit with diagram and description
Let's crochet this animal! This is also quite simple. I will provide a drawing that describes the sequence of knitting rows step by step. By repeating the description, it will be easy for you to repeat the entire process from beginning to end on your own.
In the bottom diagram, “sc” means single crochet.

A simple one-sided applique can be made according to the bottom diagram. This shows the sequential arrangement of chain stitches and double crochets in rows.

To make it even clearer for you, I suggest watching a video where a needlewoman shows in detail how to knit a bunny.
The video shows how to assemble single crochets into a ring and how to increase the width correctly. Try this, because crocheting is not difficult, and when you master the simple patterns given above, then you will be able to create very realistic rabbits.

They deserve praise, right?
Felt symbol
Felt is very loved by many craftswomen, because it has such a variety of colors, and it is also pleasant to work with. You can choose different thicknesses of the sections, but you should not buy fabric for this craft that is more than a millimeter thick, it will be difficult to create with it, because it will not obey your hands and follow the desired curves.

You can use all the patterns given in this article for bunnies, because felt is a very pliable material.

Well, if you don’t want to use seams, then all the parts can simply be glued together.
You just need to choose a colorless glue, otherwise it may seep through the fabric and leave unsightly marks.
Cute bunny made of threads
For the little ones, I suggest making an animal from woolen threads. It is made using a pompom and cardboard.
We will need:
- wool threads,
- cardboard,
- scissors,
- felt,
- beads for eyes and nose,
- needle and thread.

To make these bunnies you need 1 large pompom for the body, 1 medium one for the head, 2 small ones for the front legs and 1 small one for the tail.
All pom-poms are made according to the pattern from below. The basis is two cardboard rings of the required diameter, which are wrapped with thread.

Then we cut the thread between the rings with scissors and pass the pre-cut thread between the rings to tighten the pieces. This is shown in detail in the photo.

We will cut out ears from felt and sew them to the head with threads.

All that remains is to fasten the pompoms and glue the eyes and nose with hot glue. You can also make the following craft using a thread base.

Only here the pompoms are not taken out of cardboard rings, which act as the base and body of the craft. The head is a continuation of the pom-poms, so draw the diagram with the head, ears and body on one piece.
Easter bunny made of paper
Cute little bunnies can be made from any material, but the most accessible and favorite for most children is paper. You draw what you want on it, and bend it as needed. Check out this cute egg holder you can make.

For this craft, use this template, you can immediately print and cut it out. Where dotted lines are shown, the paper needs to be folded and glued.
The template consists of two parts that are connected to each other. I think your kids will definitely be delighted with such a funny and cheerful craft.

And another interesting option for you to note: my daughter and I have already tried it - the child was delighted. Of course, I had to cut out all the parts myself, because she still doesn’t know how to cut straight. And everyone likes crafts that are smooth and neat.

We will need:
- album sheet,
- colored cardboard,
- glue,
- scissors,
- markers.
Take this diagram as a basis, simply print it out or attach a sheet of paper to the monitor screen and carefully trace it with a soft pencil.

Fold lines are shown as dotted lines, and straight lines need to be cut. These will be the legs. You can glue them to any sheet of cardboard; we made a clearing in the photo.
The eyes and mouth can be made with a felt-tip pen, or you can use beads.
Important! Tape the fold of the head well because it can peel off easily.
Well, also note for you the idea of crafts from egg trays. The cell is cut off and its bottom is trimmed. And the decor is glued on, so you can, of course, make not only a rabbit, but also a chicken, a bear or a cat.

Any joint creativity develops children's fine motor skills, which contributes to the normal development of speech. And also the development of imagination, especially when the child chooses the color and decor for a future craft.
Making a bunny using origami technique
Origami is a fairly well-known technique in which a figure is made from paper without the use of glue or scissors. With the correct bending of the lines, the figure folds very easily. There are more complex patterns that children cannot complete, but there are very simple ones, for example, when we folded.
For Easter, this technique will help us make cute egg cups. And all you need for this is attentiveness, a sheet of paper and a felt-tip pen.

Below are step-by-step instructions for folding with a description.
Important! Do not take a thick sheet, it is very difficult to roll the shape.

And another interesting idea for an animal using the same technique. Make it a little lighter, and it can also serve as a basket.

To ensure that all the crafts turn out neat, calm down and pay full attention to what you are doing. After all, they say that whoever is given a rabbit for Easter will be happy all year. And, if this gift was made with your own hands, then it was also made by your loved one. Nice, isn't it?
On the holiday of the Resurrection of Christ, Easter cakes are usually baked. Now in our country the symbols of Bright Day - Easter bunnies - are also becoming popular. You can make them with your own hands using very simple methods in a few minutes or make beautiful but complex souvenirs in the form
Ideas and manufacturing methods
To get beautiful gifts - Easter bunnies, made by yourself, choose your favorite options from the following list:
- knitted and crocheted;
- paper applications;
- origami;
- products made from plasticine, model mass;
- decorative forms from dough (salted and baked);
- sewn simple rabbits from felt and other fabrics;
- Easter eggs decorated with ears and faces;
- painted stones.
Any of the methods is suitable as a creative activity with children. This way you can make gifts for family and friends, cards, and interior decorations.
Materials for work
To ensure that you get original and varied Easter bunnies created with your own hands, prepare everything in advance. You will need the following:
- paper;
- scissors;
- glue;
- textile;
- filler for soft souvenirs;
- threads with a needle;
- paints;
- pencils;
- tassels;
- plasticine, model mass, dough.
If you are going to make souvenirs with children, try different methods. Complex stages of work should be carried out by adults, and the rest the children will be happy to do themselves.
We sculpt from plasticine and polymer clay
Any work with plastic materials has a beneficial effect on the development of children. Souvenirs can be made according to samples, using metal or plastic forms. Objects are made both flat and three-dimensional.
They are made quickly from plasticine. The main advantage of the material is the ease of working with it. Polymer clay allows you to record the result of a craft in the form of a solid sculpture. In addition to different shades of plastic masses, children like to use additional decor (beads, seed beads, sequins).
Dough crafts
A DIY Easter bunny can be made either decorative from a salty substance or in the form of an edible bun or cookie. The first option will decorate the room. It is enough to glue a magnet to the back of the product to get an original decoration for the refrigerator.
Baked goods will pleasantly surprise guests at the festive table. In both cases, the working technology is similar: shapes are cut out of rolled out dough or a three-dimensional figure is created from a piece.

Cookies and buns can be easily decorated after heat treatment with icing, made with stencils or sprinkled with confectionery beads.
Easter egg decoration in the shape of a bunny
Products in the form of Easter eggs, decorated to resemble rabbits, look unusual and beautiful. The base is an ordinary chicken egg, a wooden one, or a papier-mâché mold.

To get such a cute animal, do the following:
- Take the blank, paint it in It is good to use acrylic paints.
- Paint the lower part with a second layer in a different shade. Apply the design with a brush or stencil. You can also glue a colored napkin, having previously coated the surface with PVA glue.
- On the upper half, draw or glue the elements of the muzzle.
- Cut out ears from paper, cardboard or felt so that they are also convenient to glue.
- Finish with varnish to add shine and water resistance.
If the egg is natural and will be eaten, use only food coloring.
DIY Easter bunnies made from paper
Cardboard or even a regular sheet of Whatman paper will allow you to create original interior decorations or greeting cards. To decorate walls and bookshelves, it is easy to make a garland of plain or multi-colored rabbits.

To do this, follow these steps:
- Draw it yourself or print a ready-made template (object outline);
- Cut out the silhouette from cardboard.
- Trace it the required number of times on colored paper.
- Cut out all the elements.
- If desired, decorate them with drawings, stickers, bows.
- Connect all the parts together by assembling them onto a cord using glue, knots, or attaching them with pieces of wire threaded through a couple of holes made in the workpiece.
A cute DIY Easter bunny can be made using the applique technique. It is good to use to decorate the front of a greeting card.

To make a bunny like the one in the photo above, do the following:
- Buy colored paper (designer, wrapping, scrapbooking).
- Cut out the elements of the object from it.
- Glue the parts together.
- Draw a muzzle.
- Glue on a beautiful bow or other decor.
In addition to paper, shreds, felt, and lace are used for applique. Get creative and create your own stylish souvenirs.
Origami
This is a popular hobby today. Both children and adults do it. Take a beautiful and not very thick colored paper, perform the entire sequence of actions with the sheet, as shown in the diagram.

Draw the eyes and glue a bow. The souvenir is ready. By using several different paper samples, you can create cute DIY Easter bunnies. Origami, like any other technique, will definitely interest children.
We sew simple souvenirs
Another simple method is making textile accessories and decor. It is enough to take the simplest template, in the shape of a rabbit (the same as was used for cutting out dough or plasticine). This is done on a variety of objects: from a garland element to a sofa cushion.

Even if you are not a craftswoman with extensive experience, but just a beginner needlewoman, you can easily make DIY Easter bunnies like those in the photo above. The pattern is taken ready-made, or the template is drawn independently in the desired size and shape. The further sequence of work will be as follows:
- Place the workpiece on a fabric folded in half.
- Pin it in place so it doesn't move.
- Trace the outline with chalk, taking into account seam allowances.
- Place the two pieces right sides together.
- Baste and then stitch the seam along the outline, leaving a small opening.
- In places where there are bends, make cuts along the allowances. Be careful. It is important not to damage the seam. This operation will prevent the formation of folds and distortions on the front side of the product.
- Turn the object inside out onto its face.
- Fill the toy with stuffing material. Synthetic padding polyester, holofiber, and scrap scraps are suitable.
- Hand sew the left hole neatly along the front side.
Such souvenirs are made from any plain or colored fabric. If you wish, you can draw a muzzle on the finished product. To do this, it is better to pre-coat the corresponding part so that the paint does not fade after drying.
An even simpler technology is creating felt rabbits. This material allows you to grind parts by hand and does not require edge processing, as it does not crumble. The parts are usually sewn along the front side over the edge or along it using a regular or decorative seam.

Small details are embroidered and even glued. This technology allows you to make many souvenirs in a short period of time.
For any of the two methods, the pattern shown in the figure below is suitable. It can be used for appliqué and even for working with dough.

Interior dolls
The next two ideas are suitable for experienced needlewomen. If in the previous section we looked at simple textile souvenirs, here the photo shows a doll in the shape of a rabbit. To make it, you will need to cut out many parts, which are first sewn and stuffed separately, and then joined into one.

This hand-sewn souvenir will become a valuable gift and a pleasant home accessory.
Crochet bunnies
If you have this tool, try making gifts this way. Use a wooden egg as a base or fill the mold with stuffing material.

The details of the product are knitted separately and then sewn together.
Unusual DIY Easter bunnies. Master class on making
As you can see, there are a lot of technologies and methods for making gifts. Spectacular crafts are obtained by combining different materials. The photo below shows a souvenir that can serve as a magnet, postcard, or decorative panel.

Use several suggested ideas in one product. And you will get a variety of exclusive Easter bunnies with your own hands. Photos from the article give room for the expression of imagination and refinement of the crafts seen.
To make the magnet, which is shown in the picture above, an applique of paper and felt was used. If you have time and want to make such a gift more complex and decorative, make the rabbit three-dimensional, as described in the previous sections, and make the frame from polymer clay.
In addition, a magnet can be made from an ordinary stone, which you paint to look like a rabbit.

Here it is important to find a suitable round shape with one small flat surface to which the magnetic sheet can be glued. The technology will be like this:
- Take the prepared stone and prime the surface. White acrylic will do.
- After drying, apply the design with a pencil. As a sample, take a photo of a real rabbit or a cartoon one if you are not confident in your abilities and skill as an artist.
- You should paint with acrylic paints. They are special, suitable for stone.
- After completing the work, coat the product with varnish. This will make the surface resistant to moisture and other influences. It is better to apply the varnish in several thin layers, allowing each previous one to dry first.
So, you have learned how to make Easter bunnies with your own hands. Choose the appropriate manufacturing method. Practice with your children at home or in art classes.
How to sew an Easter bunny from fleece with your own hands
Andronova Kira, 10 years old, resident of the “City of Masters” of the children’s center “Zvezdochka”, Tomsk
Supervisor: Vera Aleksandrovna Pavlukhina, additional education teacher, MAOU DOD Youth and Youth Center “Zvezdochka”, Tomsk
Description: The Easter bunny is made of fleece. This textile toy will serve as a wonderful gift for family and friends on the eve of Easter, or will become your child’s favorite toy.
Purpose: This master class is intended for children 10-13 years old, additional education teachers, and parents. It will arouse interest among people involved in textile creativity.
Target: making an Easter bunny from fleece
Tasks:
- To teach the technology of making soft toys from fleece;
- Introduce the seam “over the edge”;
- Develop fine motor skills of the hands;
- Develop creative abilities;
- Develop personal qualities.
Sewing work attracts children with its results.
This type of activity helps improve coordination of movements, flexibility, and accuracy in performing actions. The favorable emotional mood of children during the making of toys, the joy of communication during work, the pleasure experienced in the process of creating a beautiful toy are very important for overall development.
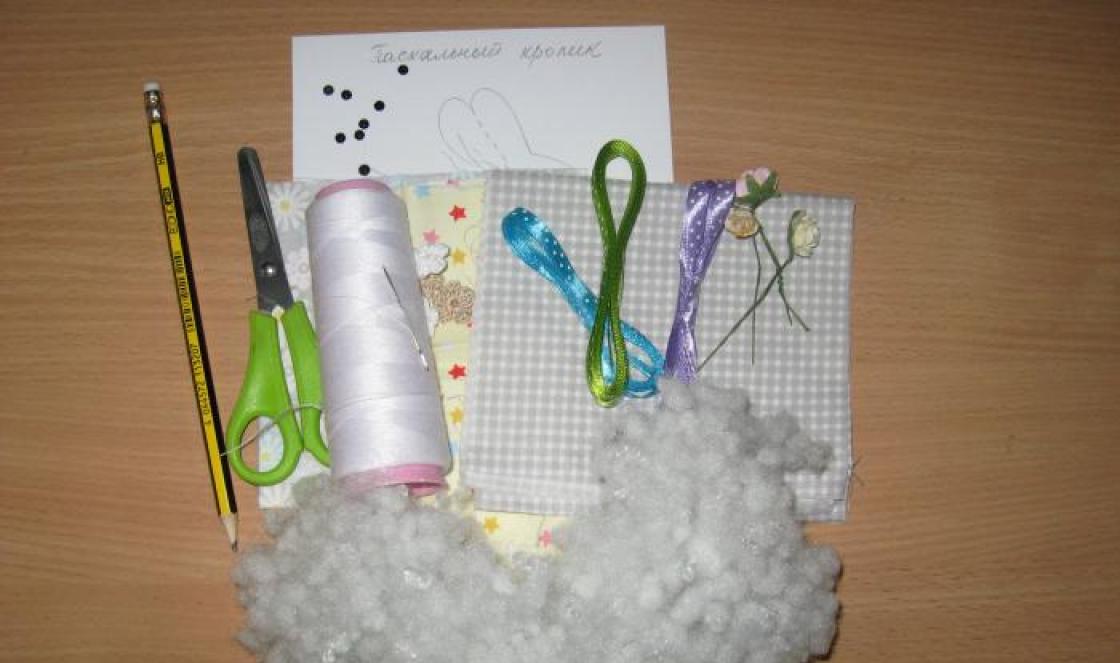
Materials and tools:
fleece in two colors;
white, black threads;
Hollobyber;
beads No. 5;
felt-tip pen;
needle, scissors.

Safety precautions when working with a needle
Don't put a needle in your mouth
Don't stick a needle into your clothes
The needle is always either in work or in the needle bed
Safety precautions when working with scissors
Don't hold the scissors upside down
Don't leave scissors open
When working, watch the fingers of your left hand
Place the scissors on the table so that they do not hang over the edge of the table
Pass the closed scissors in rings towards your friend
Do not cut with scissors on the go, do not approach your friend when you are cutting with them.
Ready to sew a long-eared rabbit,
Feel free to sit down at the table.
Let's get started:
Templates
Take the finished template and carefully cut it along the contour

We transfer the finished parts to fleece and cut them out

Now be careful.
We take one piece (barrel), place it on the table with the front side up.
Take the part (the belly), bend it in half, as shown in the photo, and place it face down on the barrel.

From point A to point B we sew a seam “over the edge”.


Take the second part (side), apply it to the tummy and sew from point A to point B.


All the difficult things are left behind.
We connect and sew the two parts (side) together, leaving a hole for stuffing.
We left it on the back.

Turn it inside out and stuff it with hollobiber.

We sew up the hole with a seam “over the edge”, but at the same time we tighten the thread more tightly so that it is not so noticeable.

Let's start with the ears.
We connect two parts of different colors together with the right sides facing inward and stitch them. We leave the bottom unstitched. Likewise the second ear.

Turn it inside out, bend it in half and connect it in the middle with a few stitches.
Sew the second ear by analogy.

Ponytail. We put the two parts together with the right side inward and stitch them, do not stitch the bottom, turn them inside out.

All that remains is to sew on the ears and tail of our little bunny.
We sew the ears with a seam “over the edge”, tightening the stitches more tightly.


We sew the tail with a seam “over the edge”, tightening the stitches more tightly.

We sew on the eyes (beads) with black thread.
In order to sew on eyes (beads), we mark the place for the eyes with a needle. We stretch the thread from one side to the other, thread a bead and return to the other side, thread the second bead, return, and do this several times.


We shape the nose. You can sew a piece of black fleece with a seam “over the edge”, or a bead.
A universal selection of gift ideas for any occasion and occasion. Surprise your friends and loved ones! ;)
Hello, dear guests and readers! I am glad to see you in this new article, dedicated to, if not a classic for us, but a very cute and bright symbol of Easter. Do you think making your own Easter bunny is difficult? But no
Although the rabbit tradition has not completely taken hold among us (it was born in Germany and is more typical for Catholics than for us), many people like the idea of this little animal as an Easter souvenir.
Rabbi was born when I had only been seriously interested in needlework for a very short time. Rabbi is not just a rabbit, he is also a kind of mascot for me. This is perhaps my favorite creation. He was born a couple of years ago just in the spring, so he is a full-fledged Easter bunny

His name is formed from two English words: rabbit + bee = Rabbee. As you probably already guessed, I gave this toy such an original name because of its color. Why did I call him Rabbi-kun in the title of the article? The fact is that the postfix “-kun” in Japanese means “friend”. That is, Rabbi-friend
Required materials
Our baby can be made from the following materials:
- fabric with a stretch effect (I recommend: knitwear, fleece or faux fur);
- felt for floral linings under the eyes, muzzle and nose;
- threads in the color of the fabric;
- black beads for eyes;
- padding polyester for stuffing;
- tailor's chalk, soap or a special pencil for transferring patterns onto fabric;
- scissors;
- glue “Moment” or similar;
- marker for drawing the face;
- paper for printing patterns (you can also use tracing paper by tracing patterns from the computer screen).
Rabbi's creation process
To get started, copy the Rabbit patterns below and print them out.


Attention!!! Consider what material you use! I sewed a toy from knitwear, so the rabbit turned out to be slightly larger than expected.
Now cut out the patterns and pin them to the material. Pay attention to the pattern of the fabric and the direction of the pile (if you are using faux fur).
Trace the patterns onto the fabric. Be sure to leave a small seam allowance, otherwise the rabbit will be somewhat smaller, and it will not be very convenient to sew. Carefully cut out the details of our future little rabbit.
Place the ears in pairs with the right sides facing inward and baste, then sew. Turn the ears inside out and stuff them with padding polyester.

The ears are ready! Now put them into the head, folded with both parts inward (the pattern shows where the ears will be inserted). Sew, leaving room at the bottom for turning and stuffing. (The hole should be the same width as the rabbit's neck).

Turn the head inside out and stuff it with padding polyester. But don’t sew up the hole yet, we’ll need it later.

Now we are working on the rabbit's body. Baste and then sew the bottom legs together as shown below. Then sew the back and back of the bottom of the Rabbit, leaving holes for sewing in the front legs.


Turn the torso out, but don't stuff it yet. Sew and turn out the front legs. Stuff them.

Place the front legs into the left unsewn side seams. Sew the legs into the body in a circle, as in the picture.


Stuff the body with padding polyester. Pack fairly tightly. The head and body are ready separately. But we need to connect them! To do this, align the hole in the head and the neck of the body. Sew them together using a blind stitch as below.

Prepare the nose, muzzle and marker. Glue the nose with Moment glue or other glue (a small amount so as not to spoil the face). Draw a face with a marker as shown below.

Sew the muzzle with a loop stitch to Rabbit's head. Hold it so it doesn't move.

To make our bunny look cute and not flat, do a little trick called a “drawdown.” This is done as follows. (Points “1” and “5” coincide and are located behind the toy, in the neck area).
- First, insert the thread and needle into this point.
- Having grabbed a large amount of padding polyester, bring the needle to point “2” and hook a millimeter of fabric there.
- Then bring the needle out at point “3”, also grabbing a large amount of padding polyester.
- Make a millimeter hold and return to point “2”.
- From the second, return to the very beginning, to point “5”.
- Tighten the thread to the desired state, secure.

Now sew the floral linings under the eyes in the same way as the muzzle. Sew beady eyes in the center.
Place a “forward needle” stitch along the contour of the ponytail. Pull, stuff and pull until the end. Sew the tail in the marked place on the back.


Tie Rabbit a bow like a real gentleman. You can also decorate the rabbit as you wish and place it in an Easter basket.
My rabbit, as mentioned, turned out to be striped and with a bow:

Other master classes on creating rabbits
Pom Pom Rabbit
A very simple option that can be done with children. For each pompom you will need two identical “donuts” made of cardboard (you can use special devices for creating pompoms, as in the photo in the master class). Wrap these bagels with thread in several layers, and then cut them along the outer circle. Thread a thread between the cardboard circles and tighten.
You will need two of these pompoms. In addition, cut out the ears from felt, the tail can be felted from wool or padding polyester.

Using an unnecessary shirt
The original idea of Tilda's rabbit in this case is that a shirt is used, and its central part.

Eared felt bags
Such bags can be made from either paper or felt. And put colored eggs inside (real or decorative, depending on the size of the package and your desire).

Sock fantasies
Here you will need a pair of children's or bright women's socks, scissors and thread with a needle.

12 Easter bunny ideas (photos)
I have selected for you the most interesting options from a variety of materials - plastic bottles, dough, rice, polymer clay and much more.


Finally, the most realistic idea - from a distance it seems as if the bunny is alive, although it is made of wool.

That's all I have. Tell us which bunnies you liked the most and be sure to share this article with your friends on social networks.
You don’t want to miss out on the most original and grandiose gift ideas (including handmade ones), right? If so, be sure to subscribe to blog updates and visit more often. See you soon!
Sincerely, Anastasia Skoracheva