12/17/2012 10 736 0 Elenka
For children
If you have friends who have small children, and you don’t know what to present to them, you should definitely come to us. We offer knit such cute bunnie booties on one's own.
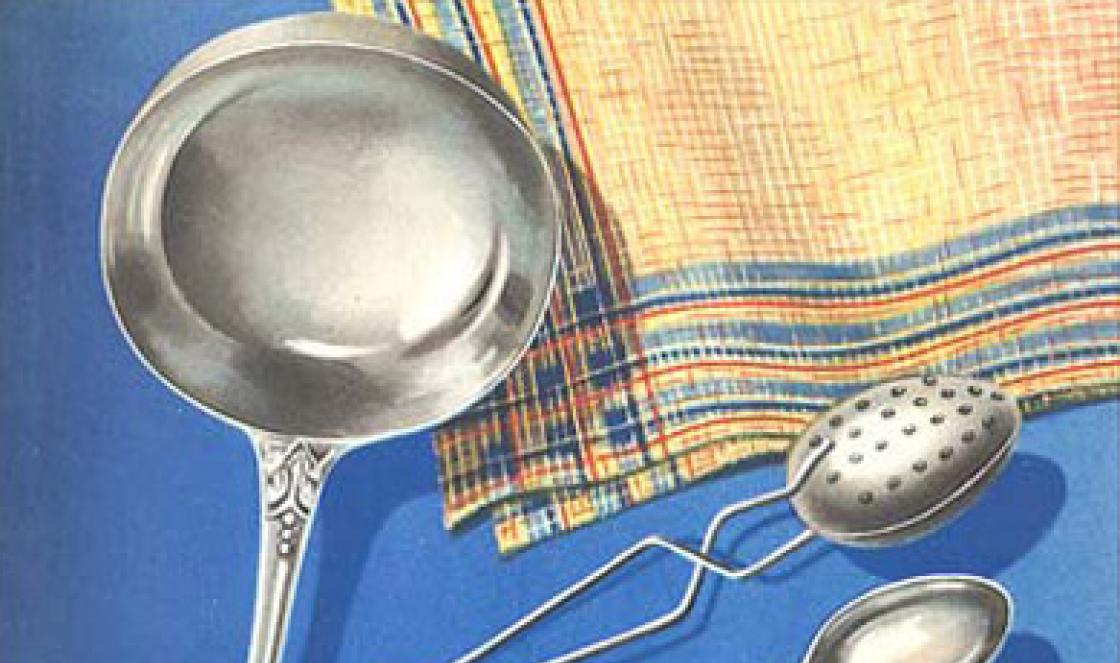
To make booties we need yarn, preferably half-wool, a set of needles No. 2.5 and hook.
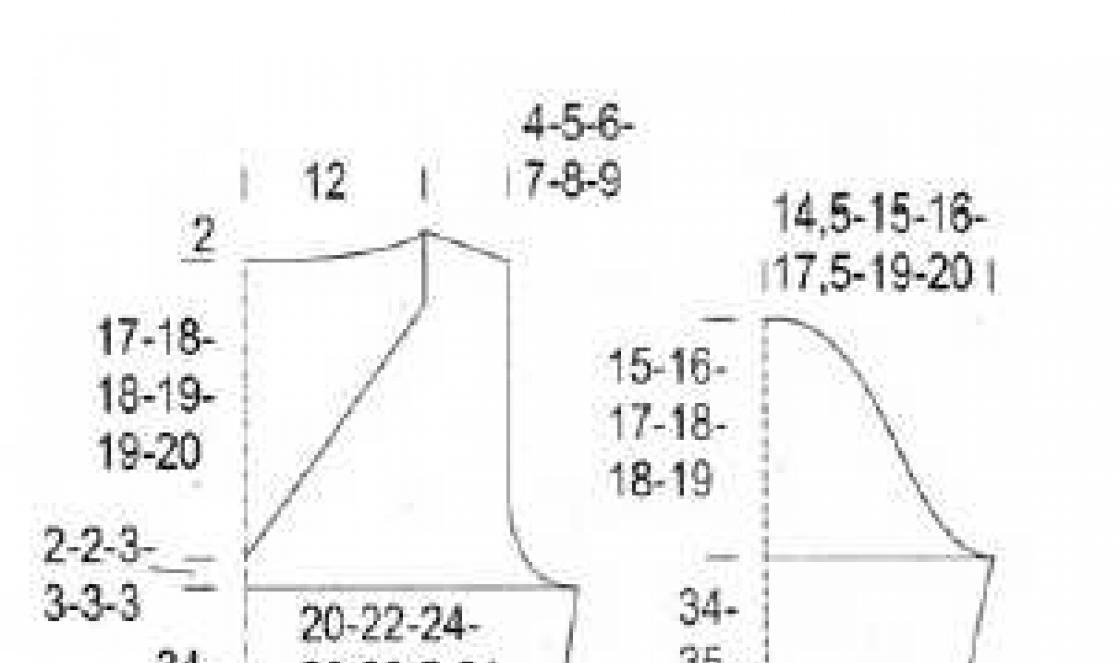
First we do the sole. All rows are LP. We put 7 loops on the knitting needles and knit one row. In the 2nd, 4th and 6th rows, we make yarn overs near the edge loops; in odd rows we knit them with a knitted loop, so that there are no holes. There are 13 loops on the knitting needles. Next. we knit 13 purl stripes without additions (26 rows). Next, we make one yarn over on each side and knit 15 loops without adding, so you get 23 stripes or 46 rows. After this, we gradually decrease the loops: on each side, at the beginning and at the end of the odd rows, we knit two loops together, and perform such decreases until there are 7 loops left on the knitting needles. Then close the loops.
Next, with a white thread we cast on four knitting needles in a circle around the sole of the loop so that there are 12 loops for the toe, and an even number of loops on the remaining knitting needles. 
Making the cloves
We knit in circular rows with facial loops. In the 2nd row we count as follows: knit 2 together, yarn over. Repeat this way until the end of the row. The 3rd and 4th rows are performed with facial loops. We tie a white thread and cut it. Next. we knit in circular rows with red thread, forming “teeth”. To do this, we connect the loops of the next row with the red loops of the last row, which is in front of the white one, as in the photo.
We knit nine rows in a circle. 
We perform the toe
We perform the toe on the front 12 loops as the heel of a sock. We transfer the 123rd loop to the second knitting needle and knit two loops together with a knit stitch. Let's turn the work around. Next, the thread before work, remove the first loop, and purl the remaining loops, but don’t knit the last one, but transfer it to another knitting needle and purl the two together. Let's turn the work around. Slip off the first stitch and knit the rest. We repeat in this way until there are 30 loops + 12 toe loops left on three knitting needles. We stop on the wrong side. 
Next we knit the bootie in a circle from the inside.
Two rows - purl stitches.
Seven rows of elastic (1x1).
One row - purl stitches.
Seven rows - facial loops. 
Then we tie a white thread.
We knit one row with knit stitches, 1 row with purl stitches, 1 row with knit stitches, 1 row with purl stitches. Next, use red thread for two rows of knit stitches. Then with a white thread: 1 row - LP, 1 row - IP, 1 row - LP, 1 row - IP. We close the loops. 

We make the ears. For them, we cast on 22 loops with a white thread, and purl the first row. Next, use a red thread for 6 rows, alternating the front and back rows. We cut the red thread, leaving a long tip. We then sew the ears to the booties with this tip. White thread 2 rows. We close the loops. We connect both edges with a hook. The final touch is to embroider the nose. 

Booties ready for the baby.
Not all kids love to dress up, but if the clothes resemble a fun toy, the process will become more enjoyable. We offer you a master class that will help you knit bunnies with knitting needles. This shoe option is suitable for newborns.
You will need yarn of two contrasting colors. For girls, pink and white, and for boys, blue and light gray. Choose the composition of the yarn based on the time of year. For summer and spring, cotton, viscose or silk are suitable. For cold weather - wool, acrylic or mohair. In this case, the thread is mixed (50% wool, 50% acrylic). You will need a set of double needles that match the size of the yarn.

Getting started
The length of the foot is 13 cm. Be guided by the length of the child’s leg. Try on the booties while knitting, or work according to exact measurements.
Conventions in the lesson
- facial loop - LP;
- purl loop - IP.
Follow the detailed description in the master class. Start working from the sole with yarn of the main color. Cast on five stitches on the knitting needles. In the first row, perform LP, and in the second, make additions. To do this, make two units from the second and fourth loops. Insert the knitting needle behind the front wall, pull out the loop, and again into this loop behind the back wall. Perform the remaining loops as IP.


There are seven loops on the knitting needle. Then knit using the following technique:
- In the third row of LP.
- Knit the fourth as the second, and you will get 9 loops on your knitting needles.
- In the fifth row there is an LP, and the sixth is like the second, and you will get 11 loops on the knitting needles.
- From rows 7 to 19, knit in stockinette stitch straight, that is, without any additions.
- The 20th row is like the second. Make two increases and you get 13 stitches.
- From 21 to 29 rows - stockinette stitch.
- 30th row - knit the first and second stitches together, then all the stitches in the stitch, the penultimate and last stitch together in the stitches.
- 31st -LP.
- 32 is like the thirtieth.
- Row 33 – LP.
Then in each even row, decrease at the beginning and end of the row, and knit LP in odd rows until 5 stitches remain.


Close the loops, the bunny sole is ready.

Switch to threads of a different shade and tie the cloves. Cast on 16 stitches on the sides of the sole, 6 on the toe, and 8 stitches on the heel:
- The first row is all individual entrepreneurs.
- 2nd row – two stitches together, yarn over, two stitches together again, and so on on each needle. This is a simple pattern for forming cloves.
- 3rd row and 4th row-IP.
Attach a thread of the main color to the front side of the product and knit 5 rows.


Start shaping the toe part of the bootie. Work on a needle with five stitches. Knit all the loops from the LP needle, transfer the fifth loop to the knitting needle adjacent to the left, and throw the first loop onto the one that was transferred. Return the resulting loop to the knitting needle. Knit the next row IP, and with the last loop do the same as in the previous row. As a result, the loops on the sides are shortened. Continue decreasing until there are 6 and 7 stitches left on the side needles.


Tie two rows of IP. Work along the inside of the canvas. Then knit 5 rows with a 1x1 elastic band, and 10 rows of LP. Switch to a different color of yarn and knit 4 rows. In the first, perform the LP, in the second the IP, the third LP, and the fourth row of the IP.


Using yarn of the main shade, two rows of LP, then 4 rows with another shade, alternating a row of LP, and a row of PI. Close the loops and make a lapel.

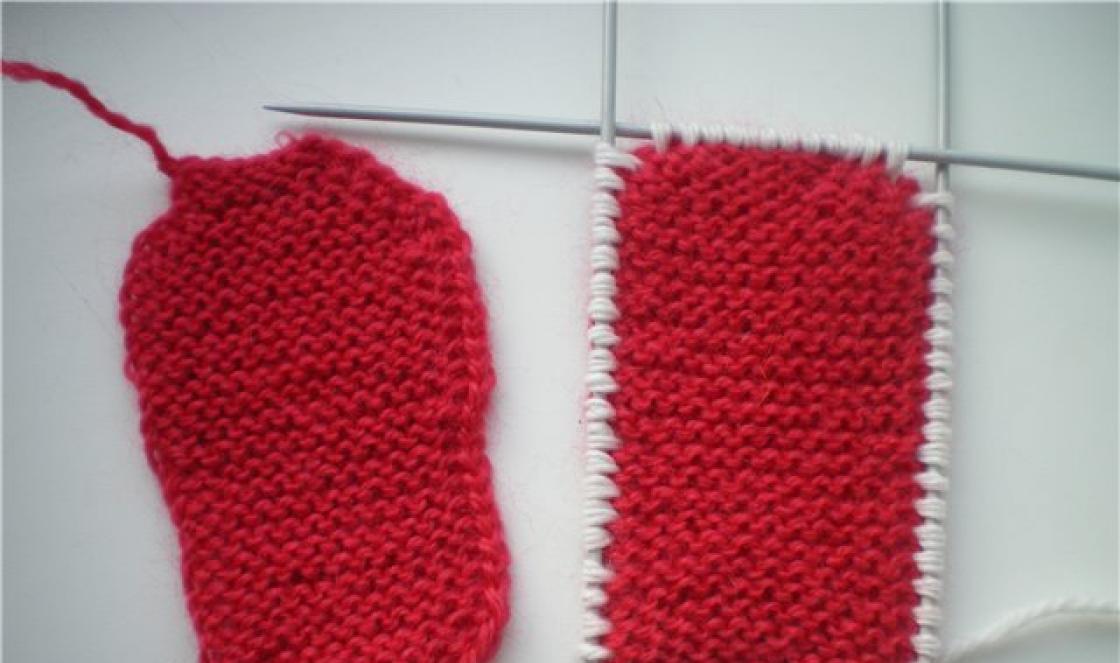
To sew the teeth, turn the bootie inside out and sew the top seams to the bottom seams, as shown in the photo.

Booties for bunnies: knitting for kids in a master class
If a child doesn't like to do something, there is only one way to change the situation - turn it into a game. Not all kids love to dress up, but if the clothes resemble a fun toy, the process will become much more enjoyable. I bring to your attention a master class that will help you knit very cute “Bunny” booties, made with knitting needles. Even the most capricious child will wear them with pleasure! 


Knitting process for booties
The master class was prepared by Ekaterina Kuryleva.
To knit booties with knitting needles, we need yarn of two contrasting colors. Pink and white are suitable for girls, blue and light gray for boys. Choose the composition of the yarn based on the time of year. For summer and spring, cotton, viscose or silk are suitable. For the cold season, wool, acrylic, kid mohair. In our case, the yarn composition is 50% wool, 50% acrylic, it is soft, hypoallergenic and very warm. You will also need a set of double needles that are the right size for the yarn. 
Knitting booties The length of the foot of these booties is 13 cm. You are guided by the length of the leg of the child for whom you are knitting. If possible, try it on while knitting, or find out the exact foot size if you are knitting to order. Conventions that will appear in the description of knitting cute bunnies:
- row - P;
- loop - P;
- facial loop - LP;
- purl loop - IP;
- knitting needle - SP.
This master class does not contain a diagram, just follow the descriptions. We start work with the sole of the “bunnies”. We knit with yarn of the main color. We put five loops on the knitting needles. 1P – all LP. In the second P we make an addition. To do this, we knit two Ps from the second and fourth Ps. First, we insert the SP behind the front wall, pull out the loop, and again insert the knitting needle into the same P, only behind the back wall. We knit the remaining Ps with IP. 

Now there are seven P on the knitting needle. 3R - LP. 4P - see second row. It turned out 9 P. 5R - LP. 6P - see second row. On the joint venture there are now 11 stitches. 7R-19R – we knit in stockinette stitch without any additions. 20Р – see second row. We make two additions, on the joint venture we got 13 P. 21R-29R – stockinette stitch. 30R - we knit the first and second P together in IP, then all the loops are IP, the penultimate and last P together in IP. 31R – LP. 32R – see 30 R. 33R – LP. Next, in each even P we make a decrease at the beginning and at the end of the P, and for even P we knit a LP until there are 5 P left on the SP. 


We close the loops. The “bunny” sole is ready! 
We switch to yarn of a different color and knit “teeth”. Let's dial 16 stitches on the sides of the sole, 6 stitches on the toe, and 8 stitches on the heel. 1P – all P IP. We knit from the inside of the booties. 2P - two P together IP, then make a yarn over, again two together IP and so on for each joint. This is a simple scheme, thanks to which later we will get “teeth” on our booties. 3R-4R – IP. On the front side of the product we attach a thread of the main color and knit 5 R-in. 


Let's start shaping the toe of the bootie. We will work on a joint venture with five loops. We knit all the Ps from the LP needle, change the fifth loop to the one next to the left of the SP and throw the first P onto the one that we just changed. We return the resulting P back. We knit the next P, and with the last P we do the same as in the previous P. Thus, the loops on the sides are shortened. We continue decreasing until 6 and 7 stitches remain on the side knitting needles. 


We will knit two rows of IP. We work on the inside of the canvas. Now, knit five rows with a 1x1 elastic band. Five rows of LP. A number of all drugs. Five more rows of LP. We switch to yarn of a different color: R - LP, R - IP, R - LP, R - IP (four rows in total). 


Yarn of the main color is two R LP. We change the thread again: R - LP, R - IP, R - LP, R - IP. Close the loops and make a lapel. 
Now we need to sew the “teeth”. Turn the bootie inside out and use a needle to sew the top seams to the bottom seams, as shown in the photo. 
This is what has already come out of our “bunnies”. 
Knitting ears for bunnies Let's move on to knitting the ears. It is because of this element that the booties are called “Bunnies”. We will cast on the joint venture with yarn of an additional color 18 P. 1R - IP. 2Р-5Р – change yarn, stockinette stitch. 6Р-7Р – change the strand, stockinette stitch, close the loops. The ear piece is ready. 


Fold the strip in half and sew with a needle. Now we fold it like this, as shown in the photo and sew it inside.
Using the same principle, we make the second eye and sew them to the bootie. You can embroider a nose with a thread of a contrasting color, and you can also sew or embroider eyes. Booties “Bunnies” made with knitting needles are ready! 
Video tutorial on knitting booties
You can learn how to knit these bunny booties by watching a video master class on the “Happy Needlewoman” channel. The video consists of three parts, watch them all carefully. Good luck!
Photo example of knitting booties

Comments
Related posts:
 Knitting socks and slippers from photo and video master class
Every mother tries to dress her child in an original way. To create a bright image for your baby, you don’t need to buy expensive clothes. Unusual bunnies will help with this. These baby's first shoes can be not only comfortable, but also beautiful. To do this, you don’t have to know how to knit professionally or look for a specialist in this type of needlework. Just read how to knit bunny booties. The description diagrams shown in this article will help anyone cope with this task.
These bunny booties will look great on little feet. If you choose the right yarn color, both boys and girls can wear them. For a charming baby, you can knit bunny booties with knitting needles from pink or white yarn, and for your son, darker colors are suitable - blue, blue. 
All that remains is to consider how to knit bunny booties with knitting needles.
The bunny booties discussed in this description are knitted from “Semyonovskaya yarn”; you can also take “Pekhorka”, in which there is 50/50 wool and acrylic. You will need 5 knitting needles 2.5 mm.
The sole is knitted with knit stitches.
Cast on 7 loops (the first and last are edge stitches). Let's knit one row.
2nd, 4th, 6th rows - make yarn overs near the edge loops, in odd rows knit yarn overs as knit crossed loops.
You will get 13 loops.
We knit 26 rows without increases.
Yarn over on each side and knit 15 stitches without increasing. You should get 23 stripes out of 46 rows.
At the beginning and end of odd rows, knit 2 stitches together until 7 stitches remain. Cast them off.
We cast on loops on 4 knitting needles with white thread. There should be 12 loops on the toe, and an even number on the rest.
We form teeth.
We knit a row of knit stitches in the round
2p.: 2 knit stitches together, yo. Repeat until the end.
3-4 rows: fasten the knit loops and cut the white thread.
To form the cloves, we knit with red thread, connecting the loops of the next row with the red loops of the row that was before the white one. 
Or knit in a circle with red thread and sew up the loops 
9 rows are knitted with knit stitches. 
We knit a toe on 12 loops located in the front.
Transfer the 12th loop to another knitting needle and knit 2 loops together.
Rotate the product. Remove the first loop, with the thread in front.
The remaining loops are purl, except for the last one, which is not knitted. The last loop is transferred to another knitting needle and knitted together with the next purl.
Rotate the product.
The first loop is removed, the remaining ones are knitted.
Continue knitting in this manner until you have 30 stitches and 12 toe loops on the knitting needles.
We finish knitting on the purl row. 
We continue to knit from the inside in circular knitting.
2 rows purl, 7 rows – rib 1*1, 7 rows – knit, 1 row – purl, 7 rows – knit. We tie a white thread.
1r. – persons, 1 rub. - purl, 1p. persons., 1 rub. - purl
We take the red thread and continue two rows of knit loops.
We close all the loops. 
All that's left is to tie our bunnies' ears.
We cast on the knitting needles 22 loops.
1r. - purl
We knit 6 rows with red thread - 1 row - purl, 1 row - knit, 1 row - purl. etc.
Leave a little red thread to sew on the eyelet.
Knit two rows with white thread and bind off the loops. Use a hook to connect the two edges. 

You can also check out another model
When a baby appears in the house, you really want him to have all the best and most beautiful things. Children's things are very cute and bright. One of these adorable little things is booties, especially knitted ones. Needlewomen not only use interesting and varied patterns to create them, but also give them the shape of some animals or decorate them with flowers and berries. One option is bunny booties, which have funny ears and imitate a bunny's face.
We will look at a master class on knitting them in this article. In addition, knitted “slippers” are very soft. They are easy to put on small feet and do not cause any inconvenience to the baby. Don’t forget to use the provided diagrams and videos to better understand the process.
Photo master class on knitting booties
Required accessories
So, to knit booties in the shape of bunnies for ages from 6 to 12 months, using the master class offered here, you will need: 
- Children's acrylic yarn in two shades. In this case, it is white for decoration and pink as the main one. But you can take any others to your liking.
- We will knit using number 3 knitting needles on a fishing line.
- Knitting markers will also come in handy.
- Needle for stitching the finished product.
- Diagram, as well as a video to study the process.
Work progress
Let's start a lesson that can also be used for knitting regular booties, if you don't do the part about the ears.
- Using pink yarn, cast on 43 stitches with knitting needles.
- We remove the first edge and knit all the others with knit stitches, and the last one with purl stitches.
- Next we will knit six more rows, adding elements in certain places by knitting a loop from the broach of the previous row.
- In the second - increase after the first, after 20 loops, mark 1 element after the increase with a marker, add again, 20 loops, increase and the last loop.
- We knit the rows in the knit method, with the exception of the last element, which is always purl.
- The third, fifth and seventh are knitted without increases.
- In the fourth, we increase the number of loops after the edge loop, after 21, then after 3 and after 21. As a result, 51 loops should be formed.
- In the sixth - after the first, after 22, after five, after 22. In this way we tied the foot of the future bootie.

- Add a white thread to the work without cutting the main thread. We perform 4 rows of stocking knitting (11 in total), and in the twelfth we alternate 2 together with the yarn over.
- The thirteenth and fifteenth are purl, and the fourteenth is knit.
- Now we cut the thread and tie it to the main one. Fold everything knitted in white in half. This gives bunny booties a frill with a scalloped edge.

- Next in the work is the main color. If you look at the canvas from the inside, you will see a “stitch” of white arcs on the pink color where another thread is attached.
- We will knit, grabbing the white loop from the knitting needle and the arc from the “line”. To do this, first move the element from the left knitting needle to the right one, grab the arc and place it on the left one, return the previously removed one there and knit them together in the knitting method. We do this until the end, after which we knit a row of purl loops.

- Now you need to make 8 rows of stocking stitch and divide all the loops into three groups. There should be 11 of them in the center, and 22 on the sides.

- The boundaries of the parts are marked with markers. We knit 22 loops, and then 10 from the second group and combine the eleventh with the first of the third group (for the front half).
- We turn the knitting over and continue to work only with the middle group, performing 11th each time together with the first. We do this until there are 13 elements left in the side parts.
- Having reduced the number of stitches the last time, we simply knit the rest so that the entire fabric is on one knitting needle and knit the faces. and out. row The bunny booties have an upper hand.

- The master class moves on to the next stage. And now we will perform 7 rows with the “1x1 elastic” pattern.
- Having finished, we turn the work over to the inside and work in the stocking method for the same amount of time as there was an elastic band.
- Turning the knitting over to the outside, we make a front row. And then from the inside we continue stocking stitch for the same amount.

- When finished, turn it over and attach a finishing thread, with which we knit 4 purl rows.
- We change to the main color without cutting off the previous one, and perform purl, and then knit. Purl 3 rows again with white and close the knitting by knitting 2 rows together.
Making the bunny booties is almost complete. Cut the thread and tighten it into the last loop. We will leave the tip of the main color longer so that we can use it for stitching. 
Bunny ears
Of course, bunny booties should have ears.

Now the master class is nearing its end.
Product assembly

The result of the lesson was wonderful bright bunny booties, which you can make in a different color or decorate at your own discretion.
Video: Long-eared bunny slippers
Gallery of MK for knitting “Bunny” booties and other funny shoes