The satin roller “cordone” is the main seam in machine embroidery and the most difficult. It must be done as follows. Sew along the outline of the pattern 2 times with a fine line. Then take an interfacing thread (cotton No. 10, 20, 40 depending on the fabric), single or double, apply it to the stitch and first secure it with 2-3 needle strokes. Holding the interfacing thread with your left hand and slightly pulling, lay it on the stitching, at the same time overlapping with frequent, even cross stitches. The hoop should be moved to the right and left and away from you, moving it slowly along the stitch. In this case, the needle strikes from one side or the other of the interfacing thread, placing the stitches close to one another. We must try to ensure that the stitches are even in length and slope and as close as possible to the interfacing thread. To ensure that the needle does not fall between two interfacing threads when making a roller, they must be slightly twisted together. The interfacing thread should be the same color as the main embroidery thread.
- The bottom thread - cotton No. 60-80 - white or in the color of the fabric - is stretched tightly.
- The upper thread is silk No. 65A, floss, cotton No. 80 - a little weaker.
The quality of this seam largely depends on the accuracy of execution. When done correctly, the roller should be smooth, convex and fairly narrow in width, not much greater than the thickness of the interfacing thread, and look like a thin cord. When making a roller on thick fabrics for interfacing, you need to use cotton threads No. 10, and on thin fabrics - cotton threads No. 40. Before applying the interfacing thread, the outline of the design must be stitched with a small stitch once. If the edges of the product (festoons) or cutwork cuts are processed with a roller, then for strength the outline of the design is trimmed with a double stitch, and the stitches should fit tightly to each other. First, for training, it is recommended to practice the correct execution of this seam on a piece of fabric. And then, with the acquisition of skill, you can embroider a small design using various “stitches”, “mound”, and process its outline with a satin roller.
 The satin roller "cordone" is used to secure the edge of the product in the form of various scallops, cutting in cutwork embroidery, as well as to give clarity and relief to the embroidery pattern.
 Using basic stitches, you can embroider a simple design - a branch of a cherry or strawberry, filling the leaves with stitching stitch or a figure eight stitch, and the berries with a mound stitch with colored threads on a small napkin or pincushion, you can decorate children's clothing.
After mastering the basic stitches, you can move on to more complex embroideries. Usually they start by doing hemstitching, during the embroidery process of which they practice the accuracy of hitting with a needle and quickly master the technique of embroidery on a machine.
Author - Frosya Burlakova (a wonderful craftsman, a role model for me, because she knows so many excellent seams that I never dreamed of, and most importantly she knows how to use them!), from the forum club.season.ru/lofiversion/index.php/ t11215.html.
I came up with this name myself, here! If you don't like it, you can call it your own.
Its application is multifaceted, interesting and very effective. I can say that I use this stitch in almost every item I sew.
Fabrics - any.
It consists of tiny stitches on the face and quite large on the back, loosely tightened stitches back with a needle. The main effect that can be obtained is a natural-looking fastening of a package of materials (of any thickness), taking into account the bending of layers (of any number of them). And this is a very useful and necessary effect, which otherwise has to be achieved by seating, ironing, placing pieces of wood under allowances, etc. And in many cases, it is the beaded stitch that gives unsurpassed results.
Execution: I sew across the face from right to left. I make a tiny (1-2 threads) backward stitch along the face and a large (8-10-12 mm) forward stitch along the wrong side. I tighten it loosely so that the thickness through which I sew is not pulled in any way.
Something like this. There can be any number of layers of fabric.
I use a thread on the fabric that is inconspicuous (although this is not necessary) and thin.
At the same time, I DO NOT use the embroidery method, when the thread is pulled out completely, first inside out, and then out. No! That’s the whole point: the needle is pulled up and down at once and it’s obvious. Because that's how we use the wonderful property hand stitches, which allows us here to do all sorts of tricks.
Trick #1 IN THE WORLD:)
When sewing, the top layer of fabric is placed on the hands. Everyone knows that the machine plants the bottom layer, although there are all sorts of feet that manufacturers say they don’t plant :). And when sewing on your hands, the opposite happens (if you DO NOT sew using the embroidery method). This is how we hold the fabric in our fingers; it is not stretched straight, but slightly in an arc.
Moreover, the machine exactly plants the bottom layer, those. pulls it together slightly. And on the hands, the top layer does not gather, but seems to be slightly pulled and correctly bends around the bottom layer. Layers of fabric, in particular allowances, can thus be stacked on top of each other very correctly and beautifully on all curves of the figure. Virtually no wrinkles and no steps. Fastening them with a beaded seam.
===========================
Personally, I use this type of fastening very often.
Application No. 1.
Pairing a narrow bodice with a full skirt.
Being a lover of the New Look style, I often sew dresses with full skirts. 6 m at the bottom is not a question :).
Now imagine that you have gathered about 2.5 m of skirt at the waist to the 58 cm waist of your bodice. We sewed the skirt to the bodice and... Oh, what a wonderful thick sausage from the allowance at the waist, how it decorates and slims your tight waist!:) - However, it is not tightened, because... the fabric protrudes onto the sausage, and a slack is formed above.
Postpone? - won't help. The sausage will remain in place, and even the seam will go in waves and stretch in the stitching.
Smooth, press? - alas... The law of conservation of mass.
Hard-earned technology.
1. The bodice is lengthened by 1.5, maybe 2 cm. Moreover, it is not simply lengthened, but by attaching the base of a tight-fitting skirt, that is. with expansion from the LT downwards, and also with a small additional freedom to bend around the allowance, about 1 cm in a circle. The sausage allowance will be carefully placed under this extension (slightly below, and not at the waist itself).
2. The skirt is sewn on. Better seam do not overcast, or simply treat with a thin bias stitch. If you really want to do it by machine, then overcast the skirt separately and assembled. But as a rule, this seam is closed with doublure. becomes internal.
3. The seam is not ironed at first, as it will be pressed into a nice position with your fingers. In principle, you can, out of habit, sweep the seam allowance up without tightening, as long as it holds, just temporarily attach it, throw the needle forward across the face (this is mandatory). Or simply flatten the seam allowance with your fingers facing up.
4. Now go over the face with a beaded seam, sewing on the seam allowance. Somewhere 5-6 mm above the seam along the LT. There is no need to pull anything, the main thing here is molding. It's like you're placing layer after layer on top of the waist cylinder from the inside out: a thickly gathered skirt allowance, a bodice allowance, the top of the bodice. We do not pull the top fabric away from the seam; naturalness is our ally. - The feeling of a sculptor... And you secure the package of layers of fabric with stitches in correct position. In general, this happens almost naturally. Trick #1 is the best assistant. You can rarely sew, 8-10 mm approx.
5.Well, now you can stroke it, although, in general, everything is already there. Just secure what happened with your fingers.
If you iron from the inside, then press it, if from the outside, then press it. But this is mainly for the sake of order, maybe. everything is formed with a beaded stitch.
Here is an example of such processing. This is a photo from life, just a family photo. Because of the angles we got. The first photo is close-up of the back, the second is of the front.
The blue arrow shows where the bodice extension is, under which the allowance is hidden. - Do you see it? :) - It is sewn with a beaded seam up from the seam along the LT and does not stand out at all, because the layers of fabric are laid with fingers and fastened with threads. 60 rare stitches... well, let's say 5 seconds per stitch - that's 5 minutes of work... And it will never stand out :). Try laying it this way in any other way. - And it’s thick there, and even uneven: the cream fabric is thick cotton, the lilac fabric is very thick cotton, almost denim. And there are also seams and reliefs. And this bodice is without corsetry, without rigidity and without bones, just a doublure.
The red arrow shows that nothing spoils the waistline. No steps.
In the close-up photo of the front, I personally can’t see anything where the bead stitches are :) But I know for sure that they are there! I sewed it myself, here.
I can say that I personally almost always sew all the allowances on the bodice with a beaded (aka dotted, good name!) seam. For molding you don’t need it so thick, but for finishing you need it at any thickness.
Application No. 2.
I'll have to turn to my humble creativity again :). We will talk about very practical things, specifically sewing velvet. Everyone knows what a problem this is. And therefore, I offer to your kind attention... this skirt.
1. Figured yoke with a corner at the back and front, satin lining. 2. Dense gathering under the yoke. 3. High stitched belt. Glueless, double lined, with a satin lining. 4. The waistband in front has a wrap, the right and left halves overlap each other at the waist by about 8 cm.
You are all sewing people, so I think you immediately imagined the multitude of problems that would arise. Some of them.
iron a very elastic satin onto the rib at the top of the waistband so that the gathers do not bubble in the seam of the yoke, so that the top allowance of the yoke does not stick out in the waistband, and now let’s count the layers in the seam where the smell is on the LT.... Mamma Mia, there are 16 of them and 5 of them are velvet.
Are you hoping to iron this allowance? :) And so that it doesn’t bubble, pull, or shine? :)
So, here is a bright picture and a description of my work on the formation of this entire structure using hand stitches. To be honest, it turned out even better than I expected. It is on capricious velvet that many problems that cannot be solved with an iron are solved with a hand stitch, and on velvet it is almost invisible (to Amantha’s chagrin:), because a thin silk thread drowns in the pile. I’ll be even more honest: I can’t imagine how to do this any other way.
And here are the technical pictures. The thickness of the belt is in the smell.
Here is the reverse side, on which the stitches are visible; they are shortened, this is due to the large thickness during molding. You can't see them from the face.
And here in the next photo is the molding process itself. For a sample, I took a yellow thread.
Here you can see that when sewing, I lay the work on my finger and sew, which is why numerous layers of fabric are laid without deformation, as if on a cylinder, the lower layers are sewn and do not bubble, and the belt takes on a rounded shape that matches the shape of the body. After all, I will wear it on a round waist, and not on a flat wardrobe.
This is generally very convenient to do on a mannequin. But my fingers are used to it, and I do it in the air, I can even slightly adjust this degree of curvature, more on the sides, less in the front.
www.hnh.ru
A product decorated with beads looks original, but sewing on beads and beads by hand takes a long time; sewing can be speeded up using a sewing machine. For such purposes, a special foot is used for sewing beads onto fabric. Using it, you can sew a thread of beads and beads with a diameter of 2 to 5 mm. The thread for sewing can be either transparent (monofilament) or contrasting.
We install a special foot for beads on the machine, insert a thread with beads or beads into the groove of the foot. Select a zigzag stitch; the stitch length and stitch width depend on the diameter of the beads being sewn. When sewing with monofilament, loosen the upper thread tension to value 1. If you are using beads strung on a fishing line, leave a small amount of fishing line to allow the beads to move freely while sewing.
First, we carefully make a fastening at the beginning of sewing with 3-4 reverse stitches and make a machine stitch securing the thread with beads. It is necessary to sew on beads, cords, beads, piping, and braid at medium or slow speed, directing the thread with beads into the groove on the foot.
If the thread on a product needs to be stitched at an angle, at the point of turning, lower the needle into the fabric, raise the foot, unroll the fabric along with the thread (the needle remains in the fabric at this time and is used as an axis), guide the thread at the desired angle, lower the foot and continue the stitching. If the beads are placed very tightly together, the angle will not be acute. If you want to make a 90 degree angle, then the beads should not be close together. It is best to sew bead threads along straight or slightly curved lines.
If you have two rows of beads, then the side of the foot will determine the minimum distance between the rows of threads.
If we need to process the edge of a product with beaded thread, it must be pre-processed (on an overlocker or overcast stitch) and, after folding, ironing. Place the thread with beads and the folded edge of the fabric under the foot, and at the beginning and end of the stitch we make a backstitch. Let's start sewing, making sure that the bead thread is close to the fold of the fabric.
Beads can also be sewn on individually. In this case, the beads are placed on the fabric with a flat surface. The first needle injection is made into the bead hole; before the second needle injection, the fabric moves in the direction opposite to the stitch line by an amount equal to the height of the beads. The second needle prick is made into the fabric and the needle thread turns the beads so that they lie with a spherical surface on the fabric. Before the third needle prick, the fabric moves in the direction of the stitch by an amount equal to the sum of the diameter and height of the beads. The third needle prick corresponds to the first, with the needle thread slipping off the sewn beads. This method simplifies the work of sewing beads and beads to the fabric.
See you on the pages of the site mirmotka.ru
mirmotka.ru
Don't know how to embroider on a sewing machine? You just haven't tried! – Masters Fair
If you have a Singer foot sewing machine and a desire to embroider, then this is 90% success. If you don’t have such a machine, but have an electric one with a foot pedal, then you can embroider on it with no less success. I started embroidering on Singer, and then switched to electric. I don't see much difference.
These recordings are for beginners, but inspired by the idea of getting maximum results with minimal effort.
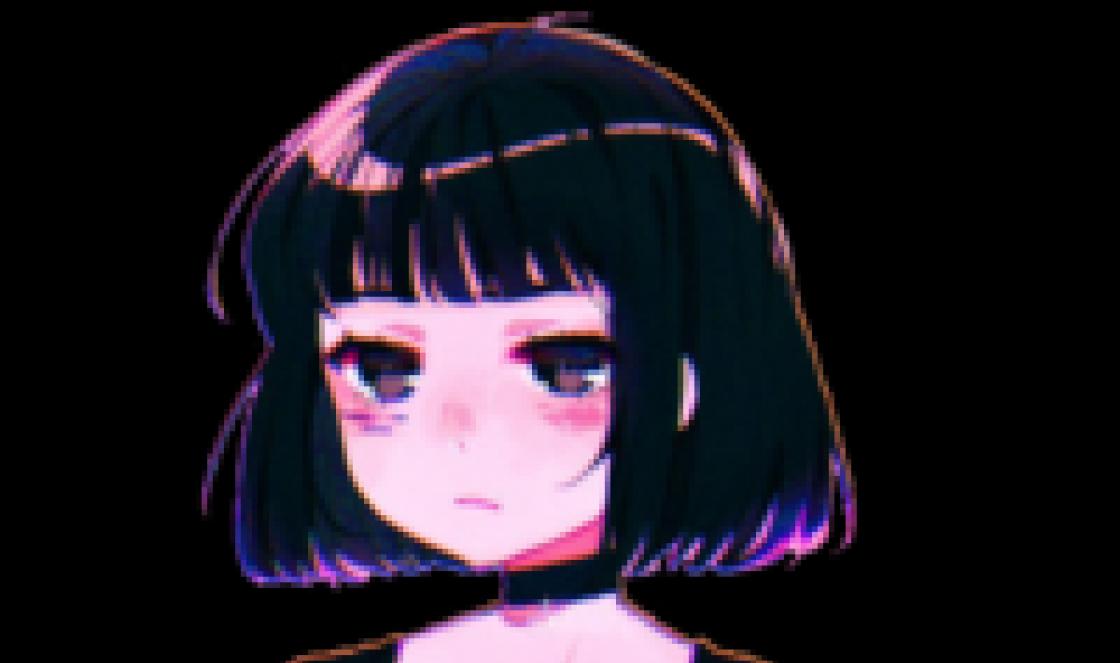
The only thing you need to learn is how to lay a straight line on a machine. The main principle of such embroidery is to embroider as you draw. Not knowing how to embroider yet, I embroidered this girl based on a painting by a Korean artist, using a simple straight stitch.

First we try to embroider a straight line. Thread the fabric into the hoop. It is better to take cotton or linen fabric. The hoop size should be small. The optimal diameter is 15 cm. This size allows you to stretch the fabric very tightly in the hoop so that the embroidery does not tighten the fabric. We wrap the inner hoop with adhesive tape so that the tension of the fabric does not weaken during operation.
The next stage is preparing the machine for embroidery. We remove the paw. Lower the lower conveyor. Adjust the tension of the lower and upper threads. For embroidery, it is better if the lower thread is tensioned a little more than the upper one. The bottom thread should be quite thin. Ideally cotton No. 80 - 60. Transfer the design to the fabric. I do this using green carbon paper.
Let's get started. Place the hoop under the needle on the frame sewing machine, not as usual with hand embroidery, but by turning the hoop “inside out”, so that the fabric in the hoop lies tightly on the base of the sewing machine. Lower the presser foot lift lever. The presser foot is removed, but the lever must be lowered to tension the upper thread.

Lower and raise the needle once and pull the lower thread up. With our left hand we take the lower and upper threads together, move them away from the needle and make several stitches in one place, securing them to the fabric. We cut off the ends.


First you need to learn how to sew a straight stitch with approximately the same stitch length. For a foot-operated machine, you can adjust the speed yourself. For electric - pressing the pedal harder or weaker. If the electric one has a speed control button, then first set it to minimum.
All! The boring part is over. Creativity begins. After some practice in making a straight stitch, the question arises - what can be embroidered with such a poor technique as a simple straight stitch? It should be clarified that when I say a straight line, this does not mean. that the line is laid strictly in a straight line. This is a somewhat arbitrary term. The line may follow a slightly curved curve, but this does not change the essence. The stitch remains a simple stitch. Now I’ll try to depict something as an example. I embroidered a rectangle of rice. 2 filling its area with parallel lines: loose, dense and darker in color. Four leaves are embroidered with stitches of different density and color:

A rather impressive pattern is embroidered with a simple stitch using two colors. All lines are sheathed twice.

The most spectacular embroidery- this is an artistic surface. It is created by pouring one color into another due to the fact that stitches of threads of different colors enter each other to different depths, thereby creating a continuous transition from dark to light. Let's try to do this with our simple technique. The best effect is obtained using a satin stitch, but it requires more skill. I'll show you how to embroider a leaf and a flower petal. Let's start with the leaf. Sew the outline of the leaf with a small stitch and begin embroidering the most light color. We try not to go beyond the outline of the leaf. The stitch length is about 4 - 5 mm. One line is 2-3 stitches from the edge towards the center of the leaf and back.

We embroider in the same color on the second half of the leaf:

Then we embroider with a darker color thread closer to the middle of the sheet:

On the other side of the leaf we embroider closer to the edge. When finishing, we make several stitches at one point, securing the thread and cutting.

We embroider the veins and edge with the darkest thread.

Let's start with the petal. We choose three colors that are similar in tone but of different lightness. We start by stitching the outline with the lightest thread, making the so-called flooring at the end of the petal. The flooring is parallel lines in the place where the embroidery will be done in the future. The direction of the stitches of the covering should be perpendicular to the direction of the stitches of the embroidery itself. Flooring allows you to make the embroidery voluminous and embossed, which adds decorativeness to it.

We begin to embroider from the outer contour of the petal, placing stitches from the edge to the center.

Introduce a darker thread color, trying to ensure that some lines fit into the field of the lighter thread

We continue to “color the petal more dark color, “pouring” one tone into another. The petal is ready.

Now let’s try to make a simple but cute composition of blades of grass and small flowers, which can be used to decorate children’s clothes, for example.


And this is almost an artistic surface. Almost, because it is embroidered with stitching. and not ironing. Embroidered with viscose silk. The direction of the stitches is important, repeating the shape of the leaves and petals. The stitch length is slightly longer. than in the previous embroidery. About 5 mm.


All examples of varying complexity in execution, but identical in technique - straight stitch; but in theory, we embroider with a line, as if we were shading, painting over the drawing. I plan to continue this topic in the next posts. If you liked my approach to embroidery and it inspired you to take up embroidery, I will be very glad.
www.livemaster.ru
Source
stranamasterovv.ru
Designation of stitches on sewing machines
Species sewing stitches modern sewing machines, especially computerized ones, are so varied that sometimes the owners themselves do not know all the operations performed on their sewing machine.Without visual perception, it is difficult to understand what the different lines are. Let's try to decipher the most common lines that are found on almost every sewing machine. As a rule, a narrow set of types of lines and operations is used for everyday use. Most often, an “overlock” stitch is used using a special foot, several types of zigzag stitches, and a straight stitch. The remaining stitches remain only a decoration for the stitch selection panel and a reminder of the “good” price of a sewing machine. The number of stitches on a modern machine varies from a few to several hundred complex computerized machines. Sewing machine stitches are usually divided into working and decorative stitches. Working stitches Working stitches include, in addition to the traditional straight stitch and zigzag, also overlock stitches, stitches for elastic fabrics, blind stitches, stitches for quilting, etc. The table shows examples of useful, working lines:| Straight stitch - used for various sewing jobs where a straight stitch is required. | |
| Triple reinforced straight stitch - used when it is necessary to lay a particularly strong seam that is almost impossible to tear. It can also be used to imitate a thick thread, if you have a thin thread, and you need to hem jeans where thick threads are used, then this stitch is just right for such a case. Triple reinforced straight stitch is performed on dense fabrics, as well as for sewing elastic fabrics. As everyone knows, knitwear tends to stretch and, accordingly, when stretched, the thread often breaks if the knitwear was sewn with a “straight stitch”, but if it is sewn with a “triple elastic stitch”, the seam turns out to be stretchable and stretches along with the knitwear without tearing this thread. | |
| Zigzag - used for edge stitching and decor. | |
| Elastic zigzag - is stretchable, for sewing elastic, sewing curtains. Suitable for darning, embroidery. | |
| Triple reinforced zigzag - is characterized by increased strength, since each edge of the zigzag is performed three times. Used for sewing in rubber bands and decorative effects. |
|
| Double cross - used both for sewing and for decorative purposes. This stitch is mainly used to sew sportswear. | |
| Imitation of overlock stitch (open) - used for overcasting the edge of a product, for simultaneous stitching and finishing the edge on elastic materials. When using this stitch, a visual resemblance to overlock stitches is created. | |
| Honeycomb stitch is an elastic decorative stitch for decorative edge finishing on elastic materials, used for decorative finishing. Can be sewn with elastic thread in a bobbin. | |
| Connecting Stitch - This stitch is stretchable. It is good to use it for finishing purposes, for joining materials and decorative effects in patchwork. | |
| Decorative elastic stitch - used not only for end-to-end stitching, but also when sewing layer-on-layer pieces, such as leather or decorative trim. | |
| Imitation of overlock stitch (closed) - closed overlock stitch. It is used when processing fabrics such as jersey and for overcasting bulk materials. | |
| Pullover stitch with reinforced edge - creating elastic and overcast seams on knitted items, stitching parts. The left edge of the product is processed. | |
| Blind stitch - for blind hemming on dense, non-stretchy fabrics. When performing a blind hem, you should also fold the fabric correctly. | |
| Stretch blind stitch - for blind hemming on stretchy materials. | |
| Scallop seam - for decorative finishing and edge processing with subsequent cutting along the edge. | |
| Linen buttonhole - there is either a semi-automatic buttonhole in four steps, or an automatic buttonhole, for blouses, shirts, bed linen etc. |
The set of stitches even for simple machines is sufficient for sewing all types of fabrics: jeans, leather and knitwear. Sewing machines for beginners have basic stitches: straight, zigzag, overlock stitches and perform stitching, darning, blind stitching, button sewing and buttonhole sewing. If your hobby is sewing and you use various materials, including knitted ones, and you are interested in high-quality edge processing of the material, then it is better to look at middle-class, electromechanical and entry-level electronic machines. As a rule, they have an expanded set of operations (up to 30 types of stitches), knitted seam, overlock stitches, as well as automatic buttonhole mode.
For professionals whose needs are not limited to 30 stitches, we can recommend the most comprehensive electronic and computer class of sewing machines. They have knitted, overlock, reinforced and decorative seams and the number of lines in such machines varies from 50 to 1000.
Source
master-class.mirtesen.ru
Satin stitch is one of the types of embroidery. Satin stitch is used to embroider linen, decorate clothes and household items. The surface can be white, slotted, single-colored or multi-colored.
White satin stitch - it includes a simple machine stitch, a stem stitch, a roller stitch, banners, etc.
White surface is characterized by convex shapes. They make a smooth surface with flooring. It is used mainly in plant patterns. It can be used to embroider both small and large designs. You can embroider patterns with both white and colored threads of the same tone. On thin material, embroidery is done with silk or bobbin thread No. 80. When embroidering with satin stitch, the details are hemmed with a “roller” along the laid thread (boil No. 30). The veins of the petals are made with a double stitch: from the center to the contour and back along the same line. The leaves are filled with light satin stitch. Holes in small flowers performed without prior stitching. In a one-color design, you can embroider one half of the leaves with light stitches, the other with dense stitches. Meshes in large parts can be of any kind (slotted, false, banner meshes).
Welted surface - it is characterized by through patterns. Welted satin stitch consists of holes of various sizes and shapes, covered with a roller without backing thread. The slotted satin stitch is combined with white satin stitch, with nets and hemstitching.
You can embroider a wide variety of things on any fabric using colored satin stitch. When doing color embroidery, it is important to sequentially introduce threads of different colors and tones according to the design. In this case, it is necessary to ensure that the stitches of different tones smoothly flow into one another - while trying to maintain the direction of the stitches in flowers towards the middle, in leaves - towards the midrib. The stitches are directed over the entire area of the embroidered part.
Richelieu - a sign of this embroidery are holes cut into the fabric through which jumpers (bridges) are thrown. It is good to perform cutwork on fabric using bobbin thread No. 80. The pattern is applied to the fabric, and then the contours are sewn with fine stitching twice, close to row, to strengthen the edge. In places where the lines of the pattern expand, at the ends of the petals, the flooring is made with frequent stitching. All lined contours are processed with a “roller”. The edges of the cut-out space are treated entirely with a roller and thread No. 10 (for strength).
The middle of the petal can be shaded with strokes - a dashed mound. The core of the flower can be filled with a patterned mesh. To make the design more beautiful and stand out more sharply on the fabric, you can make a transparent mesh around it.
Mosaic grid - it is used mainly as a background for patterns. The contours of the design are stitched with fine stitching twice close together for strength. The fabric is cut out in parts as needed, without removing it from the hoop. When the entire mesh is filled with sheathed warps, the edges of the cutout are also sheathed with a “roller”.
Some of these seams are usually taught at school during technology lessons - http://uchitelya.com/tehnologiya/
In addition to knowing the seams, you must also remember that embroidery on napkins and handkerchiefs is done on thin white or plain material using silk white or colored threads to match the material. The edges of the handkerchief can be finished various options cloves - “roller”, festoons. The patterns are embroidered using various stitches that make up the satin stitch technique.
The embroidery is finished. Now wash your work, iron the fabric from the inside out on a soft mat. Then, using scissors (with sharp rounded ends), cut out from the inside the pieces of fabric under the brims and the edge of the product, if it is trimmed with scallops (edges of napkins, collars, scarves, etc.).
If there were holes in the pattern you chose, then you can give them beautiful shape, stretching them with a thick knitting needle, inserting it into the hole from the inside out.
Then the product must be ironed again from the inside out.
BEADED SEAM from Burakova Frosya From the author: The application will be discussed separately, because the application is multifaceted, interesting and very effective. I can say that I use this stitch in almost every item I sew. Fabrics: Any. Features It consists of tiny stitches on the face and quite large on the back, loosely tightened stitches back with a needle. The main effect that can be obtained is a natural-looking fastening of a package of materials (of any thickness), taking into account the bending of layers (of any number of them). And this is a very useful and necessary effect, which otherwise has to be achieved by seating, ironing, placing pieces of wood under allowances, etc. And in many cases, it is the beaded stitch that gives unsurpassed results. Execution I sew across the face from right to left. I make a tiny (1-2 threads) backward stitch along the face and a large (8-10-12 mm) forward stitch along the wrong side. I tighten it loosely so that the thickness through which I sew is not pulled in any way. There can be any number of layers of fabric. I use a thread on the fabric that is inconspicuous (although this is not necessary) and thin. At the same time, I DO NOT use the embroidery method, when the thread is pulled out completely, first inside out, and then out. No! That’s the whole point: the needle is pulled up and down at once and it’s obvious. Because this is how we use the wonderful property of hand stitches, which allows us to do all sorts of tricks here. Trick #1 IN THE WORLD:) When sewing, the top layer of fabric is placed on your hands. Everyone knows that the machine plants the bottom layer, although there are all sorts of feet that manufacturers say they don’t plant :). And when sewing on your hands, the opposite happens (if you DO NOT sew using the embroidery method). This is how we hold the fabric in our fingers; it is not stretched straight, but slightly in an arc. Moreover, the machine exactly plants the bottom layer, those. pulls it together slightly. And on the hands, the top layer does not gather, but seems to be slightly pulled and correctly bends around the bottom layer. Layers of fabric, in particular allowances, can thus be stacked on top of each other very correctly and beautifully on all curves of the figure. Virtually no wrinkles and no steps. Fastening them with a beaded seam. =========================== Personally, I use this fastening very often. I’ll tell you, for example, about one application. Application No. 1. Pairing a narrow bodice with a full skirt. ...Being a lover of the New Look style, I often sew myself dresses with full skirts. 6 m at the bottom is not a question :). Now imagine that you have gathered about 2.5 m of skirt at the waist to the 58 cm waist of your bodice. We sewed the skirt to the bodice and... Oh, what a wonderful thick sausage from the allowance at the waist, how it decorates and slims your tight waist! :) - However, it’s not tight, because... the fabric protrudes onto the sausage, and a slack is formed above. Postpone? - won't help. The sausage will remain in place, and even the seam will go in waves and stretch in the stitching. Smooth, press? - alas... The law of conservation of mass. Hard-earned technology. 1. The bodice is lengthened by 1.5, maybe 2 cm. Moreover, it is not simply lengthened, but by attaching the base of a tight-fitting skirt, that is. with expansion from the LT downwards, and also with a small additional freedom to bend around the allowance, about 1 cm in a circle. The sausage allowance will be carefully placed under this extension (slightly below, and not at the waist itself). 2.The skirt is sewn on. It is better not to overcast the seam, or simply treat it with a thin bias stitch (see SEAM No. 2). If you really want to do it by machine, then overcast the skirt separately and assembled. But as a rule, this seam is closed with doublure. becomes internal. 3. The seam is not ironed at first, as it will be folded into a beautiful position with your fingers. In principle, you can, out of habit, sweep the seam allowance up without tightening, as long as it holds, just temporarily attach it, throw the needle forward across the face (this is mandatory). Or simply flatten the seam allowance with your fingers facing up. 4.Now go along the face with a beaded seam, sewing on the seam allowance. Somewhere 5-6 mm above the seam along the LT. There is no need to pull anything, the main thing here is molding. It's like you're placing layer after layer on top of the waist cylinder from the inside out: a thickly gathered skirt allowance, a bodice allowance, the top of the bodice. We do not pull the top fabric away from the seam; naturalness is our ally. - The feeling of a sculptor... And you secure the package of layers of fabric with stitches in the correct position. In general, this happens almost naturally. Trick #1 is the best assistant. You can rarely sew, 8-10 mm approx. 5.Well, now you can stroke it, although, in general, everything is already there. Just secure what happened with your fingers. If you iron from the inside, then press it, if from the outside, then press it. But this is mainly for the sake of order, maybe. everything is formed with a beaded stitch. Here is an example of such processing. The first photo is close-up of the back, the second is of the front. The blue arrow shows where the bodice extension is, under which the allowance is hidden. - Do you see it? :) - It is sewn with a beaded seam up from the seam along the LT and does not stand out at all, because the layers of fabric are laid with fingers and fastened with threads. 60 rare stitches... well, let’s say 5 seconds per stitch is 5 minutes of work. .. And it will never stand out :). Try laying it this way in any other way. - And he’s very plump :), and also uneven: the cream fabric is thick cotton, the lilac fabric is very thick cotton, almost denim. And there are also seams and reliefs. And this bodice is without corsetry, without rigidity and without bones, just a doublure. The red arrow shows that nothing spoils the waistline. No steps. In the close-up photo of the front, I personally can’t see anything where the bead stitches are :) But I know for sure that they are there! I sewed it myself, here.
types of simple seams:
"beaded" seam
To decorate a product, when making a narrow satin roll, a seam is often made along its inner edge “ embankment" or " beaded", so called because appearance resembles a chain of beads.
This seam is very often used in embroidery and serves as both an addition and the main seam in some types of embroidery (when stitching an outline and for making designs of floral patterns).
With the first method When embroidering with a beaded stitch on a machine, the embroidery looks like small knots embroidered using satin stitch. The technique of making a beaded seam with knots is that, when making a small stitch, the needle is inserted three to five times into two points located at a distance of 1 mm from each other, and thus the knot is embroidered using satin stitch. Then they sew with a fine line and, making the next knot, cover almost the entire line, and so embroider until the end of the row. The next row of knots is placed between the previous knots in a checkerboard pattern. This method of embroidering with a beaded stitch produces a slightly convex embroidery. It is good to use for finishing a dress in combination with artistic satin stitch.
It is also good to use it for embroidering flower cores: roses, daisies, cornflowers, poppies, chrysanthemums, etc. To embroider linen with a beaded stitch, you need to take the thinnest line silk. Of course, a beaded stitch alone does not give the effect; it must be combined with white or artistic satin stitch. For example, when embroidering a leaf, you can embroider half of the leaf using satin stitch, and trim the other half along the contour with a narrow satin roller and fill it with a beaded stitch (Fig. a).
With the second method When embroidering with a beaded stitch on a machine, the embroidery has the appearance of fine stitching with curls. This seam looks very impressive in combination with white satin stitch. The “curl stitch” must be positioned so that the entire fabric is covered with a beaded stitch. The second row of curls should cover the edges of the first row (Fig. b). In colored artistic embroidery, you can use a beaded stitch called “curl stitch” to embroider the background. Pour various colors the bead stitch is very convenient, as it crumbles into small specks, and you can easily pour up to five tones into one spot without a contrasting transition from color to color. The beaded stitch “curl stitch” is good for embroidering vegetables, fruits, and hearts in flowers. Combining it with artistic and quick stitch when embroidering landscapes and portraits is very impressive. When finishing a dress, this seam is used for embroidery with thick brocade thread. The brocade metal thread is wound on a shuttle bobbin, and the tension of this thread should not be tight. The design must first be embroidered using artistic satin stitch, and then the fabric must be pulled on the hoop with the wrong side up and embroidered on the wrong side with silk of the same color as the brocade; the brocade thread will lie on the front side of the embroidery. The embroidery in this case looks light and delicate.
Probably every girl in school was taught the basic types of seams for hand and machine sewing during needlework lessons. But over time, these skills disappear. And when you need to apply your knowledge of seams, it becomes an almost impossible task. You immediately need to remember how to make a French seam, how to tuck the fabric and re-master the art of threading the lower and upper threads in the machine.
All fabric processing technologies are divided into two groups. It's not difficult to remember them. These are manual and machine more varied).
Main types of hand stitches
They are used to connect parts of a future product. The most common one intended for fastening parts is a seam made using the basting technique. It is intended to temporarily connect the parts of the product and outline its future appearance. Most often, cotton threads of different thicknesses are used to make this seam. The “over the edge” technology is also popular. With its help, parts are sewn together so that the resulting fragment of the product can be turned inside out.
A buttonhole stitch is more often used for decorative finishing - this is how the edges of a hand-embroidered napkin are processed. A back stitch looks just like a machine stitch. Therefore, it is used in cases where it is necessary to hem the hem of a skirt, for example. But in order to shorten the product, hemming seams were invented. They come in two types: simple and secret. It's not difficult to master them. useful when you don't want anyone to see the thread stitches on the finished product. It is used often. The French seam is not a manual fabric processing technique, although it may seem like it was made by a person and not by a machine.

Machine seams
Making machine seams will take much less time than the same job done by hand. With a sewing machine, tailors even use decorative techniques for processing fabric or decorating the finished product. They look especially impressive if you stitch them with a thread that differs in color from the fabric. Contrasting colors will look best in this case. are divided into two types: connecting and decorative.
Connecting machine seams
The most commonly used technique for machine processing of fabric is a connecting seam or “stitch”, that is, designed to fasten the parts of a product together. This is an ordinary straight stitch. The threads are not visible at all, if the work is done correctly, of course.
The overcast seam is one of the types of stitching technique. It is used during processing of reversible parts. To do this, the parts are folded face to face and connected with a simple stitch, that is, the stitching technique is used.

The sewing seam is one of the most durable. It is also called “denim”. Why? It is often used to process denim fabrics. The sewing seam looks like a decorative stitch, both on the front and on the wrong side. With the help sewing seam You can make all types of linen.
When sewing bed linen, a double reverse seam is used. To connect overlay parts, tailors use the technique of making an overlay seam with a folded cut. You can see it on the finished product. And to process sections of product parts, the craftsman needs knowledge of how to make edging seams. Particular attention can be paid to the double seam.
Double seam
It is very common in light industry. This technique is also called French and linen stitch. The double seam on the front side looks like an ordinary stitched connecting stitch. From the inside it looks like a stitched fold. The French seam is often used to process thin, “flying” fabrics such as organza and silk. The linen stitch looks very similar to the sewing technique, but it is simpler. But how can you learn to do this? machine stitch, if the description in the text is unclear, but the picture is completely sketchy and strange?

Those girls who want to learn how to make a French seam can watch a master class on it on the Internet. Such video tutorials can be found on popular websites. This method of learning is very convenient - everything is visible, there is sound, and you can watch the video several times.
But if we explain it in words, the description of the implementation technology will be short. First you need to fold the parts inside out to each other, lay a line at a distance of 0.5 centimeters from the cut of the part. Then you need to cut off the allowances close to the laid line and carefully unfold the parts, folding them in reverse - with their right sides facing each other. All that remains is to sew the line again using a sewing machine and that’s it - the linen stitch is ready. You can do the procedure several times until the result satisfies you. As you can see, making a double seam on a machine is not at all difficult.
Decorative machine stitches

Decorative seams are used for finishing products. They give the impression of embroidery and look beautiful. One of the decorative seams is stem stitching. It is used for making plant stems, small branches and other embroidery elements. The line is laid with small stitches along the contour of the pattern once or twice (depending on the thickness of the thread). There is also a “beaded” stitch, so named because it resembles a beaded line.
The decorative and finishing seam made using a sewing machine looks very beautiful, and it is called a “pigtail”. It looks great on women's summer sundresses and dresses.
Conclusion
We talked about how to understand basic hand and machine stitches. Learning to perform them, if desired, is not so difficult, because finding any kind of manual today is very easy. The French seam may be useful to you more often than other technologies for joining product parts, so you should pay special attention to it.