A teapot warmer is a functional item and a stylish element of kitchen decor that will highlight your taste.
First you need to decide how you will make it: knit or sew. Then we select appearance. You can look at a photo of a heating pad for a teapot on the Internet, or come up with a unique design.

IN lately Warmers in the form of a doll or animal (usually an owl, chicken, cat, etc.), or in the form of a fruit or vegetable, are becoming increasingly popular. Next, you need to decide for yourself: will it completely cover the teapot or will the spout and handle remain open. Not only the form, but also the stages of work will depend on this.

Here we will provide a master class on making three heating pads: sewn, crocheted and knitting needles.


To make a heating pad for a teapot with your own hands, you will need the following tools and materials:
- needle;
- scissors;
- sewing machine (if possible);
- compass (can be replaced with any container of a suitable size);
- tailor's chalk (or a piece of dried soap);
- threads;
- fabric for the top of the product (can be absolutely any texture);
- interlining;
- padding polyester;
- ruler or measuring tape;
- paper or newspaper (for making a pattern).

If you know how to knit, the set will be smaller:
- hook or knitting needles;
- reinforced threads, acrylic or wool;
- sewing needle, a needle with a large eye for threading thick threads;
- lining fabric (preferably cotton).

Step-by-step description of actions
First, I’ll tell you how to crochet a heating pad for a teapot. It will be in the form of a chicken.

Crochet heating pad
After choosing a design and type, we get to work. Let's consider the option of making a closed heating pad, since it is easier to make. It is better to start knitting from the bottom. We cast on the first row of loops, equal to the width of the teapot, 2 centimeters. Next, we knit in a circle up to 1/3 of the height. After this, we decrease the loops on both sides (from the side of the spout and the handle), 1st in each row, and so on until the end of the height of the teapot plus 1 cm.

At the end of the work, close the part, fold it in half to form an even trapezoid and connect both edges with the last column. The bottom edge can be made of contrasting threads.

Then we knit a circle for the head (from two halves), onto which we attach button eyes on both sides (you can glue ready-made ones). We make the beak in the form of a triangle. Having collected all the parts, we sew the workpiece and stuff it (with cotton wool, scraps, etc.).

We attach the finished head to one of the ends. We make wings and sew them on the sides of the trapezoid. Upon completion of the work, we cut out the inner cotton part. This will prevent any yarn lint from getting into the kettle. It should be 0.3 cm smaller side seam, and 1 cm longer in length than the top one.

We sew the lining. If the material is fraying, we process the edges with overlock, zigzag or finishing braid. Now let's connect the parts. Knitted cover turn the seams inside out, the lining with the seams out and insert it into the first one. We fasten the parts. We bend the bottom of the lining and attach it to the outer part.

Knitting heating pad
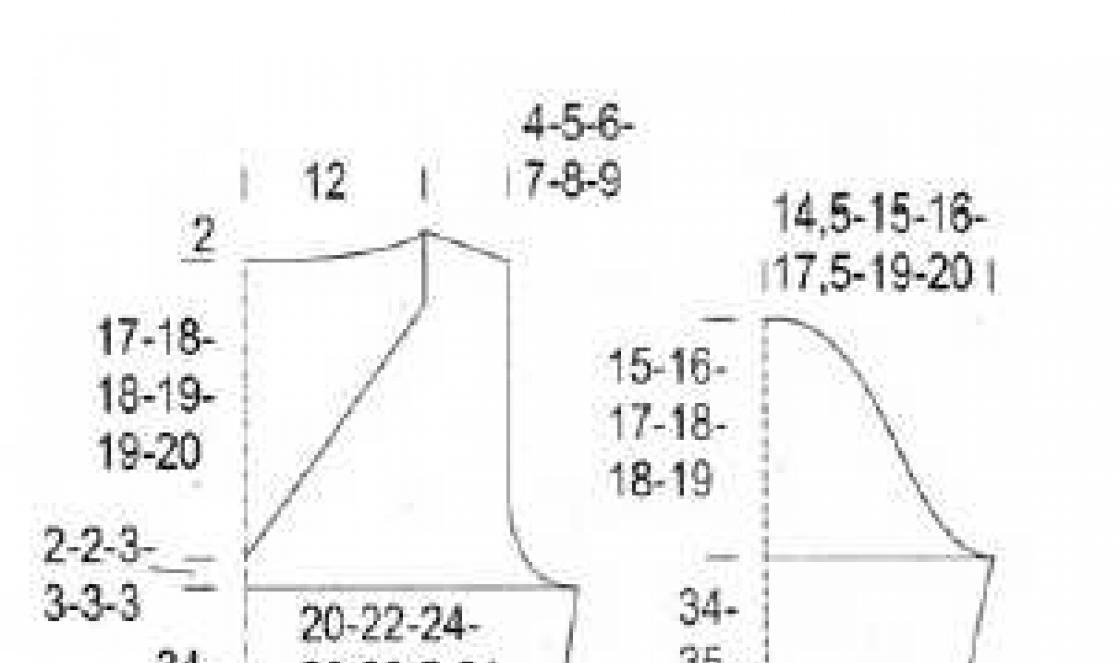
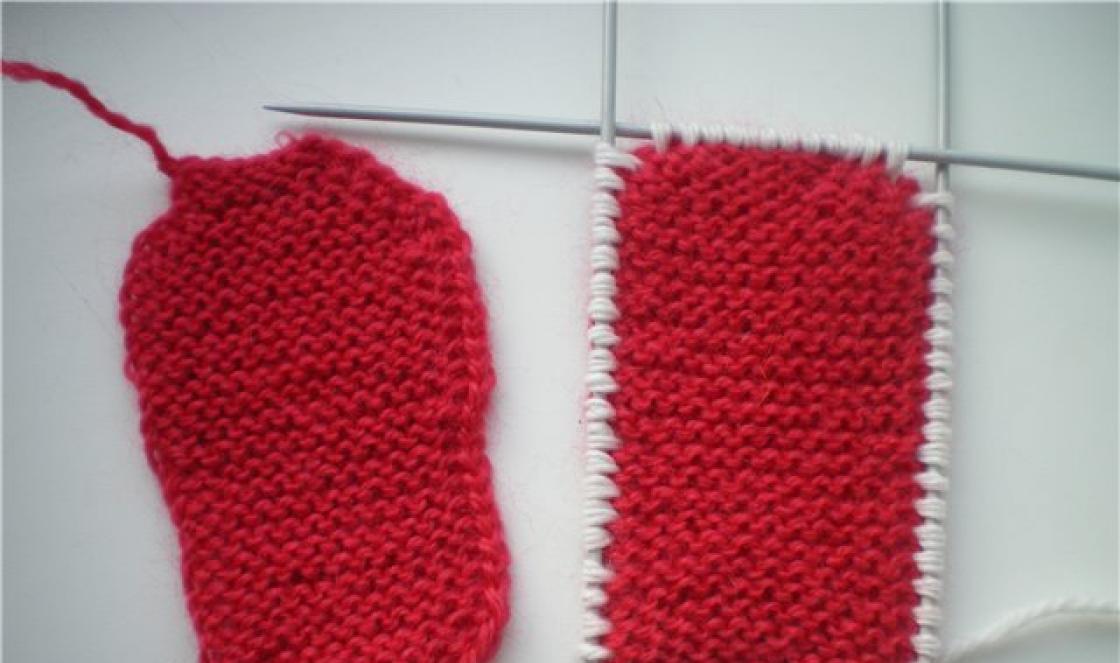
The second option is for working with knitting needles. The knitting pattern is simple: we cast on an edge row equal to the volume of the teapot + 1 cm and knit the fabric in garter stitch at two heights + 2 cm. Fold it in half and sew the sides together. We knit the ears tightly so that they stand up.


There are two ways - either cast on the loops from the top row or separately. The number of loops affects the length and durability of the ears. It's better to limit yourself to 10-15. When working, at the beginning of each row we knit the first two loops together. We knit this way until the end until two or one loop remains.

We sew on ears, eyes and a nose from buttons (or glue store-bought ones) and embroider mustaches. Upper part already ready. Further everything is the same as described above.

Sewn heating pad
The third type is for those who love to sew. Draw a semicircle with a diameter 1-2 cm larger than the teapot. We cut out the blank from fabric, non-woven fabric and padding polyester. We fold the fabric with the front side inward, apply padding polyester to the back and connect it along the perimeter, leaving the bottom open.


We sew the interlining along the perimeter (except for the bottom), leaving 10 cm on one side. Then we put the lining with the right side inward and sew it along the bottom, turn it inside out through the hole, which we then sew with a blind seam by hand or on a machine. Everything is ready! Enjoy your tea!

Photo of kettle warmers


Let's crochet a warmer in the shape of a small bright house.
To knit a heating pad for a teapot we will need:
- Yarn of several colors;
- Hook;
- Glue gun;
- Red beads.
Job Description
We knit first for the house roof. You can knit such a heating pad from inexpensive Karachay yarn. It is somewhat rigid and thanks to this it will keep its shape perfectly.
Let's make 2 loops. And then in 2 we knit a row of single crochets. There will be a total of 6 columns in the first row.
Next we knit another row in a circle. All rows are knitted behind the front walls.
Now we will knit 6 increases per row. We knitted a row and made increases in the next row. And we repeat. We distribute the increments evenly.

First we knit them in each of the loops, then through the loop, through 2, then through 3 and so on. We knit until the base of the roof becomes equal in diameter to the lid of the kettle itself. Let's mark this row.

Now let's complete a row and make additions every 2 stitches. And we will knit the new row without increases.
Let's change the thread and continue knitting house walls. We knit it from the inside in the row that we marked when knitting the roof.

Having knitted 1-2 rows, divide the knitting in half. And we knit 2 parts of the house separately.
We knit almost to the very end of the kettle. You don't need to knit a couple of rows.

Now we will attach green yarn to one part. It will be grass. And we knit a row of single crochets before the beginning of part 2. We connect with part 2 and also knit single crochets along it.
You can knit another row. On one side our knitting is connected, but on the other it is not.

Let's tie door. Let's make 12 loops and knit, starting with 3 loops, half double crochets. And in the very last loop we knit 5 stitches at once. Next we move to the other side of the chain and knit half double crochets here as well. And then we turn the knitting back. We knit 1 more row. And in the rounding we perform 5 increments. And then we simply tie the door with half double crochets.

Let's make a row of yarn of a different color, knitting it behind the front wall with half double crochets. We do not tie the bottom of the door.
Let's connect. Cast on 6 loops with yellow yarn and knit a connecting stitch to the one farthest from the hook. Let's make 5 loops and knit the connecting stitch again in the same place. And we will repeat 3 more petals from 5 loops and a connecting column. We knit 5 of these flowers.

We knit leaves. We perform 6 loops. We knit a connecting stitch, then a single crochet, a double crochet, again a single crochet and a connecting stitch.

Glue the door and flowers with hot glue. And in the middle of the flowers we glue red beads.
To decorate the house you can use any.
As a fastener on the heating pad, you can make 2 ties on the side of the handle (under it).
The kettle warmer is ready!

Other heating pads, crocheted, on our website:


Did you like the product and want to order the same from the author? Write to us.
More interesting:
See also:
DIY pincushion: ideas and master classes
Do-it-yourself pincushion Any housewife loves to have order and comfort everywhere in her house. Despite...
Champagne case (crochet)
There is very little left until the New Year, but those who know how to crochet will still have time to knit a beautiful...
Drinking tea for pleasure is not about rushing. It's about leisurely movements, beautiful napkins on the table, homemade shortbread cookies, "delicious" conversations with loved ones and cute, charming accessories that...
A great idea for needlework on long winter evenings is knitting. Knitted heating pad It will not only help you brew delicious tea, but will also give the kitchen even more comfort. Needless to say, a heating pad for a teapot - great gift for love...
Pumpkin is traditionally associated with October, the month that ends with Halloween. Why not knit a pumpkin because it's so cheerful? If you like practical things, you'll love our pumpkin version. It was heating...
A hot water bottle for a teapot is great! It helps keep you warm. Where? Wherever you want! Whether you're making tea or want soft-boiled eggs to stay hot for a long time. You just need to dress up what you need warmly...
No one will argue that aromatic freshly brewed tea with friends or with family is one of the most wonderful ways to spend a couple of dozen free lazy minutes. Now imagine how wonderful it can be...
A knitted teapot warmer with flowers is a guarantee not only that the drink will be aromatic and tasty. Your tea party will undoubtedly be a success, because a beautiful crochet hot water bottle brings a smile to your face, which means it improves your mood...
The cute Burenka is ready to give aromatic tea to anyone who is willing to work a little. A hot water bottle for a teapot is the key to successful tea drinking, as any housewife knows. Do you use this secret? Sew a heating pad for a teapot...
Craftswoman Foxxy63 suggests knitting this cute heating pad for a teapot. For my crochet heating pad I chose Foxxy63 melange yarn cheerful color and decorated the finished item with an applique in the form of a delicious lemon...
We will crochet two versions of a hot water bottle in the shape of a pig, the symbol of 2019.
First hot water bottle
To knit a heating pad we will need:
- Yarn “Children's bulk” in pink, white and black;
- Hook;
- Button;
- Needle;
- Brown nail paint or polish;
- Satin ribbon.
Let's start knitting the base of the heating pad. This is the biggest detail. Let's make a sliding loop from pink yarn and cast on 3 more chain loops.
Let's knit 11 more double crochets into a slip stitch. And close the row into a circle using a connecting post.
In the next row you need to make increases. We will make them in each loop of the bottom row. And we will have 24 double crochets in the second row.
In the next row we will also continue to make increases. But now we knit them through a loop.
We knit an increase every 2 stitches in the new row. And in the next row we will make the last increases every 3 loops.
You will get a circle. Its diameter is suitable for a teapot. If this circle turns out to be smaller, then we continue to make increases. In one row there are 4 loops, in the other through 5 and so on.
Now we simply knit in the round without increments until the knitting reaches the spout or handle.

We need to divide the canvas in half. For example, if we have 60 loops, then we knit only 30 of them. We turn around and knit a new row. And so on. We do not knit until the very bottom, about 1.5 cm.
One wall is ready. We knit the remaining loops in the same way.


On one side we make a loop of 5 air loops, and on the other we sew a button. This part will be near the kettle handle.
All that remains is to knit the small details.
We knit ears.
IN sliding loop we need to knit 3 double crochets. The first column will be 3 lifting air loops. Tighten the sliding loop.
You will get triangles. They need to be tied around the edges with single crochets.

Knitting a patch. Let's cast on 2 loops and then tie 6 single crochets 2 times from the hook.
Then we will perform increases in each of the knitted columns. That is, after the 2nd row we will have 12 columns. After the 3rd row we need to get 18 columns. Therefore, we knit an increase in every 2 loops.
Immediately mark the nose with paint.

Knitting eyes. First we take black yarn or any dark one. We perform 2 air loops and in 2 we knit 6 single crochets. We attach white yarn and knit 2 single crochets in each loop.
We sew all the parts to the main part of the heating pad. And sew it on satin bow to the top of the heating pad.

The crocheted pig-shaped teapot warmer is ready. Enjoy your tea!

Second heating pad
In this heating pad, Pig seems to be standing with his arms akimbo and offering to have a cup of tea with her.

For knitting you will need:
- Pink yarn;
- Hook;
- A pair of beads;
- Yarn dark blue for embroidering a muzzle;
- Sintepon;
- Needle;
- Satin ribbon.
You can use any yarn. In this MK it is “Areola” in 2 additions.
Job Description
We make a sliding loop, cast on 3 air loops (we will further denote these loops as VP). And inside the ring you also need to knit 11 double crochets (we will further denote it as a dc). At the end of the row we connect it with a connecting loop. This is row 1.
We knit row 2: 2dc in each underlying dc.
We knit row 3: 1dc, increase (that is, 2dc in a loop).
We knit the 4th row: 2DC, increase.
And then we will make increases every 3dc, then every 4dc. To the required diameter of the kettle. After all, it can be different for everyone.
 We knit a few more rows in a circle until the beginning of the spout of the teapot or to its handle.
 Now we divide the resulting number of columns by 2. And we will knit only half of all the columns. That is, if there are only 48 stitches in a circle, then we will knit only 24 of them.
We knit in turning rows without increasing the DC.
 We knit the first wall of the heating pad, leaving about 2 cm short of the bottom of the teapot.
 We knit the second part of the heating pad and the second wall in the same way.
And now we will make the connection in one place. We knit a new row of dc. We knit the loops of the first wall of the heating pad and immediately proceed to knitting the second wall of the SSN.
We knit the second wall with a dc. But in the end we no longer connect it. We have a hole for the spout and a cut for the handle.
We knit the required number of rows to the bottom of the teapot. And on each side of the walls we knit a chain of 20 VP. These are the ties.
This is how the base of the heating pad will look on the teapot.
 Let's tie pig head.
We knit row 1: 2VP. In the far row we knit 6 single crochets (hereinafter SC). And now we need to make increases. Repeat until the end of the row.
We knit row 2: 2 sc in each loop. Repeat until the end of the row.
We knit the 3rd row: behind the back wall of the loop without increases.
We knit the 4th row: without increasing RLS.
We knit the 5th row: 1СБН, in the 2nd loop we knit 2СБН, that is, an increase. Repeat until the end of the row.
We knit the 5th row: 2СБН, increase. Repeat until the end of the row.
We knit the 6th row: 3СБН, increase. Repeat until the end of the row.
We knit rows 7, 8 and 9: no increases.
We knit the 10th row: 3СБН, decrease. Repeat until the end of the row.
We knit the 11th row: 2СБН, decrease. Repeat until the end of the row.
Knit row 12: 1sc, decrease. Repeat until the end of the row.
We knit the 13th row: fill it with padding polyester and knit 2 sc together.
 All that remains is to tie ears.
Knit row 1: 7VP.
We knit rows 2, 3, 4 and 5: 6 sc each.
We knit the 6th row: 1VP, decrease, 1СБН, decrease.
We knit the 7th row: 1VP, decrease, 1SC.
We knit the 8th row: 1VP, decrease.
The ear is ready. We also knit the second sc and do it at the end of the decrease.
 We embroider the face with dark blue or black yarn. And sew beads in place of the eyes.
Sew the ears to the head.
 And we sew the head onto the top of the heating pad. Decorate the heating pad with a satin ribbon bow.
A hot water bottle in the shape of a pig for a teapot is ready!

You can also knit it in the shape of a pig for the New Year.

Check out more knitted warmers:


In winter we often drink delicious and hot tea. And to keep it that way longer, we need a “Dog” teapot warmer, which is not difficult to crochet. We offer you a master class in which the knitting pattern is described in detail. A description of the materials and stages of work will help you create a useful item.
We will need:
- yellow yarn;
- yarn of brown (or any dark) color;
- fluffy beige yarn (you can use nako paris);
- hook No. 3;
- needle;
- 2 black beads;
- padding polyester;
- a beautiful ribbon or lace.
How to crochet a heating pad for a teapot
Let's start with the basics. Let's make 2 loops first. Then we will proceed to row 1 of the top of the heating pad.
We knit a row in the farthest loop from the hook, which consists of 6 single crochets.
After this row, you need to knit several rows in a row with increases. The number of these rows can be any. It depends on the size of the teapot.
We distribute the increments evenly. That is, if in the 2nd row they go to all loops, then in the 3rd through 1 loop, in the fourth through 2 and so on.
We need to knit a circle that will be slightly larger in diameter than the teapot lid. 
And then we simply knit rows in a circle without any increments. We tie it to the spout with a handle and divide the knitting in half. 
Now we knit first 1 half of the heating pad and then the other. They should be the same and reach almost to the end of the kettle. 
Now we will attach a fluffy thread to one of the ends. You can use any.
And we knit single crochets, connecting 2 parts on 1 side. There is no need to connect to the other one. There will be a handle and a tie to remove and put on the heating pad.
Let's knit 1 more row. 

Now let's tie the head. First you need to knit the circle.
We make 2 loops. And then we begin to knit a row of 6 stitches in the farthest one.
Evenly, as in the main part, we make increases until we have collected 42 loops.
Now we need to knit 3 rows in a circle. And after that, start making decreases.
We will decrease in every 6 stitches. In the next row in every 5, then in 4 and so on along the rows. When there are only 6 loops left, we will pull them off. But here you also need to remember to fill your head with padding polyester. 
Let's knit the muzzle. And for this we will again knit a row of 6 stitches. After which we will perform 2 rows with additions. In row 2, you need to increase in all loops and in row 3 through the loop.
We will knit another 2-3 rows in the round. 
We sew the muzzle to our ball - the dog's head, also filling it with padding polyester.
We embroider the nose with brown or any dark yarn. 
Now let's tie the ears. Let's make them fluffy, like a trim around the bottom of a heating pad.
We knit 12 loops. We skip a loop and knit into the next half double crochet. We knit half double crochets along the chain, leaving 4 loops short. In 3 of them we knit double crochets. And in 4 we will knit 6 double crochets at once.
On the other side we will knit 3 double crochets and finish the ear knitting with half double crochets. 
Let's sew on the ears. We will also sew on eyes (beads). We sew the dog's head to the main part so that the teapot's spout looks as if it were a tail.
The teapot warmer in the shape of a dog is ready! As it turns out, crocheting is not that difficult. 

And this is how you can connect