The paper folding technique appeared in our country from Japan.
This art was invented by monks, who, with the advent of paper, began to send messages to the gods through such folded pieces of paper.
It was believed that this method was the surest and fastest.
Then (over the centuries) paper became much cheaper and became easily accessible to all people.
Origami appeared relatively recently in Russia, but even here it has found its enthusiastic followers.
The most popular flower of all paper crafts is the lily.
It is amazing for its beauty, simplicity of shape and ease of assembly from paper..
In nature, lilies come in different colors: white, yellow, pink and red. Among different peoples, it is a symbol of purity and innocence.
A lily made from paper with your own hands can be given, for example, to a birthday girl on her birthday and it will delight her for a long time.

The first simple DIY paper lily model
It is not at all difficult to assemble a paper lily. It belongs to the classic types of origami and can be assembled by anyone without special skills. In addition, the lily is a very beautiful flower that can delight you with its presence on the table even in winter, if you try and implement this master class with your own hands.
The sheet folding method is carried out according to the following scheme:

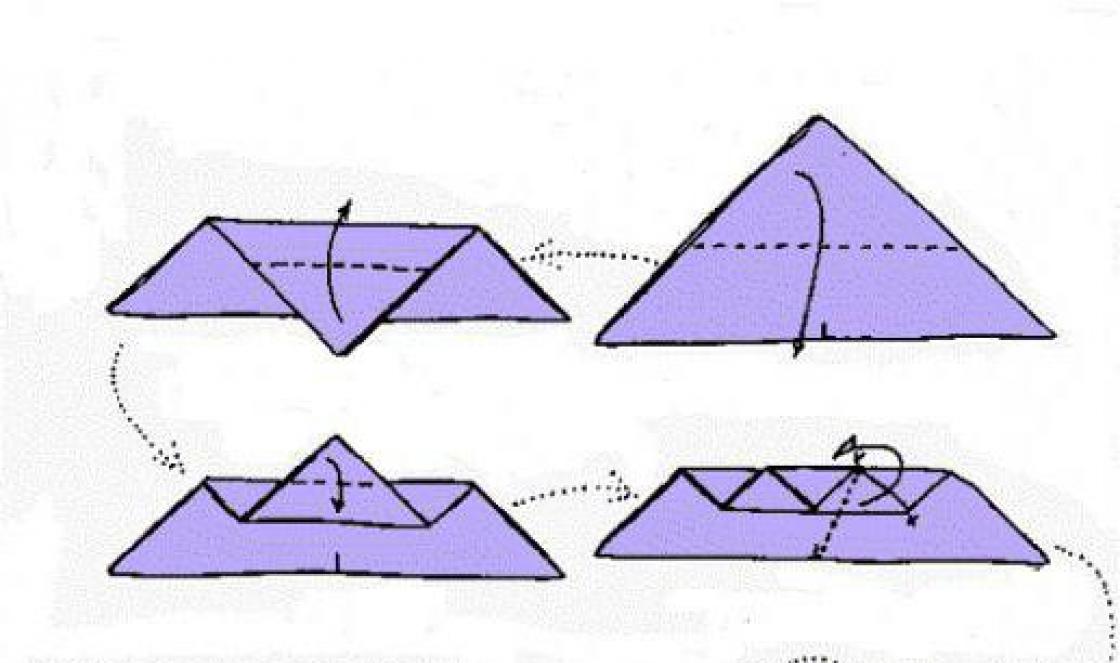
A sheet of paper is placed on the table. It is better if it is not white, but some color with a pleasant, delicate tint. Next, the A4 sheet is folded to form a square. The excess is cut off and removed. The resulting square needs to be folded several times (Fig. 1, Fig. 2). The lower edges of the form are folded towards the middle and unbent back (Fig. 3). The upper sharp corner bends towards the lower one and unbends (Fig. 4). In all places of folds, marking lines were obtained for subsequent assembly.
Now the petal is assembled. One of the lower corners is turned up (Fig. 5). The same manipulation is repeated with the remaining three corners. The model visually decreases in size. Next, the corners are bent down on all sides (Fig. 6). On each of the four sides, leaves are rolled up from the sides to the center (Fig. 7).
You can form petals (Fig. 8). The model rotates 180 degrees. Each edge bends and unfolds. Here you will need the help of a pencil, which is inserted to straighten the petal in the 3D volume (Fig. 9). Be careful, multiple folded papers can easily tear.
The resulting flower needs to be strung on a stem. Tightly rolled paper is used as a stem.
And now you can make a whole bouquet of paper lilies with your own hands. The scheme is already known and it will not be difficult. You can also experiment with the size of the initial square leaf: unusually large lilies also look elegant and stylish.

The result is a wonderful bouquet that can be presented for any holiday for any reason.
The second do-it-yourself paper lily model using the rolling technique
This water lily model is a more complex origami technique - twisting. First, the paper is folded many times at the desired angles and at the end it is straightened once along the resulting lines.

First, a square piece of paper is placed on the table. You can use a regular napkin. The transparency and weightlessness of this paper will give the future flower more realism. Visually or with a pencil, the sheet is divided into four equal parts (Fig. 1). Another square fits in the center of the square sheet (Fig. 2). All corners are folded one by one towards the center (Fig. 3). The folds are “ironed” (Fig. 4). The leaf is completely straightened (Fig. 5). After which the corners are again bent towards the center (Fig. 6). Now on each of the four sides the top layer of paper stretches upward (Fig. 7). You need to pull slowly. The first petal is formed. And then the remaining three petals are pulled out. After which the model is turned over, leaf side down (Fig. 8). All corners bend outward. The model is flipped again. All four central corners slowly bend in different directions and the lily takes on its natural shape.

The result is a very beautiful and delicate shape of a lily made from paper with your own hands, which needs to be placed on a piece of paper. To do this, take a sheet of green paper and cut it out according to the approximate natural shape of a water lily leaf. After which the flower itself is placed on top. The resulting composition can be tested for its floating properties in the bathroom.
DIY paper lily from modules
This is the most difficult technique in origami. The model is assembled from modules: small folded pieces of paper that are firmly inserted into each other. In this way, a large three-dimensional model is built.

This figure consists of rectangular leaf modules, and not square, as was the case with the previously described lilies.
Take a sheet of A4 paper and divide it into 16 small rectangles (53.5/74 mm.). You will need 30 small rectangles. Then they are bent into future modules exactly according to the diagram.

As you can see in the picture, the module has two pockets and a pair of corners. All known modules are inserted into each other using the same method.

First, a series of ten modules is assembled. The row closes into a ring. Next, the remaining modules are connected in a checkerboard pattern, as in the figure.

Finally, the stem is inserted into the flower. The stem can be made from thinly rolled paper. You can use thin wire wrapped in the same paper.

All known techniques for assembling paper lilies with your own hands have been studied.
There are few methods. And, besides, it’s especially nice to engage in a new unusual creative process on a weekend with children or in a warm, friendly company.
Everyone knows that the best gift for a girl is flowers, especially if they are made with their own hands. In this article we will look at a very beautiful, but quite simple flower - the lily. Origami lily, of course, does not have a scent, but its appearance is no less presentable than that of a real plant.
Why exactly lily?
It should be noted that in the origami technique, the lily is the most popular flower. As you know, lilies symbolize innocence and purity, and that is why they are considered the best gift. To make them, you can use multi-colored paper, because in nature there are lilies of different shades.
Required materials
To create a lily using the origami technique, you will need paper. This is the main material, and it produces excellent flowers, which, unlike living ones, will delight your eye for quite a long time. If you want your origami lily to look more impressive, you can use special corrugated paper. Skilled craftswomen quite often use fabric material to create a charming flower.
Origami lily: where to start?
We will try to describe in more detail the process of creating a lily and provide a diagram that will clearly show you this procedure:
- Take a sheet of paper measuring 15 by 15 cm.
- Turn it over and fold it diagonally to make a square.
- Expand.
- Fold again.
- Expand.
- Now fold the square you have to make a rectangle.
- Unfold it and fold it in half again.
- We unfold again.
- All of the above manipulations were necessary to obtain the lines with which we will continue to work. Now you need to fold the rhombus.
- Then you should lift the left side of the resulting figure, namely a rhombus, and flatten it.
- On the right side of the triangle, make a fold that will be directed towards its center.
- Do the same on the other side.
- We put one side on the other, namely the right on the left.
- We repeat these steps with the remaining sides.
- Rotate the workpiece 180 degrees.
- Unfold the corners of the flower.
- Now you need to fold the corners of the future lily so that you get a so-called diamond.
- We repeat the steps described in the previous step with all sides.
- Fold the resulting triangle up and repeat with the remaining sides.
- We rotate the products 90 degrees.
- Now from the bottom left side we make a fold towards the center. We repeat the procedure with the rest.
- Turn one of the faces to the left.
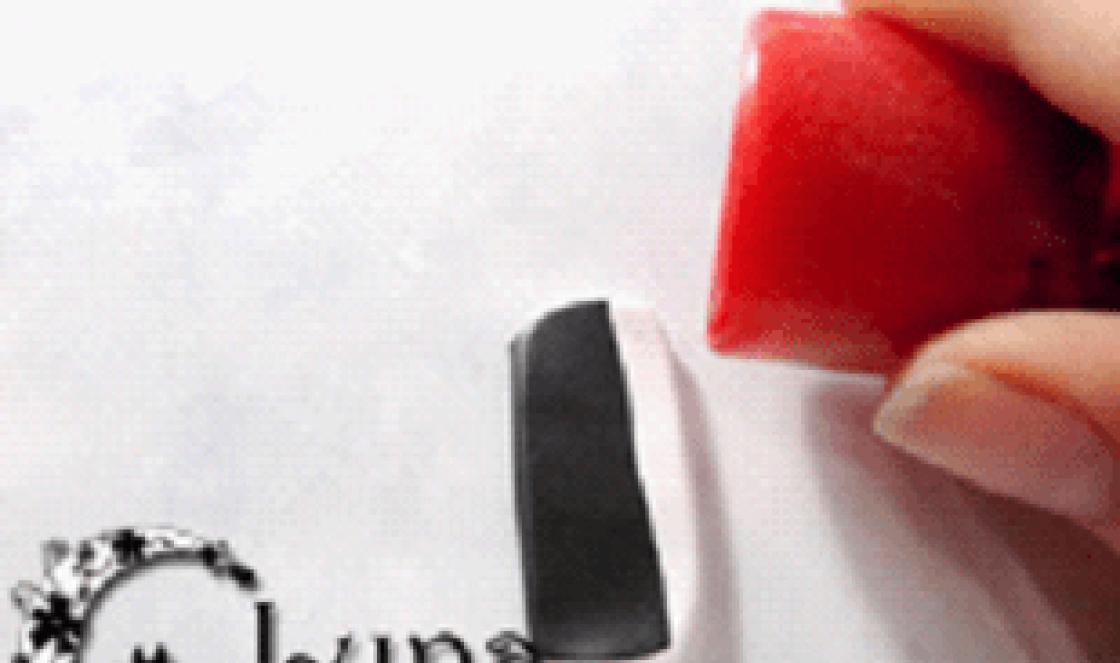
- Using a pen, we add volume to the flower and straighten all its sides.
That's it, your origami paper lily is ready!
To make it easier for you to understand all these steps, we recommend that you familiarize yourself with the diagram below.
Origami lily: diagram
It is very difficult for beginners to start their work, so they need help. What could be better than a diagram?


Flowers have always been considered a valuable gift, but nothing can compare with handmade products. When doing something with one’s own hand, a person puts a piece of his soul into this thing, which is why these gifts are so expensive. It should be noted that paper flowers are not only durable, but also very beautiful.
We hope that this article helped you learn how to collect lilies. If everything worked out for you, then you can start creating a whole bouquet that will be an original decoration and addition to your interior.
It is unnecessary to remind you of the advantage of origami flowers, which is significant savings in money. There are a lot of women's holidays, and I want to give something special, unique. That's when paper flowers come to the rescue.
Good luck in your endeavors! Believe in yourself and you will succeed.
Making a paper lily is actually not as difficult, even for a person without certain skills, as it might initially seem when looking at the end result. The technique is quite simple - you can try to make such a flower even with a child.
What you need to make a paper lily.
We need:
Colored paper (in this case, paper of two shades - for the flower and one shade - for the leaves);
scissors;
ruler.

It is worth noting the fact that when making this craft, glue or other similar materials are not needed for joining.
Preparatory stage.
Before you start making the flower itself, you need to cut strips of colored paper 13.5 centimeters long and about 7.5 centimeters wide for the leaves and petals.

Step 1. Form the leaves and petals of the lily.
Fold a sheet of paper in half along the long axis so that the white side of the sheet is on the inside.

We bend the corners of the rectangle, bringing them to the fold line.

Now we bend the edges towards the middle, connecting them at the fold line.


Turn the workpiece over.

We bend it along the central axis.


For the petals we make blanks according to the same pattern.

But at the final stage we bend it along the axis inwards.


For the petals we need 4 pieces of green paper.

Step 2. Collect the flower elements.
We stack the blanks on top of each other in the following sequence: green leaves with dark pink petals on them.

Place soft pink petals on dark pink petals.

This is what the blanks nested inside each other look like from the outside.

We collect all the resulting prefabricated petals together and tie them in the center with thread.

Step 3. Form a lily.
We straighten the petals of the future flower.

We begin to form a lily, bending it at an acute angle and slightly turning the petals inside out.

The first row of petals is bent - the shape of a lily is already visible.

The second row of petals was bent.

Let's start forming the lily leaves. We turn it inside out using the same principle, but we don’t bend it anymore. Or rather, we bend it, but just a little.
The result of the work done.
The final look of the craft. Photo 1.

The final look of the craft. Photo 2.

The final look of the craft. Photo 3.

The final look of the craft. Photo 4.
Making such a lily from paper is quite simple - you should get it even the first time.
Lily is perhaps one of the most delicate and pretty flowers. Usually among the white petals there is a yellow center hidden. This classic combination of tones can be slightly different. The main thing is that the shades are gentle and muted. Is it possible to create an artificial likeness of this wonderful living creation of nature with your own hands? This article offers a detailed master class describing the stages of work accompanied by photos. Thanks to these instructions, it is very easy to make. Lily will look most successful in a bouquet consisting of several blossoming buds (photo 1). So let's get started.
Material used for crafts
In order for the flower to keep its shape well, you need to be especially careful and thoughtful in choosing the material. Plain white paper will probably be too thin. It will only be needed to make a flower template. For the craft itself, it is worth using something denser, for example, album sheets or a piece of whatman paper. For tools, prepare scissors, a simple pencil, and a set of painting brushes. And to paint the middle - yellow acrylic or poster paint (gouache). You will also need glue (quick-drying “Moment” type). With its help, flowers are formed from blanks. For the stem, you can take any wire that holds its shape well, which is then hidden in a green ribbon. The leaves are made of the same dense material as the flowers. For painting you will need green paint.

First stage. How to make a lily out of paper? Making a template
The flower is made from a single piece. To do this, take a standard A4 sheet and place your palm on it. Draw a continuous line around all your fingers. The bottom part looks like a smooth arc with a flat stop in the middle. How to make a paper lily more realistic? It is the multi-level arrangement of the petals that will be most natural. But at the same time they need to be drawn approximately the same width. And design the connection points in the form of sharp corners, without smooth transitions. Cut out the drawn template and use it to draw an outline on thick paper. Since the workpiece is slightly asymmetrical, to make several buds, when transferring it to the material, you can wrap it around its axis (that is, use a mirror image of the location of the petals). So the crafts will turn out somewhat different from each other.

Second stage: giving the flower the desired shape
Now turn the prepared blanks into buds. most similar to a natural flower? To do this, take a pencil (it should be smooth and without edges) and twist the petals onto it one by one (photo 2). Then let the coils loosen a little. As a result, they will look like rings turned up. Do the same work with all the “fingers”. In this case, the petals should curl in one direction. Wrap the workpieces around its axis so that the spirals are directed downward. After this, you can proceed to the next stage of work - decorating the interior.
Third stage: coloring the middle of the bud
Let's look at how to make a paper lily with natural colors. Typically the core should be yellow, but other shades are possible. Take the paint and apply it to the areas at the base, also extending a little into the middle of the petals (photo 3). The lower part will be solid, and the upper part will look like fingers. There is another design option. You can take a rectangular piece of paper and paint it yellow. Then cut it on one side in the form of long thin strips. Paint the very edges of such stamens with black paint. Then roll the workpiece at the whole base into a tube, and fluff the edges freely. Insert the core made in this way into the center of the formed bud.

Stage four: bud formation
After the paint has completely dried, you can begin rolling up the blanks. Connect the product in the shape of a funnel, while leaving a small hole at the bottom to secure the stem and leaves. Next, a paper lily is made into a bouquet. The diagram of the leaves (photo 4) provides for their manufacture with an average bridge at least 1-1.5 cm wide, since a hole will need to be cut in the center. So, take thick paper, transfer the template onto it and paint it with green paint. You can also perform this step after completely cutting out the leaves. Finally, string the leaves and then the bud onto a wire (previously wrapped with a matching colored ribbon). To ensure that the structure holds tightly and does not slip, you need to make fastening points. To do this, wrap the edge of the wire inside the flower in a loop. Do the same under the leaves. Collect a bouquet of several of these buds, made by yourself.

Corrugated paper flowers
Once you have mastered this simple technique, you can try working with other materials. For example, make lilies from corrugated paper. Photo 5 shows one of the craft options. These flowers are more reminiscent of water lilies. Of the entire palette, in addition to white, other light shades are also suitable - soft pink, pale yellow. Multi-colored buds look very unusual when there is a smooth change in color saturation from the edge to the middle or vice versa.
The main principle of bud formation in this case is the production of each petal separately. At the bottom of the flower, place larger blanks, evenly distributing them around the circumference on top of the green base. Then glue smaller petals with each next row. Decorate the middle with a bunch of yarn, a different color from the main tone of the craft, and beads. The last finishing element can be secured using knots on the edges of the threads. It is problematic to produce flowers formed in this way in the form of pedunculated buds. Therefore, form the craft on a plane as part of, for example, panel displays.
Imagine and surprise with unusual creations!
Master class on handicrafts (working with paper)
Master class. Bouquet of white lilies
This master class is designed for students in grades 1-2.
Appointment of the master class: making a gift for the holiday, and lilies can also be used in interior decoration.
Target: teach children to make three-dimensional flowers.
Tasks:
Teach children to work with paper using wire and beads;
Develop three-dimensional - spatial thinking;
Cultivate aesthetic taste.
Introductory talk:
Lily cannot help but amaze with its exquisite and delicate beauty. The history of the lily is mysterious, like the flower itself, and full of fascinating events. It is not for nothing that the lily is a frequent guest of coats of arms, symbolic paintings, and itself becomes a complex symbol with multifaceted meaning.
In Ancient Greece, it was believed that the goddess Hera sent the lily to earth as a gift. Since then, the flower began to symbolize innocence and purity of thoughts, closeness to God.
In ancient Rome, the lily flower had a completely different meaning - the lily symbolized material luxury, wealth, and success.
Lily became a real queen of hearts in France. Lily was used to decorate rooms, outfits and hairstyles. The aroma of this amazing flower literally filled the air of France, since lilies were always grown in any garden. It was the French who laid the foundation for the art of growing and caring for lilies.
Progress of the master class:
Tools and materials: cardboard, white sheet of paper, wire, wooden sticks, beads, green satin ribbon (narrow), pink organza ribbon, glue, scissors, pencil and felt-tip pens.
1. It is necessary to make a template for the petals. Lily petals have an oblong shape.
.jpg)
2. Trace the template on a white piece of paper. There should be 30 pieces. Cut it out.
.jpg)
3. Place a piece of wire between the two petals and glue it together; the length of the wire must be longer than the petal. Place all 15 petals under a press.
.jpg)
4. Then we start making the stamens. We will need wire and beads. We put a bead on the wire and twist the wire in half. There should be 15 stamens. If you make larger lilies to decorate a room, then wrap the wire on the stamen with paper.
.jpg)
5. Making a flower begins with assembling the stamens. Twist the 3 stamens together.
.jpg)
6. Then we collect the petals.
.jpg)
7. We twist the flower blank onto the stem; for this we use wooden sticks.
.jpg)
8. Wrap the stem with green tape and seal the tip
.jpg)
9. Lily petals are very flexible and you can form the flower shape you like. You can use a felt-tip pen to draw dots in the middle of each flower.
.jpg)