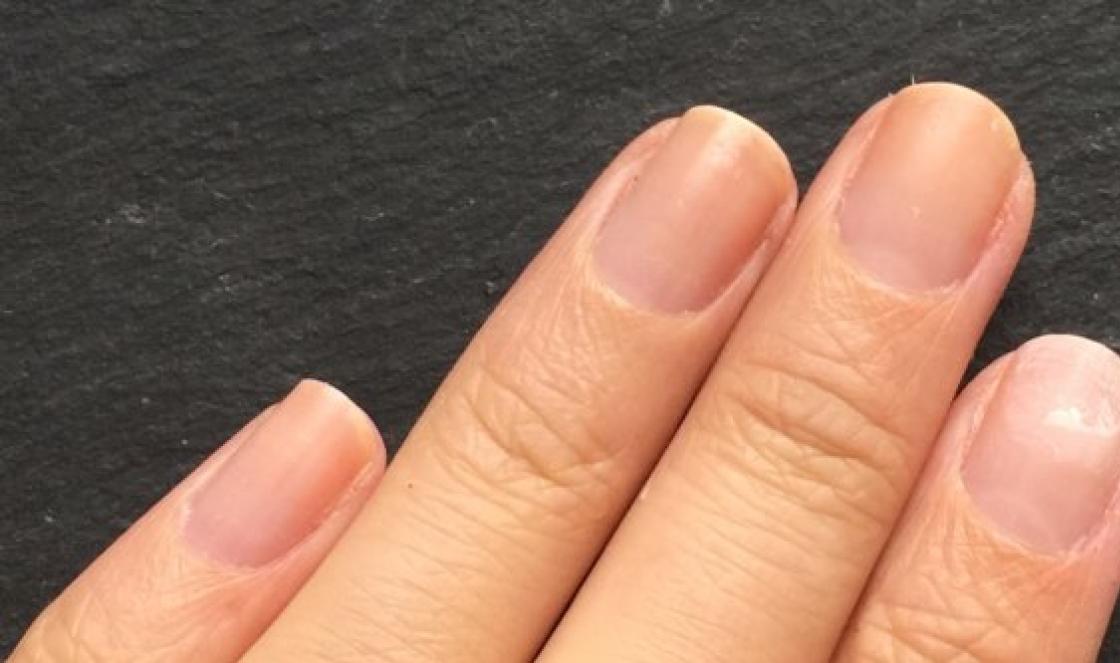
Making a beautiful and high-quality manicure at home is quite simple if you know just a few secrets. Once you achieve a certain level of mastery in this art form, you can move on to more complex options - creating designs on your nails. The most popular option are floral prints and ornaments, so it’s worth mastering the technique of how to create a flower on your nails step by step (see photo in the article).
Preparing the nail plate before creating a design
The principle of preparing the nail plate depends on what material will be used to paint and decorate. A standard manicure requires treating the nail plate as follows:
- First you need to organize a nail bath. It is advisable to use essential oils or special foams that will soften the cuticle as much as possible.
- Remove the cuticle with special forceps or nail scissors. Move the cuticle using a special spatula.
- Polish the nail plate.
- File the nail, creating the desired shape.
- Degrease the nail with a special product.
- Apply a base to the nail, which will serve as a strengthener.
- At the end, a colored varnish is applied, which will serve as a background.
Only after the preparatory activities can you begin decorating, namely drawing. To do this, you need to choose a diagram that shows how to draw a flower on your nails step by step and additional ornaments.
What tools may be needed during the work process?
It’s not enough to know step by step, you also need to prepare the appropriate tools. It is advisable to choose a table that is not cluttered and is well lit by natural or artificial light. The rays should fall from the left side. The list of “equipment” consists of several items:
- Several brushes of different widths.
- Base and top coat.
- Dots, which can be easily replaced with a regular ballpoint pen.
- Acrylic paints suitable color.
- Varnish that will determine the color of the flower itself.
Additionally, you may need cotton swabs, which can be used to correct the design and remove excess drops of varnish. In addition to a set of paints and varnishes, glitter, rhinestones or stones may be needed - it all depends on the design features of the flower and the overall composition.
Features of creating flower arrangements
To make a manicure look neat and attractive, you need not only to prepare the nail plate well, but also to choose the right pattern, as well as place it correctly.

Before you create a flower on your nails step by step, you should decide what the finished composition will look like. Before choosing, you need to consider the shape and length of the nail:
- If the nail has a rectangular or square shape, then it is better to place the flower in the lower or upper corner. The size of the bud should be large. Additionally, you should take care of decorating with shiny elements.
- On round and oval nails medium length It is advisable to depict small flowers, branches with flowering elements. Do not overuse additional curls, leaves, or shiny elements.
- Almond-shaped nails of medium length will look like flowers with large buds that can fill the space of the entire nail. In this case, the drawing is done only on a few nails of the hand.
It is worth considering the combination of colors. Varnishes of light tones and colors can visually lengthen the plate. Dark colors and bright buds can add more elegance to long nails.
Spot technique for creating flowers using varnish for beginners
The easiest way to start is with regular varnish. This method will be much cheaper and easier to correct than gel polish. To create the simplest masterpiece on your nails, you will need three colors of polish and an old ballpoint pen.

Instructions on how to create a flower on nails step by step for beginners:
- Apply base polish to prepared nails. Can be any color.
- Dip the grain of a ballpoint pen into another varnish and dot the middle and five petals around the center.
- You can make the petals oblong by stretching with a handle from the center to the edges.
- Cover the top of the drawing with a fixative.
Using this technique, you can create a sakura branch that will look identical to the natural one. The dot technique is suitable for creating wider compositions.
The simplest technique for creating a flower using regular varnish
For those who know how to draw at least a little, brushes are suitable as tools for painting flowers. To create a beautiful flower you will need several varnishes of different colors and up to 5 brushes of various thicknesses. For example, to draw a poppy, you will need a red varnish - the main one, black to recreate the center of the flower, a lighter and darker red varnish to create contrast for the petals themselves, white - to highlight the elements against the background of others. The same principle applies to selecting varnishes for any flower.

Drawing a flower with varnish brushes:
- Select a sketch of a flower. Prepare the nail plate.
- The base of the flower - petals - is drawn on the prepared nail. To do this you need to use a thicker brush.
- More dark color such color range outline the edges of the petals.
- A lighter option is to outline the middle.
- Use white varnish to paint the veins of the petals.
- Outline the outlines in black.
Stamping is the easiest way to create flower arrangements on your nails
Stamping is the easiest way to create any drawing if you have absolutely no talent for drawing. To do this, just buy a stamping kit, which consists of a plate with drawings and a sharp element with a soft rubber cushion.

A flower on the nails is created step by step using stamping according to the following algorithm:
- Apply varnish to the nail plate, which will serve as the basis for further design.
- Apply stamping varnish to the plate using a brush.
- Run the sharp part across the plate, comparing the mixture.
- With a precise movement, press the rubber pad against the plate.
- Make sure that the design is accurately printed on the pillow.
- With a precise movement, transfer the design to the nail.
- Apply clear varnish on top.
This technique allows you to create full-fledged compositions that are floral prints.
Paint a flower with gel polish
Flowers on nails with gel polish are created step by step in the same way as the standard version, with regular polish. First, a sketch of the base of the plant is formed. Then additional elements are applied to make the drawing clearer.

It is worth considering that at each stage of application you need to dry the gel polish under a lamp. It is difficult to work with gel polish on your own if you have not previously taken a manicure course. Additionally, you need to purchase special equipment. Gel for flowers on nails is applied step by step in accordance with the selected sketch.
You can use stamping, which will significantly simplify the principle of creating flower arrangements.
Manicure trends
As in any other field, manicure also has its own trends. If you want to please yourself, you should consider a few recommendations:
- It is better to use flowers in design in spring or summer, keeping in mind their relevance.
- Currently, the theme of the East has become very popular, so lotus and sakura are the most popular sketches.
- Orchids and poppies are extremely popular. It is desirable that the drawing be made in a minimalist style.
- The trend is roses, which are made using white varnish. A rose can be painted by forming tiers of white varnish.

The use of stones and rhinestones should be minimal.
To create fashionable nail designs with thematic elements, we most often use ready-made prints and simply transfer water stickers, prints from stamping stamps or airbrushing using stencils onto the main coating of the nails. But hand-made drawings make the manicure original, adding zest and special charm to the whole image. Absolutely every woman can learn to draw not only simple designs on her nails, but also master artistic painting. Modern nail art allows you to create very unusual compositions for fashionable manicure in any technique using different instruments and special devices. But before you paint on your nails beautiful drawings, practice orderly making simple patterns of dots, straight lines, curls on cardboard or on artificial (false) nails. Having gained experience, try to create a light geometric manicure with the simplest shapes (triangle, square, circle) on a plain surface, and then try to depict maple leaves, a flower, butterflies for a nail design.
It is not necessary to decorate all the nails on each hand with images. Now it is fashionable to focus on one finger, decorating the nail with an interesting design with the addition of shiny rhinestones, glitter, and crystal stones. You can paint on a hardened coating with regular varnish, but it has a rather dense texture and it is very difficult to apply elements of different thicknesses with smooth transitions with a brush. It is best to use acrylic paints, which are quite suitable for painting on gel polish after drying the color layer in a UV lamp. The top gel will protect the dried pattern on the gel polish and the manicure will remain in perfect shape for several weeks. In order to draw maple leaves, flowers, bows and other designs on your nails, use the video tutorials below and step-by-step master classes for beginners.
♦ TOOLS FOR NAIL DESIGN
Thin brush.
A brush with synthetic bristles, the tuft of which tapers at the end. With this tool it is easy to draw small details, edges, shadows of the picture;
Fan brush.
This brush is convenient for creating background elements, gradient transitions, and color flows. Often used for Chinese nail painting;
Flat brush.
The pile in the bundle is evenly distributed, the villi are adjacent to each other in dense rows. This tool is convenient for depicting large elements of a drawing, volumetric patterns, fill, mix acrylic paints;
Brush liner.
A very thin brush with elastic bristles for painting fragments of a design along the contour line, for making thin, uniform stripes;
Dots with different tips.
Using a dot with a ball at the end, you can draw tapering lines, dots and circles of different diameters, curls and monograms on your nails;
Additionally.
Pieces of foam rubber, sponges, sewing needles, orange sticks.
♦ NAIL DESIGN WITH DRAWINGS IN THE FORM OF LEAVES AND FLOWERS
How to draw maple leaves, as well as birch and oak leaves on your nails:
In the photo: step by step drawing of leaves
How to draw a flower on your nails:
In the photo: step-by-step drawing of flowers
♦ USEFUL TIPS FOR BEGINNERS
❶ There is no need to buy a large palette of acrylic paints. It is quite possible to get by with a set of 6-7 colors (must be white), from which you can get any desired shade;
❷ Any drawing begins with a contour. If you carefully draw the contour lines, then color the drawing acrylic paints will not be difficult. Place your elbow and hand comfortably on the table, take care of comfortable lighting of the workplace;
❸ Under the layer of varnish or gel polish there must be a base to protect the nail plate, and the design itself must be covered with a fixative (top gel);
❹ The background layer must be completely dry on the nails before painting on it;
❺ Large designs and compositions look harmonious on long nails, and on short nails It is appropriate to draw small prints (repeating ones are possible);
❻ In order to visually lengthen your fingers, you can make a colored jacket with a neat pattern along the “smile line”. Lengthen fingers and repeating prints in the form vertical stripes;
❼ It is advisable to start doing a nail design on the little finger to reduce the likelihood of smearing already completed designs on other nails;
❽ The background coating must be perfectly smooth. For this
Times go by, fashion is constantly changing, and popular trends in manicure do not remain aside. And if some time ago it was fashionable to do abstract nail art, then today many representatives of the fair sex opt for a floral design.
Many girls are fans of abstract design in nail art, and its most successful options are presented in the photo below.

A manicure in a light pastel color with a laconic abstract rose as an accent on one nail and rhinestones at the base of the other looks very restrained. Despite the fact that this design uses shiny decorative elements, it is not exclusively festive and can be used for an everyday look.

Option for abstract painting in black in the form of floral patterns and flowers:

Simple and delicate nail design in the form of classic French manicure with lunar manicure and 3D floral painting ring nail. The classic combination of light pink and white will go well with any look: from a prom dress to a wedding dress.

Beige color looks great on nails of any shape. All you have to do is make a design in the form of abstract floral compositions, complement them with sparkles and rhinestones, and your festive manicure is ready!

Nail designs with decor in the form of compositions covered with velvet sand look very original. The nail art in the photo below shows a similar abstract volumetric painting in the form of a flower on the middle nail. Nameless is completely covered with velvet sand. The combination of white and turquoise shades looks fresh and sophisticated.

Stylish representatives of the fair sex can please themselves with black and pink marigold designs. The manicure below is based on a soft pink varnish; on the middle and ring fingers there are fancy elements of abstract painting in the form of flowers and lines using rhinestones.

A few more good ideas for manicures with abstract flowers:


Long nails with floral design
There are a lot of ideas for floral designs on long nails, but you should always remember main rule when working: don’t overdo it! In a bad case, you may end up with a manicure that is too overloaded with details and not pleasing to the eye. What else should you know when registering? long nails floral print:
- to avoid clumsiness It’s better not to apply floral painting over the entire area of the nail, such a manicure can organically fit only into a discreet image with a minimum of jewelry;
- to create a picture-picture in which each of the elements of the individual nail plates forms a single whole,
- One of the most successful ideas for floral design of long nail plates is sculpting, and 3D elements on each nail will be appropriate only for festive occasions, for other cases you need to limit yourself to only some accents.
Successful options for floral manicure on long nails:


A classic French jacket with a floral design will transform the hands of any girl. You can focus on one or two fingers, or decorate with painting the free edges of all nails except the little finger. The smile line can be additionally decorated with rhinestones and ornate patterns.


Flower buds in nail design
For especially gentle and graceful ladies, there are many variations of manicure with decor in the form of flower buds. You can depict unblown poppies and roses on your nails. In spring, to create a light romantic look, you can do nail art with tulips, snowdrops or lilies of the valley. Painting nails with flower buds will ideally emphasize the femininity and elegance of their owner.
The contrasting combination of scarlet and white colors is perfect for creating a spring-summer manicure when you want something bright and fresh. Red buds look very impressive against a snow-white background. This way you can design not only long, but also short nails.

A manicure in light pastel shades can be not only ordinary, but also festive. You just need to dilute it with a black floral painting, adding an accent in the form of golden rhinestones on the middle and ring nails.

Quite often Chinese floral motifs are used in manicure.. The photo below shows nail art in the form of cherry blossoms. The master used a very harmonious combination of red, black and white colors. This nail design will not leave anyone indifferent.

The glossy-matte manicure in the photo below looks very unusual. The main polish is a dark purple color; all nails except the ring and little fingers are covered with it. The latter depict branches with unblown blue flowers, the background for which is a light nude shade. This manicure goes equally well with both a festive outfit and a business suit..

A very bright and warming red manicure with the image of rowan branches on a soft creamy background. The berries are rich orange rhinestones.

A few more options gentle manicure with flower buds:


Manicure with sliders with a flower pattern
Floral manicure will become accessible to anyone, even the most novice fashionista, with the help of special stickers on a very thin film - sliders. You can buy them at any store that sells everything for manicure. The finished drawing will be almost impossible to distinguish from a painting. The process of applying sliders is very simple and does not require any special skills. First you need to apply and completely dry the varnish and top coat, then place the sticker in water for a few seconds, detach it from the backing and place it in the desired place.
Looks light and airy moon manicure in white and pink tones. As an additional accent, sliders with delicate pink buds are placed on the ring nails. This design will appeal to young romantic people.

No less successful examples of manicure with sliders in the form of flowers:


Bright manicure with flowers
How to improve your mood in gloomy weather or bring warmth closer in early spring? How can you stand out among your friends at a summer party? Of course do it bright manicure with floral print! There are a great variety of options for its implementation, for every taste and color. Modern fashion allows you to depict any flowers on your nails: from classic graceful roses to delicate field cornflowers - Every girl will definitely find a suitable option for herself!
Bright floral accents on a black glossy or matte finish in combination with a rich base shade of manicure look very original:


A gentle classic jacket can also look unusual, thanks to the intense purple flower, made using the Chinese painting technique and occupying almost the entire area of the ring nail. 
Stunning nail design in bright colors using rhinestones and volumetric techniques:

Fresh manicure in turquoise color:


Floral painting in bright pastel shades:


A combination of red, green and purple shades with white in an unusual manicure for those who like to stand out from the crowd:

The design with floral painting is suitable for both festive events and everyday occasions. You just need to choose the right color and additional elements. Various decorative details will fit perfectly into the evening look:
- rhinestones,
- glitter,
- broths, velvet sand.
Everyday manicure is best done in a classic French manicure or light pastel shades with small floral accents on some nails.
If they ask you what the personification of tenderness looks like, just show them the latest nail art trend - twigs on your nails. Photos do not convey even half of the grace and sophistication into which the master transforms women’s fingers.
Surely you have noticed that in search of the desired result and really beautiful examples This design will even make you a little tired. Lots and lots of photos and even more instructions on how to paint ugly branches on your nails. Even 10 years ago it looked scary, but today it’s even more creepy. Relax, this article has exactly what you were looking for - newest trend in a nail design with delicate stems.
Features of manicure with twigs
So, in order not to make mistakes and draw truly fashionable and stylish beauty, take into account the basic postulates of this design:
First: a flawless basic manicure
Soft hand skin, an absolutely smooth plate and, of course, the absence of hangnails, overgrown cuticles and other things that will poison a sophisticated design. Even the most beautiful flower will fade if it is adjacent to red, weather-beaten skin.
Second: soft form
The silhouette on which you are going to plant the stem plays a significant role. A manicure with a twig looks best on short square nails with rounded corners. The second position is occupied by the almond shape, but the top will still have to be rounded. But the aggressive sharp corners and long length do not match the “buttercups” at all.
Third: pastel tone
Next to the design of a twig on the nails there can be any paints, from the “eye-catching” category to the most delicate shades. But one thing remains unchanged - the branches “grow” on a pastel base. The most common colors of base varnish are white, all variations of beige, pink, and dusty lemon. The so-called camouflage varnishes are popular, which seem to repeat the color of the nail plate.
Fourth: “fine” work
Forget those times when you painted on your nails with a regular needle or even (the horror!) with the tip of a pen or pencil. Those “creations” did not have any special artistic value. Now even an amateur can draw neat designs with a manicure brush. The price range for brushes is large. It is not necessary to purchase expensive natural bristles. For drawing the stems, a “zero” brush is suitable, that is, the thinnest in the set. This is the kind of tool that will look like twigs trembling in the wind, and not clumsy branches and sticks.


Botany lessons: about branches on nails in photo examples
Of course, if you haven’t picked up a brush before and haven’t imagined yourself as a nail artist, you’ll have to practice on paper or a piece of foil. And if you have some experience, then immediately break into the plant micro-world!
Lesson No. 1: stems with buds
For the first experience in nail painting, this design is best suited. No third-party decor, just you, a couple of polishes and fire in your eyes!
So, you will need the following tools:
- Base and top for gel polish.
- Camouflage gel polish in a beige-pink shade.
- Black, blue and white varnishes.
- Thin brush-column.
- A piece of foil.
- Means for degreasing and removing the dispersion layer.
- UV or LED lamp.
Work algorithm:
- As you remember, any manicure begins with nail preparation. Sand them well and give them the desired shape.
- The next step is to apply the base and dry it in a lamp.
- Now coat your nails with camouflage gel polish and dry again.
- Without removing the sticky layer, you can draw. Drop some black, blue and white pigments onto the foil. Dip the tip of the brush into the pool of black varnish. From the lunula, without lifting the brush, draw a thin, slightly curved line. Closer to the edge of the plate, the color will become almost transparent, this is not scary, it will only add to the fragility of the surroundings. The main thing is not to brush over the same place several times, the drawing will definitely be ruined.
- Along the edges of the stem, draw several short joints or branches and on one of them, with a tiny drop of blue, draw a bud.
- A stroke of white in the middle of the flower will add more liveliness.
- Now your creation can be sent for polymerization.
- The final step will be applying the top, drying and removing stickiness.


This is exactly the result you should get. If you still have any questions about the technique, watch this video and watch the hands of the master:
Lesson #2: Tenderness in 3D
Nail art will become more elegant if you add rhinestones, kamifubuki, broths or droplets to the petals. In this example, a scattering of broths and rubbing on adjacent nails add zest.
You will need:
- Base, finish for gel polish.
- Black, red and white gel polishes.
- Red rubbing pigment.
- Broths.
- UV lamp.
- Liquid for degreasing and removing sticky layers.
- Pre-preparation stage: remove the cuticle and sand the plates, degrease.
- Apply the base and dry it.
- Apply white polish to the nails selected for design and dry.
- Using a brush, paint the stems on a snow-white background. Use a drop of red varnish to create unique buds. Dry in a lamp.
- Use a brush to apply topcoat where you want to place the decor. Do not rush to dry it, but use the tip of the brush to “seat” the beads onto the top. After this, you can polymerize your creation.
- Cover the remaining fingers with black varnish, dry and rub the red pigment directly into the sticky layer.
- Cover all nails with top coat and after polymerization, remove the dispersion layer.

Here are some more variations of 3D nail art.
In this video, the wizard shows in detail the creation of a convex design:
A sophisticated microcosm: stunning manicure ideas with a twig
So, you have become proficient in the art of drawing, what so elegant can feminine nail art offer?
One-volume field
A simultaneous very simple and elegant design is obtained, as you already understood, with camouflage varnishes. However, if this color is replaced with any other pastel shade, the look will also be impressive.


French on a branch
French manicure, in any form, even the craziest, remains feminine. And if you combine it with thin stems... See for yourself, nail art is worthy of a true princess!


Tenderness on matte
A matte top coat can be used to cover adjacent nails or the “field for maneuvers” itself, that is, drawings. Make the background matte, and then draw leaves and buds on it. This move will allow them to stand out more, and your skills will definitely not go unnoticed.


Droplets
A very, very thick top will serve the craftswomen well. Remove the stems, cover with a layer of finish, dry, remove the dispersion. And then with a brush you plant tiny droplets of top in several places and immediately send them into the lamp. Voila! Your stems are covered with dew...


buds
The ability to paint with gel polishes will be useful for such magnificent nail art. You can crown the stems with gorgeous inflorescences! Poppies, violets, snowdrops - beautiful flowers will suit the image of a real lady and make her image more sophisticated.


Flowers and diamonds
This is the same best friends girls! Holes lined with rhinestones, pebbles decorating the core of flowers, rhinestones placed just next to each other - they won’t ruin your manicure.
An interesting idea is to crown the stems with round rhinestones. Just use small stones and in small quantities so as not to make the labor-intensive work tasteless.
Flowers on nails are one of the most popular types of nail art. Floral motifs used for any manicure, from everyday to wedding. Today I suggest you learn how to paint flowers on your nails using a brush and a needle.
What you will need
- Background varnish (blue or red),
- Painting varnish (white),
- Additional varnish (green),
- Rhinestones,
- Fixer,
- brush,
- Dots (or toothpick),
- Nail polish remover.
For convenience, pour a small amount of nail polish remover into a small container. And also prepare a cotton pad and some surface on which you can drop a drop of varnish (I call it a palette :)). When applying a design, it will be more convenient to take the varnish from the “palette” than to immerse a brush or dots in a bottle. And to remove excess and dried varnish from the brush, dip it in liquid and wipe it on a cotton pad.
Draw flowers on your nails
Step 1: Tidy up your nails and apply a base coat. Next, apply the background varnish. In my case it's red or blue.
By the way, when I was taking pictures, I noticed that among the varnishes there were also photogenic and non-photogenic samples. For example, options with blue varnish look much better in reality than in the photo. Moreover, I tried to take pictures in every possible way (with a flash, without it, in artificial and natural light), but, alas, the manicure does not look so attractive in the photo.
Step 2. Place four white dots using dots, as shown in the photo. Using a needle, draw lines from these points to the center of the flower.

Step 3. Now place a rhinestone in the middle of the flower.

 Nail designs “Flowers”
 Step 4. Arm yourself with a brush and draw leaves and twigs. I intentionally left the centers of the leaves unpainted.

Step 5. Use green polish to paint small green veins on the leaves.
Step 6. When the drawings are dry, coat them with a sealer.

I also tried to draw flowers on a blue background. The progress of the work was almost the same. Only initially I drew leaves, and then flowers.

Well, and finally a few more manicure ideas with flowers from the web.