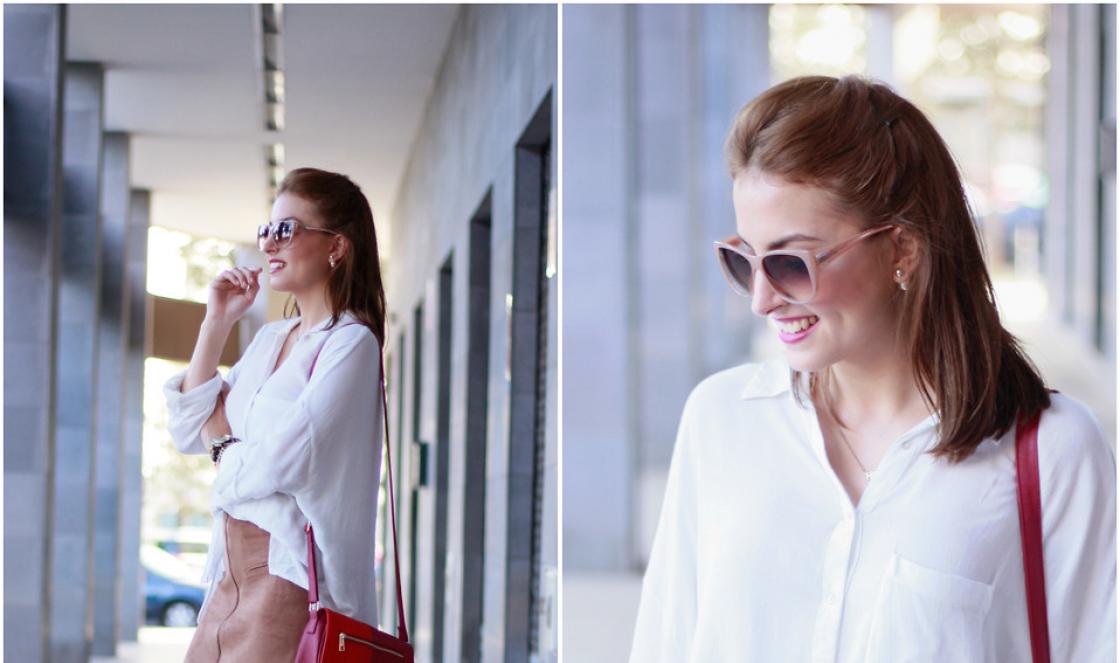
The most popular area of artistic gymnastics in recent years became cheerleading. Cheerleading is a sport that combines elements of dance, choreography, and gymnastics, requiring certain physical training.
The cheerleading movement originally arose abroad, but in lately In Russia, this sport is actively gaining popularity.
As a rule, this area of artistic gymnastics is of interest to teenage girls, who are called “girls with pompoms” due to the obligatory presence of sports equipment in the form of bright pompoms of a wide variety of colors in their performances. Today it is not difficult to purchase equipment for performances and for fans in specialized stores, but there is an alternative option - DIY production.
How to make poonpon at home? The greatest demand for purchasing pom-poms arises among people who devote their time to cheerleading. Sports stores today offer a wide range of such mandatory attribute of cheerleading like pompoms. In this case, it is worth considering the option of making pompoms with your own hands, taking into account a number of undeniable advantages:

Gallery: pompoms made from plastic bags (25 photos)


What material can be used
On the market for handicrafts there is a huge offer of a wide variety of materials for creativity. You can make pompoms from the most various materials . The choice of a specific material largely depends on the future purpose of the pompoms and the creative imagination of the master. To create hats and children's clothing for the purpose of decorating, in most cases fur or yarn is used as the main material. Instead of fur and yarn, to create a sporty one, it is recommended to use materials such as paper or thin plastic bags.
To make pompoms we use:

What is needed for production
The simplest option for making pompoms is to make them from plastic bags. In order to make sports equipment from bags, you will need the following: tools and materials:
- plastic bags in the amount of 10 pieces;
- scissors with sharp blades;
- strong tape.
The main material for creation can be garbage bags, the thickness of which is ideal for creating pompoms. As a base, you can also use ordinary bags for products with low density. Color combination of the future product depends on the selected package colors. It can be a single color or a combination of different shades. The most striking combination of contrasting colors looks:
- red and blue;
- black with white or yellow.
The listed list of tools and materials will be enough to create sports equipment. If desired, each pompom can be decorated with foil strips to give the product a more festive look.
How to make pompoms from bags
Let's look at step-by-step instructions on how you can make pom-poms from bags at home with your own hands. Making inventory is not difficult, and the manufacturing process consists of from performing sequentially the main steps:

In a similar way, you can make beautiful pompoms from rolls of soft wrapping paper. As a special technique when working with paper, you can use the technique of curling the fringe obtained as a result of cuts at the stage of forming the workpiece. Curling is done using scissors or a sharp knife. To curl the fringe, run the tool quite sharply along the entire length of the fringe.
Pom-poms are known to everyone. Some saw them on the clown's clothes, others had them hanging from their hats, coats, or even slippers. Even the cheerleaders, aka cheerleaders, are holding nothing but pom-poms. Whatever materials are used to make pompoms with your own hands: fabric, paper, plastic bags and threads - everything is used.
Pom poms can not only decorate clothes or support players on the field. They decorate interiors: hung from the ceiling, hung on walls, mirrors and flower stems, collected from them into rugs, scarves and toys. Let's figure out how to create pom-poms with your own hands.
Pom poms for cheerleaders
 Making pom-poms for cheerleading with your own hands is not at all difficult, especially with explanations.
You can use plastic bags for them. The number of bags used depends on the desired pomp of the future pompom.
Cut the bags into strips of equal length and width. To make cutting easier, you can fold several bags together, aligning the edges.
Carefully gather the resulting strips together. Tie one edge tightly and wrap it with thread or ribbon.
The pompom for the cheerleader is ready. Instead of a bag, you can take a non-falling antistatic fabric or a shiny wide Christmas tree rain.
For options for creating pompoms for support groups, watch the video:

Paper is always at hand: newspapers, magazines, writing paper, napkins, tissue paper. So why not make your own paper pom poms.
They will need:
- cigarette paper;
- scissors and wire;
- ruler and pencil;
- decorative ribbon.
First, fold the paper into an accordion shape.
Then tie the wire in the center. Do not overtighten to avoid tearing the paper.


Use scissors to round the edges or simply cut them diagonally on both sides.


To make the pompom fluffy, carefully “stretch” the accordion. Attach a ribbon to the wire and hang it wherever you want. Simple and beautiful, isn't it?


Do-it-yourself paper pompoms will decorate any celebration: New Year, Birthday, and other holidays will become elegant and unforgettable.
Many people make their own pompoms from yarn. And they sew them onto clothes, shoes, accessories, and create rugs and paintings from them.
To make such pompoms with your own hands, take:
- device for pompoms. If it is not there, we will need a compass, scissors and thick cardboard.
- thick, fleecy yarn in one or two colors.
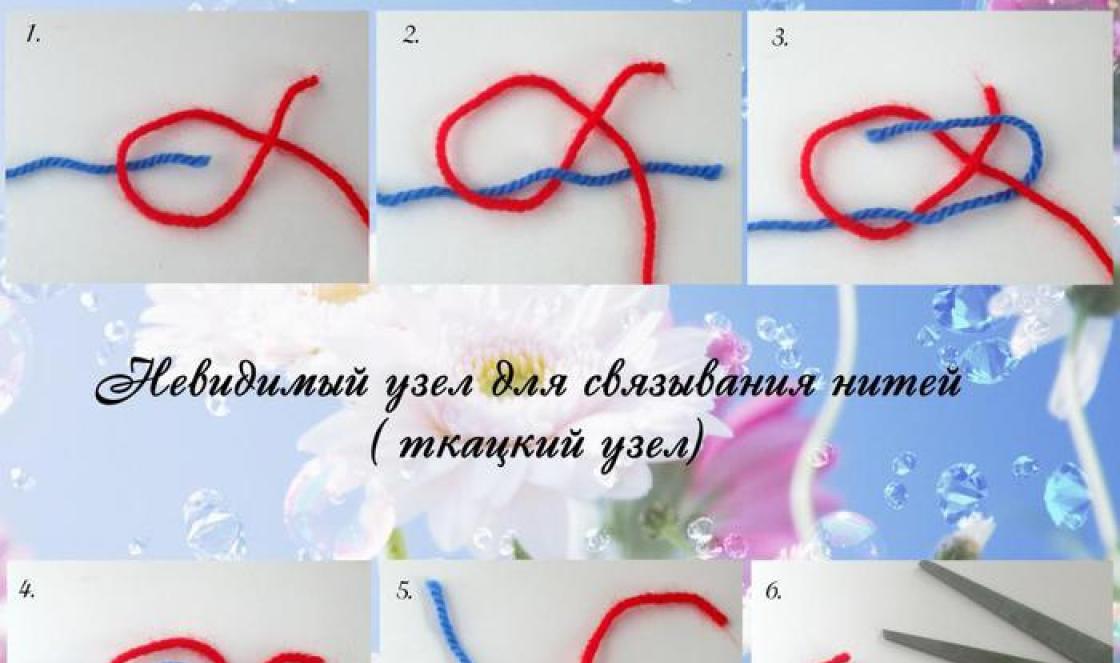
First, you need to draw two identical circles on thick cardboard. The diameter depends on the desired size of the pompom. Cut small holes (up to 2.5 cm in diameter) in the center. Cut out circles. Cut both circles on one side - this will make it easier to wind the thread. The workpiece is ready.
Next, we clamp the edge of the thread between the circles and fold them evenly together. We wind the yarn tightly onto the workpiece, laying the threads in a row next to a row. The semi-finished pompom is ready when the center is completely filled with yarn. Take scissors and carefully cut the thread between the circles of cardboard. We tie the thread that we first secured between the circles with a knot with a free tip. Having carefully removed the cardboard, we trim the resulting fluff. The pompom for the hat is ready. You can assemble a rug from made pompoms with your own hands. How to do this - watch the video.

This detail will decorate the clothes of any fashionista. And from several pompoms you can make a flirty scarf. Of course, you can buy a finished product, but making a fur pompom with your own hands means showing your imagination and talent.
We will need
- a piece of artificial or natural fur
- scissors;
- needle;
- threads;
- padding polyester
Cut a circle out of fur, for example, with a diameter of 5-8 cm.
Hand stitch the edge of the circle from the inside to the outside.
We pull the pompom by the thread.
Fill the resulting bag with padding polyester or cotton wool. Tighten and secure the thread. The pompom is ready.
If you intend to hang the pompom somewhere, you should wrap the padding polyester with ribbon. The ends of the tape should hang outward.
Sometimes you urgently need to make pom-poms for a matinee, but you don’t have anything suitable at hand. And time is limited. Make your own pompoms from bags.
The manufacturing process is similar to cheerleading pompoms. The pomp of pompoms depends on the length, width and number of stripes. If you collect them not at one end, but drag them in the middle, you will get very fluffy pompoms. They are attached to elastic bands, which are put on the hands so that all this beauty does not fly off while moving.
We hope that the described master classes will inspire you to create festive mood, decoration or exquisite, original accessory. Or maybe it will be a blanket or rug?
It is this question that may unexpectedly and acutely arise on the eve of any holiday if you are the happy parent of a kindergarten-age child.
Sultanas are made from corrugated paper or polyethylene, from ribbons or from film from old video cassettes (who still has those) or from New Year's rain. For a child, it is better to make them on a stick to firmly hold this attribute in a child’s hand.
For making rain sultana on a stick we will need the following materials:
- New Year's rain (the amount depends on the required splendor of the rain broom),
- 2 kebab skewers (pens or pencils will also work great for this task),
- scissors,
- a knife with a small ribbed blade (if it is necessary to shorten the stick),
- tape (preferably transparent),
- hot glue gun (optional).
We measure the length of the plume we need, rewind the bundle of rain with tape. Leave the tail the same length and cut it off.
We bend it in half - one bundle of rain for the plume is ready!

We make the required number of bunches; the splendor of the broom itself will depend on their number.
It is better to make several small bunches of 4-5 to distribute them evenly around the stick. This way the craft will look much neater.
It is better to use transparent tape, then you won’t need a glue gun. I only had packing tape left, and the child had to be sent to kindergarten already with ready-made plumes, so I had to use hot glue.
If necessary, saw off the sticks to the required length.

Prepared bunches of tinsel wrap it tightly with tape or attach it with hot glue to the tip of the stick with a broom in the opposite direction from it.

You can additionally secure everything together with tape on top, while trying to pull it tighter and lay the skeins tighter.
After you have checked that the rain holds firmly on the stick, you can slightly decorate the handle of the sultan itself.
You can cover it with foil, but it is better to wrap the foil on top with transparent tape. It looks, frankly, not very good. And since there is still a month of rehearsals ahead and I want to make it not only strong, but also beautiful, I decided to wrap the entire stick with the same rain using hot glue.
We wrap the rain not only around the stick, but also 1-2 turns on top, so that the stick is not visible, and the broom itself looks like a single whole.

Of course, the question may arise, why not wrap the stick with ribbons? Of course... But here I was not guided by my own imagination, everything depended on the assigned task of the educators of my miracle!
Like this rain sultana on a stick it worked!


I was glad to help!
Alexandra Kisarova
Such pompoms They are perfect for step aerobics and will colorfully decorate a performance, especially if the performance is held in honor of a holiday. Find at least bags of different colors, there should be enough of them to pom-poms enough for your whole team.
To create pom-pomsneeds to be prepared:
1. Garbage bags, 35 liters, in the amount of 10 pieces per 1 pompon(5 pieces each of blue and pink color, you can take other colors if desired)
2. Elastic bandage, tubular, No. 3
3. Scissors
4. A bottle
5. Lots of patience)
Let's get to work.
We tear off 5 at a time packages from rolls of blue and pink color, cut off the bottom of each.

Cut each one crosswise in half.

And again in half, this time lengthwise.

Let's start cutting the bandage.

Also in half.

We put it on a bottle or other cylindrical object, the main thing is that it is slightly narrower than the wrist of the hand on which it will be put pompon.

Let's start attaching part 1 bag for a bandage. Fold 1 part package in half, insert it into one of the holes in the bandage, as shown in the photo.

Let's make a knot.

Continue the row down the five-piece bandage package, there should be 8 rows along the bandage.

4 of each color, alternating.

When finished, straighten and fluff. Pompom is ready.

Publications on the topic:
M. Montessori said: “A child is his own best educator. The pace of development of each child is individual. An adult's task.
I bring to your attention a busy board - a do-it-yourself educational board for children. The purpose of creating this board is to keep children busy with interesting research.
I work as a teacher in MBDOU kindergarten 155 of the Leninsky district of the city of Nizhny Novgorod. I came to this kindergarten about 8 months ago.
Traditionally in Rus', ritual dolls were made with their own hands for the Maslenitsa holiday. The children and I offer you our master class on making.
Form of delivery: master class Participants: educators and music directors DOW. Goal: developing motivation to use the system.
The purpose of this work is to develop creativity in children. Tasks: - creating jewelry with your own hands; - development of imagination in children;
Dandelions grew in the clearing in the morning. I'm walking through a sunny meadow, hurray! I don’t pick spring flowers, but I make them with my own hands! To do.
Depending on what material the pompoms are made of, they can be used as decoration for a hat, scarf and other clothing, i.e. as a winter accessory for warm clothes; also, for example, with the help of paper pompoms you can decorate a room or make an accent in interior. This article will present master classes with detailed instructions for making pom-poms from yarn and other materials.


Attention to video
This article will present a selection of videos in which craftsmen will share the secrets of making such accessories. Several options for making fluffy and paper pompoms will be discussed.
How to make pompoms from yarn
In order to make a voluminous, fluffy, soft pompom that can be attached to a hat as a decoration, you will need synthetic, melange or wool yarn, as well as a sheet of thick cardboard and scissors.
First of all, you need to decide what diameter of pompom you plan to make, then you should cut out two circles of the required diameter from a sheet of thick cardboard, i.e. if the diameter of the planned pompom should be equal to fifteen centimeters, then the diameter of the two circles should also be equal to fifteen centimeters. In the center of two circles, you need to cut out circles with a diameter of about three centimeters and make an incision to make it more convenient to wind the yarn. You don’t have to make a cut, then you need to wind the threads with a needle.
Next, you need to place the two prepared circles on top of each other and then you can begin to tightly wrap the cardboard circles with threads. When all the rows are completed, use scissors to cut the yarn strands in the middle. Next, the thread, which is located between the circles of cardboard, must be tied into a knot. Then you need to remove the cardboard, adjust the length of all the threads, and the product is ready.
A pom-pom made of threads can be single-colored or multi-colored, it all depends on the chosen color of thread.


Making a fur pompom
In order to make a fur pompom, you will need: fur, stuffing, a needle and thread, as well as scissors and ribbon. First you need to lay out the fur, then cut out a fur circle from it, with wrong side the workpiece must be sheathed with large stitches. Then you need to prepare a small amount of filler and tie it with tape. After this, the prepared filler must be placed in the middle of the fur circle, and the tape should be placed outside. Then you need to pull the circle tightly and tie a knot. The ribbon is needed to sew or tie the pompom.


How to make paper pompoms
In order to create a festive atmosphere or simply decorate the interior, you can make paper pompoms. Crepe or thin wrapping paper, thin wire or thread, and scissors are best suited for the job. First you need to cut the paper into sheets twenty centimeters wide and thirty centimeters long. To make each pompom you will need eight sheets of paper. Eight sheets of paper should be placed on top of each other, then the sheets should be folded like an accordion, so that the width of the fold is one and a half centimeters. After this, the workpiece must be bent in half, and the bend must be tied with wire or thread, then the edges of the workpiece must be cut off on both sides. Next, you need to carefully straighten all the layers of paper and the product is ready.


From packages
It's easy and simple to make pompoms with your own hands from ordinary bags. To work you will need bags, scissors and tape.
First you need to prepare the bags, fold them in a stack, matching all sides. In order for the pompoms from the bags to turn out bright, it is necessary to alternate colors when placing the bags in a stack. After the bags are laid, all sharp corners should be cut off and the bags should be cut at the soldering points. Then the stack should be folded in half and cut in the middle using scissors. Then you need to make cuts on both sides, the main thing is that the strips are the same. Next, the stack needs to be bent in half again, then twisted and secured with tape, and you’re done.